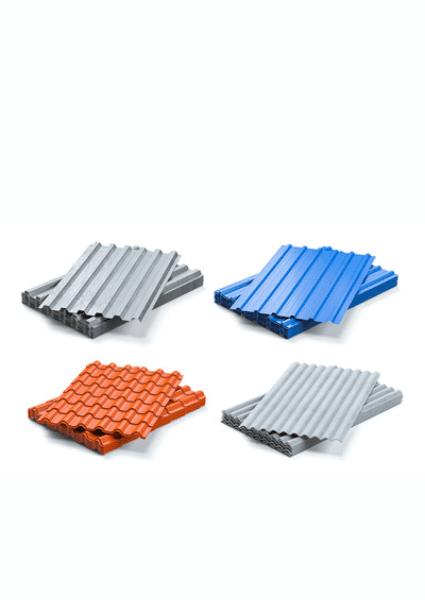
Blog

  • Cost of Roofing a Three-Bedroom House in Kenya: Complete 2026 Budget Guide

    Cost of Roofing a Three-Bedroom House in Kenya: Complete 2026 Budget Guide

    The cost of roofing Kenya homeowners should budget for a three-bedroom house depends on the roof design, roof area, roofing material, timber or steel structure, pitch, accessories, wastage and labour. A simple roof over a compact bungalow can cost considerably less than a complicated roof with multiple hips, valleys, large overhangs and premium roofing sheets.

    Roofing is also one of the most important stages of construction because the roof protects the structure, walls, finishes and household contents from weather. Cutting the budget by selecting unsuitable materials or reducing essential components can create expensive problems later.

    When calculating the cost of roofing Kenya homeowners should therefore look beyond the price of a single mabati sheet. The complete roofing budget may include roofing sheets, timber or steel, nails or screws, ridge caps, valleys, flashings, fascia, gutters, underlay, transport, labour and waste allowance.

    This guide explains how to build a realistic roofing budget for a typical three-bedroom house in Kenya, what affects the price and how to compare roofing quotations properly.

    Cost of Roofing Kenya: What Determines the Final Price?

    The cost of roofing Kenya projects is determined by roof area, design complexity, roofing material, structural framework, accessories, labour and transport. The floor area of the house alone cannot determine the roofing cost.

    For example, two three-bedroom houses may both have a floor area of 120 m² but completely different roof areas.

    One may have:

    • A simple hipped roof.
    • Short overhangs.
    • Standard roof pitch.
    • Few intersections.

    Another may have:

    • Several roof sections.
    • Large overhangs.
    • Multiple valleys.
    • Decorative gables.
    • Different roof pitches.
    • Large fascia and gutter systems.

    The second roof can require substantially more materials and labour.

    Therefore, anyone estimating the cost of roofing Kenya should begin with the roof plan and actual roof measurements.

    Cost of Roofing Kenya for a Three-Bedroom House

    The cost of roofing Kenya for a three-bedroom house should be calculated from the actual roof surface rather than simply using the number of bedrooms. A preliminary estimate can be produced by measuring the roof area and adding the structural and accessory requirements.

    A typical calculation can be structured as:

    Total roofing cost = roofing sheets + roof structure + accessories + labour + transport + wastage

    For example, a roofing budget might contain:

    Component What It Covers
    Roofing sheets Mabati, tiles or other roof covering
    Timber/steel Trusses, rafters, purlins and framework
    Fixings Screws, nails and washers
    Ridge accessories Ridge caps and associated fittings
    Valley accessories Valley gutters and flashings
    Flashings Wall and roof junctions
    Gutters Rainwater collection
    Fascia/soffit Roof-edge finishing
    Underlay Weather and moisture protection where specified
    Labour Carpentry, fixing and finishing
    Transport Delivery to site
    Wastage Cutting and installation allowance

    This provides a more realistic picture of the cost of roofing Kenya than looking at mabati prices alone.

    How Much Roofing Material Does a Three-Bedroom House Need?

    The amount of roofing material depends on the roof’s measured surface area, pitch, overhangs and sheet coverage. A house with a 120 m² floor area can require substantially more than 120 m² of roofing material.

    This is because the roof is usually sloped.

    For example, consider a simple illustration:

    House footprint:

    10 m × 12 m = 120 m²

    Assume the roof has a slope that results in an effective roof area of approximately:

    145 m²

    If the design also has overhangs and additional roof sections, the actual area could be higher.

    The roofing sheet requirement is then calculated using the effective cover width, not merely the manufacturer’s overall sheet width.

    This distinction is important because roofing sheets overlap.

    If a sheet is physically 1 metre wide but provides an effective cover width of approximately 0.9 metres after side laps, the calculation should use the effective coverage.

    Always confirm the manufacturer’s technical specifications before ordering.

    Cost of Roofing Kenya: Mabati Cost Per Sheet

    Mabati cost per sheet varies according to sheet profile, thickness, coating, length, colour, finish and manufacturer. The effective cost should be calculated from the coverage provided rather than sheet price alone.

    Common roofing-sheet considerations include:

    • Corrugated profiles.
    • Box profiles.
    • Tile profiles.
    • Industrial profiles.
    • Gauge or thickness.
    • Galvanised coating.
    • Coloured coating.
    • Length.
    • Effective cover width.

    A longer sheet may reduce the number of horizontal joints.

    However, sheet length should be suitable for:

    • Transportation.
    • Handling.
    • Roof dimensions.
    • Installation conditions.

    When comparing the cost of roofing Kenya, do not simply ask:

    “How much is one sheet?”

    Ask:

    “What is the price per square metre of effective roof coverage?”

    This produces a more useful comparison between different profiles.

    Cost of Roofing Kenya: Roofing Sheet Thickness

    Sheet thickness affects durability, handling and price, so homeowners should compare roofing products according to the specified thickness and coating rather than choosing solely on the lowest price.

    Thinner sheets may have a lower purchase price, but the appropriate specification depends on the project requirements.

    Consider:

    • Thickness.
    • Coating.
    • Profile.
    • Manufacturer.
    • Warranty.
    • Expected service environment.
    • Installation method.

    The roof should be designed and specified appropriately rather than selecting a product simply because it is cheaper.

    For the cost of roofing Kenya, the cheapest sheet is not automatically the cheapest roofing solution over the life of the house.

    Cost of Roofing Kenya: Timber Requirements

    Timber is a major component of many pitched roofs, with the quantity depending on roof geometry, structural requirements, spacing and the selected timber sizes.

    A traditional timber roof can require:

    • Wall plates.
    • Rafters.
    • Tie beams.
    • Trusses.
    • Purlins.
    • Fascia boards.
    • Battens.
    • Bracing.
    • Supporting members.

    The actual timber dimensions and spacing should follow the structural design.

    Timber quality also matters.

    Poor-quality or improperly treated timber can create problems involving:

    • Termites.
    • Rot.
    • Moisture.
    • Warping.
    • Structural performance.

    When calculating the cost of roofing Kenya, timber should therefore be priced according to the required sizes and quantities rather than simply estimating a lump sum.

    Cost of Roofing Kenya: Timber Versus Steel Roof Structure

    A roof structure can be constructed using timber or steel depending on the design, engineering requirements, availability, cost and homeowner preference. Neither should be selected solely on price without considering the complete system.

    Timber roofing

    Advantages can include:

    • Familiar construction methods.
    • Availability of skilled carpenters.
    • Easy cutting and adjustment.
    • Wide use in residential construction.

    Considerations include:

    • Timber quality.
    • Treatment.
    • Termite protection.
    • Moisture.
    • Storage.

    Steel roofing structure

    Advantages can include:

    • Dimensional consistency.
    • Resistance to termites.
    • Potentially long service life when appropriately protected.

    Considerations include:

    • Fabrication.
    • Welding or bolted connections.
    • Corrosion protection.
    • Skilled installation.

    When comparing the cost of roofing Kenya, compare the complete structural system rather than the price of timber or steel alone.

    Cost of Roofing Kenya: Roofing Screws and Nails

    Fixings are small components individually but become important when calculated across an entire roof. Correct roofing screws, nails, washers and fasteners help secure the roof covering and prevent avoidable failures.

    Depending on the roofing system, you may require:

    • Roofing screws.
    • Self-drilling screws.
    • Galvanised nails.
    • Washers.
    • Hook bolts.
    • Nuts.
    • Bolts.
    • Ridge fixing accessories.

    The fixing specification should correspond to the roofing material and supporting structure.

    Underestimating fixings can cause delays during installation.

    You can browse our bolts and nuts range for related fastening requirements.

    Cost of Roofing Kenya: Ridge Caps

    Ridge caps protect the highest points of the roof and provide a finished transition between roof slopes. Their quantity depends on the total ridge length and the effective coverage of each cap.

    Ridge accessories may include:

    • Ridge caps.
    • Ridge screws.
    • Closures.
    • Sealants.
    • Flashing components.

    A complex roof can have several ridge lines.

    Therefore, the ridge requirement should be measured from the roof plan.

    When estimating the cost of roofing Kenya, do not forget to include ridge accessories in addition to the main roofing sheets.

    Cost of Roofing Kenya: Valleys and Flashings

    Roof valleys and flashings are essential wherever different roof planes or roof-to-wall junctions meet. Complex roof designs require more of these accessories and can therefore increase both material and labour costs.

    Flashings can be needed around:

    • Valleys.
    • Chimneys.
    • Parapets.
    • Walls.
    • Roof intersections.
    • Skylights.
    • Other penetrations.

    A simple roof with fewer junctions may require less flashing.

    A complex roof can require significantly more.

    This is another reason why the cost of roofing Kenya can vary widely between three-bedroom houses.

    Cost of Roofing Kenya: Gutters and Downpipes

    Rainwater goods should be included in the roofing budget because gutters and downpipes collect and direct rainwater away from the building. The required quantity depends on roof perimeter, roof design and drainage arrangement.

    Typical components include:

    • Gutters.
    • Downpipes.
    • Gutter brackets.
    • Outlet fittings.
    • Stop ends.
    • Corners.
    • Connectors.
    • Downpipe bends.

    A large roof may require several downpipes.

    The drainage system should be coordinated with the overall site drainage plan.

    A good roof is not complete simply because the sheets have been installed.

    Rainwater management is part of the roofing system.

    Cost of Roofing Kenya: Underlay and Moisture Protection

    Depending on the roofing system and specification, an underlay or roofing membrane may provide an additional layer of weather protection beneath the roof covering.

    Underlay can help manage:

    • Wind-driven rain.
    • Dust.
    • Condensation.
    • Minor roof-covering imperfections.

    The exact product should be appropriate for the roofing system.

    Its inclusion can affect the cost of roofing Kenya, but the decision should be based on the roof design and specification rather than treating it as an unnecessary extra.

    Cost of Roofing Kenya: Labour

    Roofing labour includes carpentry or steel fabrication, installation of the structural framework, fixing of roofing sheets, installation of accessories and finishing. Labour costs vary with roof complexity and local rates.

    A simple roof can be faster to construct than one with:

    • Multiple valleys.
    • Several roof levels.
    • Complex intersections.
    • Large overhangs.
    • Decorative features.

    Labour should therefore be quoted against the actual roof design.

    A low labour quotation may not necessarily represent good value if it excludes:

    • Ridge installation.
    • Flashings.
    • Fascia.
    • Gutters.
    • Waste removal.
    • Final adjustments.

    When comparing the cost of roofing Kenya, request an itemised labour quotation.

    Cost of Roofing Kenya: Transport

    Transport costs should be included when calculating the total roofing budget because long roofing sheets, timber and steel can require specialised handling and delivery.

    Transport considerations include:

    • Distance from supplier.
    • Sheet length.
    • Vehicle size.
    • Loading requirements.
    • Site accessibility.
    • Offloading.
    • Number of deliveries.

    Long roofing sheets can be particularly difficult to transport.

    The cheapest material quotation may therefore become more expensive after delivery.

    Always compare the delivered cost.

    Cost of Roofing Kenya: Wastage and Cutting

    Roofing materials should include a reasonable allowance for cutting, overlaps and installation waste, but the allowance should be based on the actual roof design rather than an arbitrary percentage.

    Wastage can arise from:

    • Sheet cutting.
    • Incorrect measurements.
    • Damaged sheets.
    • Overlaps.
    • Complex roof intersections.
    • Incorrect ordering.

    A simple roof generally allows more efficient use of sheets than a complicated roof.

    The best way to minimise wastage is accurate measurement and careful planning.

    This can reduce the overall cost of roofing Kenya without compromising material quality.

    Cost of Roofing Kenya: Example Three-Bedroom Roof Calculation

    A worked calculation can help homeowners understand how the cost of roofing Kenya is assembled, although the example should not be treated as a quotation for every three-bedroom house.

    Assume:

    House footprint: 10 m × 12 m

    Floor area: 120 m²

    After allowing for the roof pitch and overhangs, assume the measured roof surface is:

    150 m²

    Now divide the roof into major components.

    Roofing sheets

    Assume the selected sheets provide an effective coverage of approximately 0.9 m² per sheet.

    Approximate sheet requirement:

    150 ÷ 0.9 = 167 sheets

    A final order should account for the actual sheet dimensions and roof layout.

    Timber

    The timber quantity should be calculated from the structural roof design.

    It may include:

    • Trusses.
    • Rafters.
    • Purlins.
    • Battens.
    • Fascia.
    • Bracing.

    Fixings

    The required number of screws or nails depends on:

    • Sheet profile.
    • Purlin spacing.
    • Manufacturer specification.
    • Roof area.

    Accessories

    Add:

    • Ridge caps.
    • Flashings.
    • Valleys.
    • Gutters.
    • Downpipes.
    • Fascia.
    • Soffit.
    • Underlay where specified.

    Labour

    Finally add:

    • Carpentry or steelwork labour.
    • Roofing-sheet installation.
    • Access equipment where required.
    • Finishing.

    This gives the homeowner a complete framework for estimating the cost of roofing Kenya.

    Cost of Roofing Kenya: Sample Budget Structure

    A roofing budget is easier to control when each major component has its own allowance instead of combining everything into one unexplained figure.

    Roofing Component Budget Item
    Roof structure Timber or steel
    Roof covering Mabati or tiles
    Fixings Screws, nails and washers
    Ridge Ridge caps and fixings
    Valleys Valley sheets and accessories
    Flashings Wall and junction protection
    Fascia Roof-edge finishing
    Soffit Underside finishing
    Gutters Rainwater collection
    Downpipes Rainwater discharge
    Underlay Where specified
    Labour Installation
    Transport Delivery
    Waste allowance Cutting and damage

    The actual cost of roofing Kenya should be filled in using current supplier quotations and measured quantities.

    Cost of Roofing Kenya: Mabati Versus Tiles

    Mabati and roofing tiles can both provide durable roof coverings, but they differ in material cost, weight, installation requirements, appearance and structural considerations.

    Mabati

    Potential advantages include:

    • Lower structural weight.
    • Fast installation.
    • Wide range of profiles.
    • Many colour options.
    • Relatively straightforward handling.

    Roofing tiles

    Potential advantages can include:

    • Distinctive appearance.
    • Different aesthetic options.
    • Potentially long service life depending on material.

    Considerations include:

    • Greater weight for some tile systems.
    • Different structural requirements.
    • Installation method.
    • Additional labour.

    The correct choice should be based on the design and budget.

    The cheapest roof covering does not necessarily result in the lowest long-term cost of roofing Kenya if it requires incompatible structural changes or frequent maintenance.

    Cost of Roofing Kenya: Which Mabati Profile Should You Choose?

    The right mabati profile depends on the desired appearance, technical requirements, budget and architectural design. Profile shape also affects effective coverage and installation.

    Common options include:

    • Corrugated sheets.
    • Box profiles.
    • Tile profiles.
    • Other architectural profiles.

    Homeowners should compare:

    • Effective cover width.
    • Thickness.
    • Coating.
    • Length availability.
    • Manufacturer.
    • Warranty.
    • Accessories.
    • Installation requirements.

    A tile-profile sheet may create a different architectural appearance from a conventional corrugated sheet.

    Therefore, the cost of roofing Kenya should be evaluated together with the desired final appearance.

    Cost of Roofing Kenya: How Roof Pitch Changes the Budget

    Roof pitch affects the roof surface area, material consumption, drainage performance and overall appearance. A steeper roof can require more roofing material than a low-pitch roof over the same building footprint.

    A roof pitch also affects:

    • Sheet length.
    • Flashing.
    • Ridge length.
    • Roof access.
    • Labour.
    • Structural requirements.

    A higher roof can therefore increase the cost of roofing Kenya.

    The pitch should be determined by the architectural design and selected roofing material.

    Cost of Roofing Kenya: How Roof Design Affects Cost

    Simple roof geometry is generally more economical because it reduces cutting, flashing, valleys, labour and potential material waste. Complex designs can increase the cost without necessarily improving the roof’s functional performance.

    For example, a roof with several valleys requires:

    • Additional valley material.
    • Additional flashing.
    • More careful cutting.
    • More labour.
    • More potential water-management junctions.

    Homeowners with tight budgets can often achieve savings through simpler roof geometry rather than choosing inferior roofing materials.

    This is one of the most effective ways to manage the cost of roofing Kenya during the design stage.

    Cost of Roofing Kenya: Timber Treatment

    Where timber is used, appropriate treatment and protection can help reduce the risk of termite attack, fungal deterioration and premature failure. Timber should be suitable for the intended structural application.

    Before purchasing roofing timber, consider:

    • Species.
    • Dimensions.
    • Moisture condition.
    • Treatment.
    • Straightness.
    • Structural quality.

    Avoid assuming that every piece of timber sold for construction is equally suitable for structural roofing.

    Poor timber selection can eventually increase maintenance and repair costs.

    Cost of Roofing Kenya: Maintenance Considerations

    A roofing budget should consider long-term maintenance as well as initial purchase price. Regular inspection of sheets, fasteners, gutters, flashings and timber can help identify problems before they become expensive repairs.

    Inspect the roof for:

    • Loose fasteners.
    • Damaged sheets.
    • Rust.
    • Blocked gutters.
    • Leaking valleys.
    • Damaged flashing.
    • Timber deterioration.
    • Water stains.
    • Sagging sections.

    Gutters should be kept clear of:

    • Leaves.
    • Dust.
    • Debris.

    Blocked gutters can cause water to overflow against walls and foundations.

    Maintenance is therefore part of managing the long-term cost of roofing Kenya.

    Cost of Roofing Kenya: Common Budget Mistakes

    Roofing budgets frequently become inaccurate because homeowners price only the sheets and forget the structure, accessories, labour, delivery and waste allowance.

    Common mistakes include:

    Pricing only mabati

    The roof also requires a supporting structure.

    Ignoring effective coverage

    Sheet overlaps reduce the actual coverage of each sheet.

    Forgetting accessories

    Ridges, valleys and flashings are essential.

    Underestimating labour

    Complex roofs take longer to install.

    Ignoring transportation

    Long sheets and bulky timber require delivery.

    Buying before measuring

    Incorrect quantities can create expensive shortages or excess stock.

    Selecting by price alone

    Thickness, coating and specification matter.

    Avoiding these mistakes makes the cost of roofing Kenya estimate much more realistic.

    Cost of Roofing Kenya: How to Save Money Without Sacrificing Quality

    The safest roofing savings come from accurate design, efficient roof geometry, careful procurement and controlled waste rather than choosing unnecessarily low-grade materials.

    Consider these approaches:

    Simplify the roof

    Reduce unnecessary valleys and intersections.

    Standardise dimensions

    Where possible, coordinate roof dimensions with available sheet lengths.

    Compare effective coverage

    Do not compare sheet prices without considering coverage.

    Purchase according to measured quantities

    Avoid excessive surplus.

    Compare delivered prices

    Include transportation.

    Buy compatible accessories

    Avoid improvising critical flashing or fixing components.

    Use skilled installers

    Poor installation can create leaks and premature damage.

    These measures can lower the cost of roofing Kenya while protecting the performance of the roof.

    Cost of Roofing Kenya: What Should Be Included in a Supplier Quote?

    A useful roofing quotation should clearly identify the roofing sheets, structural materials, accessories, quantities, unit prices, labour, delivery and any exclusions. A detailed quote is much easier to compare than a single lump-sum price.

    Ask the supplier or contractor to specify:

    • Roofing profile.
    • Sheet thickness.
    • Sheet lengths.
    • Quantity.
    • Effective coverage.
    • Timber sizes.
    • Timber quantities.
    • Fixings.
    • Ridge caps.
    • Flashings.
    • Valley components.
    • Gutters.
    • Downpipes.
    • Fascia.
    • Soffit.
    • Labour.
    • Transport.
    • Taxes or other applicable charges.
    • Warranty where applicable.

    This makes it much easier to compare the cost of roofing Kenya between suppliers.

    Cost of Roofing Kenya: Why You Should Measure Before Buying

    Accurate roof measurement is the foundation of a reliable roofing budget. Ordering materials before the roof design and measurements are final can lead to shortages, unnecessary surplus or incorrect sheet lengths.

    The measurement process should establish:

    • Roof slopes.
    • Roof dimensions.
    • Ridge lengths.
    • Valley lengths.
    • Eaves.
    • Overhangs.
    • Flashing requirements.
    • Gutter lengths.
    • Downpipe positions.

    The roof plan should then be used to calculate the materials.

    For a complicated roof, professional measurement is strongly recommended.

    Cost of Roofing Kenya: Final 2026 Planning Checklist

    Before committing to a roofing budget, homeowners should confirm the roof design, measured area, material specification, structure, accessories, labour and delivery. This reduces the risk of unexpected costs during installation.

    Use this checklist:

    • Confirm architectural roof design.
    • Measure the roof area.
    • Confirm roof pitch.
    • Select roofing profile.
    • Confirm sheet thickness.
    • Calculate effective coverage.
    • Calculate timber or steel.
    • Calculate fixings.
    • Measure ridge lengths.
    • Measure valley lengths.
    • Calculate flashings.
    • Calculate fascia and soffit.
    • Calculate gutters.
    • Calculate downpipes.
    • Add labour.
    • Add transport.
    • Allow for reasonable wastage.
    • Compare supplier quotations.
    • Confirm product specifications before ordering.

    This checklist can make the cost of roofing Kenya much easier to manage from design through installation.

    Cost of Roofing Kenya: Final Takeaway

    The cost of roofing Kenya for a three-bedroom house is not determined by the number of bedrooms or the price of one mabati sheet. It is determined by the complete roof system, including its area, structure, covering, accessories, labour, transportation and design complexity.

    For a practical roofing budget, begin with the architectural drawings.

    Measure the actual roof.

    Calculate the effective roofing-sheet coverage.

    Then add the structural framework, fixings, ridges, valleys, flashings, gutters, fascia, soffits, labour, delivery and reasonable wastage.

    A simple roof can be substantially easier and cheaper to construct than a complicated roof with many intersections. If the project budget is tight, consider simplifying the roof design before compromising on the quality of structural or weatherproofing materials.

    When comparing mabati cost per sheet, always look at the bigger picture.

    Ask:

    How much does the complete roof cost per square metre of effective coverage?

    This provides a much better basis for comparing roofing products.

    The same principle applies when comparing timber, steel, fixings and accessories.

    For homeowners planning construction around Ngong, Karen, Matasia and Kiserian, early material planning can make procurement significantly easier. A complete roofing list can be prepared before ordering, allowing you to compare quotations and avoid repeated trips to the supplier.

    The goal is not simply to find the lowest cost of roofing Kenya.

    The goal is to achieve a roof that is structurally appropriate, properly installed, weather-resistant, maintainable and suitable for the house design while staying within the available budget.

    Your One-Stop Hardware Partner in Ngong

    Imagine completing your project with the right tools, the best materials, and expert advice. At Ngong Hills Merchants, we turn your DIY or construction vision into reality with a complete selection of plumbing, electrical, glass, and sanitary ware.

    Contact our team for a consultation and get the right supplies, right now.

    QUALITY HARDWARE & SUPPLIES IN NGONG ✔ Complete Range of Plumbing & Electrical ✔ Power Tools, Adhesives & Paints ✔ Glass, Framing & Sanitary Ware ✔ Serving Ngong, Karen, Matasia, Kiserian & beyond.

    Request Your Free Consultation: Ngong Hills Merchants
    Email: ngonghillsmerchants [at] gmail.com
    Phone: +254 715974811
    Visit Us: Ngong Township, Ngong, Kenya
    Website: https://ngonghillsmerchants.com/

  • Cost of Building a Three-Bedroom House in Kenya: Materials Breakdown

    Cost of Building a Three-Bedroom House in Kenya: Materials Breakdown

    The cost of building 3 bedroom house Kenya homeowners should budget for depends on much more than the number of bedrooms. Floor area, architectural design, foundation conditions, structural requirements, material quality, labour, location and finishing standards all influence the final amount.

    A compact three-bedroom bungalow with basic finishes can have a very different budget from a larger three-bedroom house with ensuite bathrooms, a complex roof, large windows, premium tiles, fitted cabinetry and high-end sanitary ware.

    That is why estimating the cost of building 3 bedroom house Kenya projects from a single national price can be misleading. A better approach is to break the project into construction stages and calculate the materials required for each stage.

    For a homeowner planning a house in Ngong, Karen, Matasia, Kiserian or surrounding areas, this approach makes it easier to understand where the money goes, compare quotations and identify areas where sensible savings are possible.

    This guide provides a practical materials-led breakdown of the cost of building 3 bedroom house Kenya homeowners can use during the planning stage. It covers foundations, concrete, reinforcement steel, walling, roofing, plumbing, electrical work, windows, doors, flooring, painting, sanitary ware and other finishing materials.

    Because construction prices change, the figures discussed should be treated as budgeting guidance rather than a fixed quotation. The final cost of building 3 bedroom house Kenya should be established from current supplier quotations, architectural drawings, structural drawings and a detailed bill of quantities.

    Cost of Building 3 Bedroom House Kenya: What Determines the Budget?

    The cost of building 3 bedroom house Kenya projects is primarily determined by floor area, construction specification, structural design, material quality, labour and site conditions. Bedrooms alone cannot determine the final construction price.

    Consider two houses, both with three bedrooms.

    The first could be a 90 m² bungalow with:

    • A simple rectangular layout.
    • One shared bathroom.
    • Standard windows.
    • Simple roofing.
    • Standard ceramic tiles.
    • Basic paint finishes.
    • A modest kitchen.

    The second could be a 150 m² house with:

    • Three ensuite bedrooms.
    • A guest cloakroom.
    • Large glazed windows.
    • Complex roofing.
    • Feature ceilings.
    • Premium floor tiles.
    • Custom kitchen cabinets.
    • Several external doors.
    • Decorative wall finishes.

    Both properties are three-bedroom houses, but their material quantities can be dramatically different.

    Consequently, the cost of building 3 bedroom house Kenya should always be linked to the floor area and specification.

    A house of 100 m² cannot reasonably be given the same materials budget as a 160 m² house simply because both contain three bedrooms.

    Cost of Building 3 Bedroom House Kenya by Square Metre

    One of the simplest preliminary ways to estimate the cost of building 3 bedroom house Kenya projects is to multiply the floor area by an assumed construction rate per square metre. This is useful for early budgeting but should eventually be replaced by a detailed BOQ.

    For example, assume a proposed three-bedroom house has a floor area of:

    120 m²

    If the preliminary construction rate is:

    KES 45,000 per m²

    the calculation becomes:

    120 × 45,000 = KES 5,400,000

    At an illustrative rate of:

    KES 55,000 per m²

    the same house would be:

    120 × 55,000 = KES 6,600,000

    At:

    KES 65,000 per m²

    the preliminary figure becomes:

    120 × 65,000 = KES 7,800,000

    These examples demonstrate why the cost of building 3 bedroom house Kenya cannot be accurately represented by one universal figure.

    The assumed rate must clearly state what it includes.

    Does it include:

    • Materials?
    • Labour?
    • Plumbing?
    • Electrical installation?
    • Roofing?
    • Flooring?
    • Painting?
    • Sanitary ware?
    • Kitchen?
    • Professional fees?
    • External works?

    A rate that excludes several of these items may appear cheaper than another rate that includes them.

    Cost of Building 3 Bedroom House Kenya: Materials Breakdown

    The materials portion of the cost of building 3 bedroom house Kenya projects should be divided into stages so that quantities can be measured and purchased progressively. This provides better control than treating all construction materials as one lump sum.

    A typical three-bedroom house can be broken down into:

    1. Site preparation.
    2. Excavation.
    3. Foundation.
    4. Ground floor slab.
    5. Walling.
    6. Columns and beams.
    7. Ring beam.
    8. Roofing.
    9. Windows and doors.
    10. Plumbing.
    11. Electrical installation.
    12. Plastering.
    13. Flooring.
    14. Painting.
    15. Sanitary ware.
    16. Kitchen.
    17. External works.

    Each stage has different material requirements.

    For example, the foundation consumes significant amounts of concrete materials and reinforcement, while the painting stage is dominated by finishing products and labour.

    This makes stage-by-stage budgeting particularly useful when controlling the cost of building 3 bedroom house Kenya projects.

    Cost of Building 3 Bedroom House Kenya: Site Preparation

    Site preparation is the first physical stage and can include clearing, setting out, excavation, filling, levelling and removal of unsuitable soil. The cost varies substantially according to the site rather than the number of bedrooms.

    Potential costs include:

    • Site clearing.
    • Surveying.
    • Setting out.
    • Excavation.
    • Soil disposal.
    • Hardcore.
    • Filling material.
    • Compaction.
    • Temporary access.
    • Machinery.

    A flat, accessible plot with good soil can be relatively straightforward.

    A sloping plot may require:

    • More excavation.
    • Retaining structures.
    • Additional drainage.
    • Additional foundation work.
    • More imported fill.

    Consequently, site conditions can have a meaningful impact on the cost of building 3 bedroom house Kenya projects.

    Before construction begins, the homeowner should understand the ground conditions rather than assuming every plot will require the same foundation.

    Cost of Building 3 Bedroom House Kenya: Foundation Materials

    Foundation materials commonly include cement, sand, ballast, hardcore, masonry units, reinforcement steel, binding wire and damp-proofing products. The exact quantities should be determined from the structural design and site conditions.

    Depending on the foundation system, materials may include:

    • Cement.
    • Sand.
    • Ballast.
    • Hardcore.
    • Building stone.
    • Reinforcement steel.
    • Binding wire.
    • DPC.
    • Damp-proof membrane.
    • Concrete spacers.
    • Formwork materials.

    The foundation is not an appropriate place to make arbitrary material reductions.

    For example, reducing reinforcement simply to lower the cost of building 3 bedroom house Kenya projects can compromise the structural system if the change is not approved by the responsible engineer.

    A better approach is to optimise the design before construction starts.

    Cost of Building 3 Bedroom House Kenya: Concrete Materials

    Concrete can be required in foundations, ground beams, slabs, columns, lintels and ring beams, making cement, sand and coarse aggregate major components of the materials budget.

    Concrete generally consists of:

    • Cement.
    • Fine aggregate.
    • Coarse aggregate.
    • Water.

    The exact quantities depend on:

    • Concrete grade.
    • Mix design.
    • Structural requirements.
    • Volume of concrete.
    • Aggregate characteristics.
    • Site batching method.

    For example, if a slab is:

    10 m × 12 m × 0.10 m

    the concrete volume is:

    10 × 12 × 0.10 = 12 m³

    This does not mean that every 12 m³ slab uses the same quantity of cement.

    The cement content must be determined according to the specified concrete mix.

    This distinction is important when calculating the cost of building 3 bedroom house Kenya because concrete quantities should be based on the actual structural drawings.

    Cost of Building 3 Bedroom House Kenya: Reinforcement Steel

    Reinforcement steel is a major structural material, and its quantity should be calculated from the structural drawings and bar-bending schedule rather than estimated from bedroom count.

    Common reinforcement sizes include:

    • D8.
    • D10.
    • D12.
    • D16.
    • D20.
    • D25 and larger sizes where specified.

    A theoretical reinforcement weight can be calculated using:

    Weight per metre = D² ÷ 162

    where D is the nominal diameter in millimetres.

    For D12:

    12² ÷ 162 = approximately 0.89 kg/m

    For D16:

    16² ÷ 162 = approximately 1.58 kg/m

    If the project requires 500 metres of D12:

    500 × 0.89 = 445 kg

    The same principle applies to other bar sizes.

    When estimating the cost of building 3 bedroom house Kenya, steel should be separated by diameter because different bar sizes have different weights and prices.

    Laps, bends, hooks and cutting losses should also be considered in the final quantity.

    Cost of Building 3 Bedroom House Kenya: Walling Materials

    Walling costs depend on the selected masonry system, wall area, wall thickness, number of openings and internal partition layout. The choice between stone, concrete blocks and other approved systems can therefore influence the total house construction cost.

    Typical materials include:

    • Machine-cut stones.
    • Concrete blocks.
    • Cement.
    • Sand.
    • DPC.
    • Lintels.
    • Reinforcement.
    • Mortar materials.

    The number of masonry units depends on actual wall dimensions.

    A house with many internal partitions will use more masonry materials than an open-plan house of similar floor area.

    Window and door openings reduce the masonry area, while decorative projections and additional walls increase it.

    Accurate measurement is therefore essential for controlling the cost of building 3 bedroom house Kenya.

    Cost of Building 3 Bedroom House Kenya: Roofing

    Roofing can represent a significant part of the cost of building 3 bedroom house Kenya projects because it combines the roof covering, structural framework, accessories, flashings, gutters and installation labour.

    A roofing system may include:

    • Roofing sheets or tiles.
    • Timber trusses or steel framework.
    • Battens.
    • Roofing screws or nails.
    • Ridge caps.
    • Valley components.
    • Flashings.
    • Fascia.
    • Soffits.
    • Gutters.
    • Downpipes.
    • Underlay where specified.

    Roof geometry has a major effect on material consumption.

    A simple roof is generally easier to construct than a roof with multiple:

    • Hips.
    • Valleys.
    • Pitches.
    • Intersections.
    • Dormers.
    • Skylights.

    The roof area also exceeds the floor area because of pitch and overhangs.

    Therefore, roofing should be measured directly from the architectural drawings when preparing the cost of building 3 bedroom house Kenya.

    Cost of Building 3 Bedroom House Kenya: Windows and Glass

    Windows affect both material and fabrication costs, with the final price depending on frame material, dimensions, glazing specification, opening style and hardware. Large glazed areas can significantly increase the finishing budget.

    Common frame options include:

    • Aluminium.
    • Steel.
    • Timber.
    • uPVC.

    Glass options can also differ in:

    • Thickness.
    • Safety specification.
    • Tint.
    • Appearance.
    • Performance.

    Large sliding windows may cost considerably more than standard fixed or casement windows.

    For glazing requirements, you can browse our glass range and explore glass accessories for associated products.

    When calculating the cost of building 3 bedroom house Kenya, window schedules should be measured from the drawings rather than estimated from the number of bedrooms.

    Cost of Building 3 Bedroom House Kenya: Doors and Hardware

    Door costs include more than the door leaf itself because frames, hinges, locks, handles, architraves and installation all contribute to the finished price.

    A three-bedroom house may require doors for:

    • Bedrooms.
    • Bathrooms.
    • Kitchen.
    • Main entrance.
    • Rear entrance.
    • Store.
    • Utility areas.

    External doors may require stronger security hardware than internal doors.

    The material may also differ.

    Options include:

    • Timber.
    • Steel.
    • Aluminium.
    • Composite systems.

    A door schedule is therefore useful when preparing the cost of building 3 bedroom house Kenya because it establishes the number, size and specification of every opening.

    Cost of Building 3 Bedroom House Kenya: Plumbing Materials

    Plumbing costs increase with the number of bathrooms, water points, kitchen fixtures and drainage connections. A three-bedroom house with three ensuite bathrooms can require considerably more plumbing material than one with a single shared bathroom.

    Typical plumbing materials include:

    • Water supply pipes.
    • Waste pipes.
    • Drainage pipes.
    • Elbows.
    • Tees.
    • Couplers.
    • Valves.
    • Traps.
    • Floor drains.
    • Inspection fittings.
    • Tank connections.
    • Pump components where required.

    Pipe lengths should be measured from the plumbing drawings.

    You can explore our plumbing supplies when planning water supply and drainage requirements.

    The cost of building 3 bedroom house Kenya can also change substantially depending on whether the house has:

    • One bathroom.
    • Two bathrooms.
    • Three ensuite bathrooms.
    • A guest WC.
    • Outdoor taps.
    • Laundry connections.
    • Water heaters.

    Cost of Building 3 Bedroom House Kenya: Sanitary Ware

    Sanitary ware can range from economical to premium, making bathroom specifications an important variable in the final cost. The number of bathrooms and the selected fixture quality both matter.

    A typical bathroom may require:

    • WC.
    • Wash basin.
    • Basin mixer.
    • Shower.
    • Shower mixer.
    • Shower head.
    • Floor drain.
    • Toilet accessories.
    • Mirror.
    • Towel rails.

    Premium bathrooms may additionally include:

    • Bathtubs.
    • Wall-hung toilets.
    • Concealed cisterns.
    • Designer mixers.
    • Large-format tiles.
    • Shower enclosures.

    You can explore our sanitary ware collection when comparing bathroom products.

    The bathroom specification should be finalised early because changing sanitary fixtures late in construction can affect plumbing points and wall finishes.

    Cost of Building 3 Bedroom House Kenya: Electrical Materials

    Electrical materials include cables, conduits, switches, sockets, distribution equipment, lighting points and protective devices. The final cost depends on the number of circuits and electrical points rather than the number of bedrooms alone.

    Electrical materials can include:

    • Cables.
    • Conduits.
    • Switches.
    • Socket outlets.
    • Distribution board.
    • Circuit breakers.
    • Protective devices.
    • Lighting fittings.
    • Junction boxes.
    • Earthing materials.

    A kitchen may require additional sockets for appliances.

    Water heaters may require dedicated circuits.

    External lighting and security systems can also increase the electrical budget.

    You can browse our electrical supplies when planning the electrical installation.

    Electrical work should be designed and installed by appropriately qualified professionals.

    Cost of Building 3 Bedroom House Kenya: Plastering

    Plastering costs depend on the total wall area, plaster thickness, surface condition, material specification and labour. Poor masonry can increase plaster consumption because thicker applications may be needed to achieve a level finish.

    Plastering materials commonly include:

    • Cement.
    • Sand.
    • Water.
    • Corner beads where specified.
    • Other finishing materials.

    Internal and external plastering should be calculated separately where specifications differ.

    If the house has a large amount of wall area, plastering can consume a substantial amount of cement and sand.

    Accurate masonry work can help control the cost of building 3 bedroom house Kenya by reducing unnecessary plaster thickness.

    Cost of Building 3 Bedroom House Kenya: Flooring

    Flooring costs depend on floor area, tile type, tile size, wastage, adhesive, grout, skirting and labour. Premium tiles and complex installation patterns can substantially increase the finishing budget.

    A flooring budget can include:

    • Floor tiles.
    • Wall tiles.
    • Tile adhesive.
    • Grout.
    • Screed.
    • Skirting.
    • Trims.
    • Waterproofing products where required.

    You can discover our adhesives collection when planning tile and other bonding applications.

    The homeowner should include a cutting allowance when ordering tiles.

    Straight-lay patterns generally produce less waste than complicated patterns.

    Large-format tiles may also require more specialised installation.

    Cost of Building 3 Bedroom House Kenya: Painting

    Painting costs depend on wall and ceiling area, surface preparation, primer, number of coats, paint quality and colour choices. Paint should therefore be budgeted according to surface area rather than floor area alone.

    Typical materials include:

    • Primer.
    • Interior emulsion.
    • Exterior paint.
    • Undercoat.
    • Gloss paint.
    • Filler.
    • Sandpaper.
    • Rollers.
    • Brushes.

    The total paintable area can be several times larger than the floor area because walls and ceilings must be considered.

    You can browse our paints range when planning interior and exterior finishes.

    Choosing a quality coating system can also reduce future maintenance requirements.

    Cost of Building 3 Bedroom House Kenya: Kitchen

    The kitchen can become a significant part of the cost of building 3 bedroom house Kenya projects because cabinetry, worktops, plumbing, electrical installations, tiles and appliances are combined in one area.

    Kitchen materials can include:

    • Cabinets.
    • Countertops.
    • Sink.
    • Mixer tap.
    • Wall tiles.
    • Floor tiles.
    • Handles.
    • Hinges.
    • Electrical sockets.
    • Plumbing connections.

    The cost varies significantly according to cabinet construction.

    Options include:

    • Basic laminated cabinetry.
    • MDF.
    • Plywood.
    • Natural timber.
    • Premium custom systems.

    A kitchen should be designed before final plumbing and electrical installation so that service points are correctly positioned.

    Cost of Building 3 Bedroom House Kenya: Labour

    Labour can account for a substantial part of the construction budget and varies according to location, project complexity, workmanship and the trades required. Labour should be budgeted separately from materials.

    Different stages require different specialists, including:

    • Masons.
    • Steel fixers.
    • Carpenters.
    • Roofers.
    • Plumbers.
    • Electricians.
    • Tilers.
    • Painters.
    • Glaziers.
    • Cabinet makers.

    Complex architectural designs can increase labour requirements.

    For example, a simple roof can be quicker to construct than a complicated roof with multiple valleys and intersections.

    Likewise, detailed tile patterns can require more labour than standard installation.

    This is why labour must be included when estimating the cost of building 3 bedroom house Kenya.

    Cost of Building 3 Bedroom House Kenya: Professional Fees

    A complete construction budget should include professional services such as architectural design, structural engineering, quantity surveying, surveying and other required consultancy services.

    Depending on the project, professional services may include:

    • Architect.
    • Structural engineer.
    • Quantity surveyor.
    • Land surveyor.
    • Geotechnical or soil investigation specialist.
    • Other consultants where required.

    These services should not be treated as unnecessary expenses.

    Good design and quantity control can prevent expensive mistakes later.

    A professional BOQ, for example, provides a much stronger basis for calculating the cost of building 3 bedroom house Kenya than informal estimates based on the number of rooms.

    Cost of Building 3 Bedroom House Kenya: External Works

    External works can add significantly to the total project cost because a completed home may require drainage, paving, boundary works, landscaping, water storage and other infrastructure outside the main building.

    Potential external costs include:

    • Septic system where applicable.
    • Soakaway.
    • Stormwater drainage.
    • Paving.
    • Driveway.
    • Boundary wall.
    • Gate.
    • Landscaping.
    • Water tank.
    • External lighting.
    • Clothesline area.
    • Outdoor taps.

    A homeowner who budgets only for the building itself may therefore underestimate the actual cost of completing the property.

    Building Materials Cost: What Should You Track?

    Building materials cost should be monitored throughout construction rather than only at the beginning. Tracking purchases by stage makes it easier to identify overspending and prevent material waste.

    Create a simple procurement record containing:

    Material Quantity Unit Quoted Price Delivered Cost Stage
    Cement — Bags — — Foundation
    Steel — kg/tonnes — — Structure
    Sand — m³ — — Concrete
    Ballast — m³ — — Concrete
    Stones — Pieces/m² — — Walling
    Roofing — m² — — Roofing
    Pipes — Lengths — — Plumbing
    Cables — Rolls/metres — — Electrical
    Tiles — m² — — Finishes
    Paint — Litres — — Finishing

    This makes it much easier to monitor the cost of building 3 bedroom house Kenya as the project progresses.

    Cost of Building 3 Bedroom House Kenya: Example Preliminary Budget

    A preliminary budget should show how the estimated cost is distributed across construction stages rather than presenting a single unexplained total. The following example is a planning framework, not a current quotation.

    Suppose the proposed house is:

    120 m²

    and the homeowner is working with an illustrative overall construction rate of:

    KES 55,000/m²

    The preliminary construction budget is:

    120 × 55,000 = KES 6,600,000

    A planning allocation might then divide the budget approximately across:

    Stage Example Budget Allocation
    Site preparation and foundation 15%
    Structural frame and slab 15%
    Walling 10%
    Roofing 10%
    Windows and doors 8%
    Plumbing 6%
    Electrical 6%
    Plastering 7%
    Flooring and tiling 7%
    Painting 4%
    Sanitary ware 4%
    Kitchen and cabinetry 5%
    External/other works 3%

    These percentages are illustrative planning allocations only.

    They should not be interpreted as a standard Kenyan cost distribution.

    A real BOQ could produce a substantially different distribution.

    The value of this approach is that it helps the homeowner see how the cost of building 3 bedroom house Kenya can be divided and monitored.

    Cost of Building 3 Bedroom House Kenya: Why Prices Vary Between Suppliers

    Supplier prices can vary because of brand, quality, stock availability, transport, purchasing volume and market conditions. Comparing suppliers requires checking specifications as well as prices.

    For example, two cement products may have different prices because of:

    • Brand.
    • Cement type.
    • Strength class.
    • Packaging.
    • Availability.

    Similarly, two tiles with the same advertised size may differ in:

    • Quality.
    • Thickness.
    • Finish.
    • Water absorption.
    • Durability.
    • Brand.

    Therefore, the cheapest quotation does not automatically produce the lowest long-term cost of building 3 bedroom house Kenya.

    Compare equivalent specifications.

    Cost of Building 3 Bedroom House Kenya: Transport Costs

    Transport can have a meaningful effect on the final materials budget, particularly for heavy products such as cement, sand, ballast, hardcore and masonry units. Always compare delivered costs rather than product prices alone.

    For example:

    Supplier A: Lower material price + higher delivery charge.

    Supplier B: Higher material price + lower delivery charge.

    The correct comparison is:

    Material cost + delivery cost = delivered project cost

    This is particularly important for bulky construction materials.

    A supplier located closer to the site may sometimes provide a better total value even if the unit price is slightly higher.

    Cost of Building 3 Bedroom House Kenya: How to Reduce Waste

    Reducing material waste is one of the safest ways to control the cost of building 3 bedroom house Kenya projects without compromising structural performance. Good storage, accurate measurement and proper workmanship can prevent unnecessary losses.

    Practical measures include:

    • Store cement in dry conditions.
    • Keep steel organised.
    • Protect timber from excessive moisture.
    • Store tiles carefully.
    • Measure before cutting.
    • Plan steel cutting.
    • Order materials in stages.
    • Track material usage.
    • Protect finished surfaces.
    • Avoid unnecessary design changes.

    Waste should be treated as a cost.

    A bag of cement wasted through poor storage still has to be replaced.

    A broken tile still has to be purchased again.

    A badly cut roofing sheet may become unusable.

    Good project management therefore directly supports the cost of building 3 bedroom house Kenya.

    Cost of Building 3 Bedroom House Kenya: Should You Buy in Bulk?

    Bulk purchasing can sometimes reduce unit prices, but buying large quantities too early can create storage, cash-flow and wastage problems. The right approach is to buy according to the construction programme and product shelf life.

    Bulk buying may make sense for:

    • Cement when storage is suitable.
    • Steel.
    • Roofing materials.
    • Certain tiles.
    • Plumbing products.
    • Electrical materials.

    However, materials should not be purchased simply because a supplier offers a discount.

    Consider:

    • Storage.
    • Security.
    • Cash flow.
    • Product shelf life.
    • Price changes.
    • Construction programme.

    For example, buying paint months before painting begins may create unnecessary storage issues.

    Cost of Building 3 Bedroom House Kenya: Common Budget Mistakes

    Many homeowners exceed their initial budget because they underestimate finishing costs, ignore external works, make design changes during construction or fail to include a contingency.

    Common mistakes include:

    Using one national price

    Construction costs vary by project and location.

    Ignoring floor area

    A 90 m² house is not equivalent to a 150 m² house.

    Choosing finishes too late

    Late changes can affect plumbing, electrical work and labour.

    Underestimating roofing

    Complex roofs can require substantial additional materials and labour.

    Ignoring transport

    Heavy materials can carry significant delivery costs.

    Forgetting professional fees

    Design and technical services should be included.

    Leaving no contingency

    Unexpected conditions can occur.

    Buying based only on the lowest price

    Quality and specification matter.

    Avoiding these mistakes can improve the accuracy of the cost of building 3 bedroom house Kenya.

    Cost of Building 3 Bedroom House Kenya: How Much Contingency Is Sensible?

    A construction contingency provides a buffer for unforeseen costs, but the appropriate allowance depends on the completeness of the design, quality of the BOQ and uncertainty of the site.

    Potential unexpected expenses include:

    • Poor soil.
    • Additional excavation.
    • Price increases.
    • Design modifications.
    • Damaged materials.
    • Additional drainage.
    • Unforeseen structural requirements.

    A project with complete architectural and structural information and a detailed BOQ generally has greater cost visibility than a project based on preliminary drawings.

    The contingency should therefore be discussed with the quantity surveyor or project professional.

    Cost of Building 3 Bedroom House Kenya: How a BOQ Improves Accuracy

    A bill of quantities is one of the best tools for controlling the cost of building 3 bedroom house Kenya projects because it converts drawings into measurable work items and provides a structured basis for supplier and contractor quotations.

    A BOQ can identify:

    • Concrete quantities.
    • Reinforcement.
    • Masonry.
    • Roofing.
    • Doors.
    • Windows.
    • Plumbing.
    • Electrical installations.
    • Flooring.
    • Painting.
    • Labour.

    It can also make supplier comparison easier.

    Instead of asking:

    “How much will my house cost?”

    you can ask:

    “How much do you charge for the quantities specified in this BOQ?”

    That produces a much more meaningful comparison.

    Cost of Building 3 Bedroom House Kenya: Prioritising Your Money

    When the construction budget is limited, homeowners should prioritise structural integrity, drainage, waterproofing, roofing, plumbing and electrical safety before spending heavily on decorative finishes.

    Priority areas include:

    1. Foundation.
    2. Structural concrete.
    3. Reinforcement.
    4. Drainage.
    5. Roofing.
    6. Waterproofing.
    7. Plumbing.
    8. Electrical installation.
    9. Windows and doors.
    10. Finishes.

    A homeowner can often upgrade decorative items later.

    It is considerably more difficult and expensive to correct structural mistakes after occupation.

    Therefore, good budgeting for the cost of building 3 bedroom house Kenya starts with getting the fundamentals right.

    Cost of Building 3 Bedroom House Kenya: A Practical Planning Checklist

    Before construction begins, a homeowner should have the drawings, quantities, specifications, supplier quotations and construction programme sufficiently developed to support the proposed budget.

    Use this checklist:

    • Confirm land and site conditions.
    • Complete architectural drawings.
    • Obtain structural drawings.
    • Establish floor area.
    • Prepare BOQ.
    • Identify construction standard.
    • Obtain supplier quotations.
    • Estimate labour.
    • Budget professional fees.
    • Include approvals.
    • Include transport.
    • Include external works.
    • Add contingency.
    • Establish a procurement schedule.
    • Track spending throughout construction.

    This process gives the homeowner a far better basis for estimating the cost of building 3 bedroom house Kenya than relying on informal estimates.

    Cost of Building 3 Bedroom House Kenya: Materials You Should Compare Carefully

    Not every material deserves the same purchasing strategy. Structural materials should be selected primarily for compliance and performance, while certain finishing materials provide more flexibility for cost optimisation.

    Structural materials

    Pay close attention to:

    • Cement.
    • Reinforcement.
    • Concrete aggregates.
    • Masonry.
    • Structural timber or steel.

    Building-envelope materials

    Compare:

    • Roofing.
    • Windows.
    • External doors.
    • Waterproofing.

    Services

    Compare:

    • Plumbing pipes.
    • Fittings.
    • Electrical cables.
    • Switches.
    • Sockets.
    • Protection devices.

    Finishes

    There is generally more room to balance:

    • Tiles.
    • Paint.
    • Sanitary ware.
    • Decorative fittings.
    • Kitchen finishes.

    This distinction helps homeowners make sensible decisions when controlling the cost of building 3 bedroom house Kenya.

    Final Cost of Building 3 Bedroom House Kenya: What Should You Budget?

    The final cost of building 3 bedroom house Kenya projects should be based on the actual floor area, structural design, material specification, labour, professional fees, site conditions and current supplier quotations. A generic three-bedroom figure should only be used as an early planning guide.

    For preliminary budgeting, start with:

    Floor area × estimated construction rate per square metre

    For example:

    120 m² × KES 55,000/m² = KES 6,600,000

    Then refine the figure using:

    • Foundation quantities.
    • Concrete quantities.
    • Reinforcement schedules.
    • Walling quantities.
    • Roofing measurements.
    • Door and window schedules.
    • Plumbing drawings.
    • Electrical drawings.
    • Flooring schedules.
    • Painting measurements.
    • Sanitary ware requirements.
    • Kitchen specification.
    • External works.
    • Professional fees.
    • Contingency.

    This gives you a much more reliable estimate of the cost of building 3 bedroom house Kenya.

    The most important lesson is that three bedrooms do not define the cost of a house. Floor area, design complexity and specification determine the quantities.

    A simple three-bedroom bungalow can have a very different cost of building 3 bedroom house Kenya from a large three-bedroom maisonette or premium bungalow.

    The best strategy is therefore to design first, measure second, price third and purchase fourth.

    Do not begin with a fixed amount and force the design to fit it without understanding the consequences. Instead, establish the available budget, develop a suitable design, obtain a BOQ and then compare current material and labour prices.

    For projects around Ngong, Matasia, Kiserian, Karen and surrounding areas, working with a reliable hardware supplier can also simplify procurement. Cement, reinforcement-related products, plumbing supplies, electrical fittings, adhesives, paints, glass, sanitary ware and other building materials can be planned according to the construction programme rather than purchased randomly.

    A properly prepared materials schedule can turn a broad cost of building 3 bedroom house Kenya estimate into a practical project budget that can actually be monitored from foundation to final finishing.

    Your One-Stop Hardware Partner in Ngong

    Imagine completing your project with the right tools, the best materials, and expert advice. At Ngong Hills Merchants, we turn your DIY or construction vision into reality with a complete selection of plumbing, electrical, glass, and sanitary ware.

    Contact our team for a consultation and get the right supplies, right now.

    QUALITY HARDWARE & SUPPLIES IN NGONG ✔ Complete Range of Plumbing & Electrical ✔ Power Tools, Adhesives & Paints ✔ Glass, Framing & Sanitary Ware ✔ Serving Ngong, Karen, Matasia, Kiserian & beyond.

    Request Your Free Consultation: Ngong Hills Merchants
    Email: ngonghillsmerchants [at] gmail.com
    Phone: +254 715974811
    Visit Us: Ngong Township, Ngong, Kenya
    Website: https://ngonghillsmerchants.com/
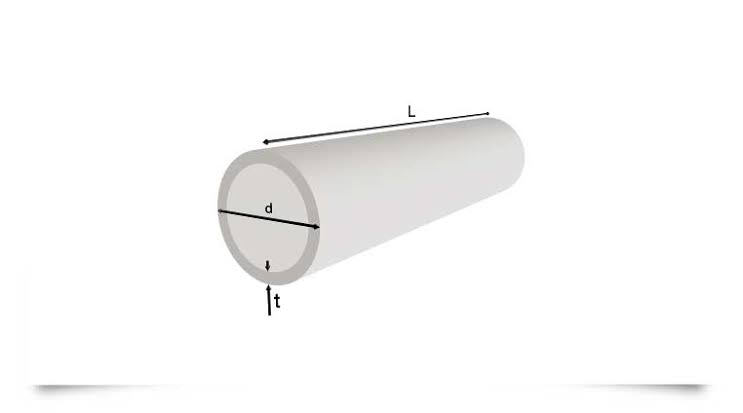
  • Steel Quantities: Y-Bar Weights, Lengths and Lapping

    Steel Quantities: Y-Bar Weights, Lengths and Lapping

    Knowing the Y bar weight per metre Kenya contractors and homeowners should use is essential when estimating reinforcement steel for slabs, beams, columns and other reinforced-concrete work. Steel is one of the major material costs in a concrete structure, so an accurate quantity calculation can make a significant difference to the project budget.

    Y-bars are commonly identified by their nominal diameter, such as Y8, Y10, Y12, Y16 or Y20. The diameter determines the approximate mass per metre, while the required number and length of bars depends on the structural drawings, spacing and dimensions of the reinforced element.

    For example, a 12 mm reinforcement bar weighs approximately 0.89 kg per metre, while a 16 mm bar weighs approximately 1.58 kg per metre. A standard 12 m length of D12 therefore weighs approximately 10.66 kg, while a 12 m D16 weighs approximately 18.95 kg.

    These figures are useful for estimating, but they should not be used to determine structural reinforcement requirements. The bar diameter, spacing, number of bars, lap arrangement and anchorage should come from the structural drawings prepared for the project.

    This guide explains Y bar weight per metre Kenya builders can use for quantity calculations, how to convert lengths into kilograms and tonnes, how standard bar lengths affect ordering, and how lap allowances influence the total amount of steel required.

    Y Bar Weight Per Metre Kenya: What Does It Mean?

    Y bar weight per metre Kenya calculations use the nominal diameter of the reinforcement bar to determine its approximate mass for every metre of length. The larger the diameter, the greater the weight per metre and the higher the cost of a given length of reinforcement.

    A reinforcement bar’s weight can be estimated using the standard formula:

    Weight per metre = D² ÷ 162

    where D is the nominal bar diameter in millimetres.

    For example, for a 12 mm bar:

    12² ÷ 162

    144 ÷ 162 = 0.889 kg/m

    Therefore, a D12 reinforcement bar weighs approximately:

    0.89 kg per metre

    For D16:

    16² ÷ 162 = 1.580 kg/m

    Therefore:

    D16 ≈ 1.58 kg/m

    This formula provides a convenient way to calculate the approximate weight of reinforcement bars without having to memorise every size.

    The theoretical weight can differ slightly from the actual delivered weight because manufacturing tolerances and product specifications can affect the mass of individual bars.

    Y Bar Weight Chart in Kilograms Per Metre

    A reinforcement bar weight chart allows you to estimate steel quantities quickly by matching the nominal diameter to its approximate weight per metre. The figures below are theoretical values calculated using D² ÷ 162.

    Bar Diameter Approx. Weight per Metre Approx. Weight of 12 m Bar
    Y6 / D6 0.222 kg/m 2.67 kg
    Y8 / D8 0.395 kg/m 4.74 kg
    Y10 / D10 0.617 kg/m 7.41 kg
    Y12 / D12 0.889 kg/m 10.67 kg
    Y16 / D16 1.580 kg/m 18.96 kg
    Y20 / D20 2.469 kg/m 29.63 kg
    Y25 / D25 3.858 kg/m 46.30 kg
    Y28 / D28 4.840 kg/m 58.08 kg
    Y32 / D32 6.321 kg/m 75.85 kg
    Y40 / D40 9.877 kg/m 118.52 kg

    These are theoretical calculations based on nominal diameter.

    For procurement, use the supplier’s actual product specification and the structural drawings.

    How Is Y Bar Weight Per Metre Calculated?

    The standard formula for estimating reinforcement weight is D² ÷ 162, where D is the bar diameter in millimetres. This formula is particularly useful when converting a bar schedule from lengths into kilograms or tonnes.

    For a D16 bar:

    16 × 16 = 256

    Then:

    256 ÷ 162 = 1.580 kg/m

    If you have 100 metres of D16:

    100 × 1.580 = 158 kg

    Therefore, 100 metres of D16 reinforcement weighs approximately 158 kg.

    For 500 metres:

    500 × 1.580 = 790 kg

    For 1,000 metres:

    1,000 × 1.580 = 1,580 kg

    Therefore:

    1,000 metres of D16 ≈ 1.58 tonnes

    This method is useful when comparing a bar schedule with a supplier quotation.

    D12 D16 Weight: What Is the Difference?

    D12 and D16 are substantially different in weight even though the diameter difference is only 4 mm. D12 weighs about 0.89 kg/m, while D16 weighs about 1.58 kg/m, making D16 approximately 78% heavier per metre.

    The calculation for D12 is:

    12² ÷ 162 = 0.889 kg/m

    The calculation for D16 is:

    16² ÷ 162 = 1.580 kg/m

    For a 12 m bar:

    D12 ≈ 10.67 kg

    D16 ≈ 18.96 kg

    The difference per bar is therefore approximately:

    18.96 − 10.67 = 8.29 kg

    If a project requires hundreds of bars, that difference becomes significant.

    However, D12 and D16 cannot simply be substituted for one another because reinforcement diameter and spacing are structural design decisions.

    Never replace a specified D16 bar with D12 simply because it is cheaper without approval from the responsible structural professional.

    How Many Metres Are in a Standard Y-Bar?

    Reinforcement bars are commonly supplied in long straight lengths, with 12 m being a widely used commercial length. However, actual available lengths can vary by supplier, manufacturer and market conditions.

    For estimating purposes, a 12 m bar is often used.

    Therefore:

    10 bars × 12 m = 120 m

    If those bars are D12:

    120 × 0.889 = 106.68 kg

    If they are D16:

    120 × 1.580 = 189.60 kg

    This demonstrates why both length and diameter must be recorded when preparing a steel quantity schedule.

    Simply saying “100 bars of steel” is incomplete.

    A useful order description should identify:

    • Diameter
    • Number of bars
    • Nominal length
    • Total calculated length
    • Estimated weight

    How Do You Calculate Steel Quantity for a Slab?

    Steel quantity slab calculations should begin with the structural bar schedule, including bar diameter, spacing, number, shape and required length. The total bar lengths can then be converted into weight using the appropriate weight-per-metre formula.

    Suppose a drawing specifies D12 bars at 200 mm centres in one direction across a slab.

    The number of bars depends on the dimension over which the spacing is measured.

    For a simplified example, assume bars are distributed over a 5 m width.

    At 200 mm centres:

    5 ÷ 0.20 = 25 spaces

    Depending on the detailing convention and whether both end bars are included, the actual number of bars will normally be established from the bar schedule or drawing.

    This is important because simply dividing the dimension by the spacing may not give the final number of bars.

    If the schedule ultimately calls for 26 bars, and each bar has an estimated cutting length of 10 m:

    26 × 10 = 260 m

    For D12:

    260 × 0.889 = 231.14 kg

    Therefore, the estimated steel mass is approximately:

    231 kg

    This is a simplified example. Actual cutting lengths must account for bends, hooks, anchorage, cover and laps where specified.

    How Do You Calculate Steel Weight From Total Length?

    Once the total length of a particular reinforcement diameter is known, multiply that length by the theoretical weight per metre. This is one of the quickest methods of converting a bar schedule into kilograms.

    The formula is:

    Total steel weight = Total bar length × Weight per metre

    For D12:

    Weight per metre = 0.889 kg

    If total D12 length is 1,000 m:

    1,000 × 0.889 = 889 kg

    Therefore:

    1,000 m D12 ≈ 889 kg

    For D16:

    1,000 × 1.580 = 1,580 kg

    Therefore:

    1,000 m D16 ≈ 1.58 tonnes

    The same approach works for every nominal diameter.

    How Many D12 Bars Make One Tonne?

    The theoretical number of 12 m D12 bars required to reach one tonne is approximately 94 bars, because each 12 m D12 weighs about 10.67 kg. Actual purchasing should be based on the supplier’s stated bar weight and the project bar schedule.

    Calculate the weight of one 12 m D12:

    12 × 0.889 = 10.668 kg

    Then:

    1,000 ÷ 10.668 ≈ 93.74 bars

    Therefore, approximately 94 full 12 m bars would weigh around one tonne.

    This is useful when converting between supplier quotations given in tonnes and project requirements given in numbers of bars.

    For example, if a supplier quotes D12 at a price per tonne, the approximate number of 12 m bars represented by that tonne can help you understand the quotation.

    How Many D16 Bars Make One Tonne?

    A 12 m D16 bar weighs approximately 18.96 kg, so roughly 53 full bars are required to reach one tonne. The exact number and delivered mass will depend on actual bar weights and manufacturing tolerances.

    Calculation:

    12 × 1.580 = 18.96 kg

    Then:

    1,000 ÷ 18.96 ≈ 52.74

    Therefore, approximately 53 full 12 m D16 bars represent about one tonne.

    The difference between D12 and D16 illustrates how rapidly steel weight increases with diameter.

    This is because the formula uses the square of the diameter.

    A small increase in diameter can therefore create a substantial increase in mass.

    Why Does Bar Diameter Have Such a Large Effect on Weight?

    Reinforcement weight increases approximately with the square of the bar diameter, which means doubling the diameter produces roughly four times the theoretical weight per metre. This is why accurate diameter identification is critical when estimating steel costs.

    Compare D12 and D24.

    D12:

    12² ÷ 162 = 0.889 kg/m

    D24:

    24² ÷ 162 = 3.556 kg/m

    D24 has twice the diameter of D12 but approximately four times the theoretical mass per metre.

    This relationship explains why steel estimates can change dramatically when reinforcement diameter changes.

    It also explains why using the wrong bar size in a quantity calculation can result in a significant cost error.

    What Is Lapping in Reinforcement Steel?

    Lapping is the intentional overlap of two reinforcement bars so that force can be transferred effectively from one bar to another. Lap lengths should be determined by the structural design and applicable reinforcement detailing requirements rather than by an arbitrary percentage of bar length.

    Long reinforcement members cannot always be installed as a single continuous bar.

    Where a longer run is required than the available bar length, two bars may overlap.

    For example, a structural drawing might specify a particular lap length for D12 reinforcement.

    If a bar needs to continue beyond the end of a 12 m stock length, the next bar overlaps the first by the specified amount.

    This creates additional steel consumption.

    For quantity estimating, laps therefore need to be included in the total reinforcement length.

    However, the lap length is not automatically the same for every bar.

    It can depend on:

    • Bar diameter
    • Concrete strength
    • Steel grade
    • Position of the bar
    • Type of stress
    • Anchorage conditions
    • Detailing requirements
    • Applicable design standard

    How Do Lap Lengths Affect Steel Quantity?

    Lap allowances can increase the total steel length beyond the simple physical dimensions of the slab or beam. If laps are ignored during quantity take-off, the project may order less reinforcement than the detailed design actually requires.

    Consider a simplified example.

    Suppose a reinforcement run requires:

    20 m

    and the available bars are:

    12 m each

    Two 12 m bars provide:

    24 m

    But if a 4 m lap is required, the effective continuous length becomes:

    12 + 12 − 4 = 20 m

    The project therefore needs two complete stock bars to achieve the required 20 m run.

    The 4 m overlap is not “free” steel.

    It is part of the material quantity.

    This is why reinforcement quantity calculations must account for laps and cutting.

    The actual lap length should always come from the structural detailing.

    Is There a Universal Lap Length for D12 or D16?

    No. There is no single universal lap length that should automatically be applied to every D12 or D16 bar. The required lap depends on the structural design, material properties and applicable reinforcement code or standard.

    You may encounter simplified rules on construction sites, such as specifying a lap as a multiple of bar diameter.

    For example, a drawing might specify a lap in terms of:

    40d

    where d represents the nominal bar diameter.

    If a particular design requires 40d for D12:

    40 × 12 = 480 mm

    For D16:

    40 × 16 = 640 mm

    These calculations demonstrate how diameter affects lap length when a design expresses the requirement as a multiple of diameter.

    However, 40d is only an illustration.

    It should not be treated as a universal design rule.

    The actual lap must be taken from the structural drawings or applicable design requirements.

    How Much Steel Is Lost Through Cutting?

    Cutting reinforcement to different lengths can create offcuts that affect the final steel quantity and project cost. A good cutting schedule aims to use standard bar lengths efficiently while maintaining the required reinforcement detailing.

    Suppose a project needs:

    • 6 m bars
    • 5 m bars
    • 4 m bars

    A 12 m stock bar may potentially be divided into combinations such as:

    6 + 6 = 12 m

    or:

    5 + 4 + 3 = 12 m

    The optimal cutting pattern depends on the actual bar schedule.

    Good cutting planning can reduce scrap.

    However, offcuts should never be reused in a way that violates the structural design.

    The steel fixer should follow the approved bending and cutting schedule.

    How Does Steel Quantity Slab Calculation Work in Practice?

    A practical slab reinforcement take-off involves identifying each bar mark, diameter, spacing, shape and cutting length, then multiplying the total length by the theoretical weight per metre. The result can then be converted into kilograms or tonnes.

    A simple schedule might look like:

    Bar Mark Diameter Number Cutting Length Total Length
    B1 D12 30 8 m 240 m
    B2 D12 25 6 m 150 m
    B3 D16 20 10 m 200 m

    D12 total:

    240 + 150 = 390 m

    Weight:

    390 × 0.889 = 346.71 kg

    D16 total:

    200 m

    Weight:

    200 × 1.580 = 316 kg

    Total estimated reinforcement:

    346.71 + 316 = 662.71 kg

    Therefore:

    Total steel ≈ 663 kg

    This is a simplified quantity calculation and does not replace a proper reinforcement schedule.

    Y Bar Weight Per Metre Kenya: Quick Reference

    For quick estimating, the following values provide a convenient reference for common reinforcement diameters. They are theoretical weights based on nominal diameter and should be checked against supplier documentation for procurement.

    Y-Bar Weight per Metre 6 m Bar 12 m Bar
    Y8 0.395 kg 2.37 kg 4.74 kg
    Y10 0.617 kg 3.70 kg 7.41 kg
    Y12 0.889 kg 5.33 kg 10.67 kg
    Y16 1.580 kg 9.48 kg 18.96 kg
    Y20 2.469 kg 14.81 kg 29.63 kg
    Y25 3.858 kg 23.15 kg 46.30 kg
    Y32 6.321 kg 37.93 kg 75.85 kg

    The formula remains:

    D² ÷ 162

    where D is the nominal diameter in millimetres.

    How Do You Convert Steel Kilograms to Tonnes?

    Steel quantities are commonly expressed in kilograms for smaller quantities and tonnes for larger projects. Divide the total kilograms by 1,000 to convert kilograms into tonnes.

    For example:

    2,500 kg ÷ 1,000 = 2.5 tonnes

    If your reinforcement schedule gives:

    D12 = 1,800 kg

    and:

    D16 = 2,400 kg

    the combined quantity is:

    4,200 kg

    or:

    4.2 tonnes

    This conversion is particularly useful when requesting supplier quotations.

    When comparing prices, ensure you are comparing the same unit.

    A price per tonne and a price per 12 m bar cannot be compared directly without converting the quantities.

    Why Should You Use the Structural Bar Schedule?

    The bar schedule is the most reliable source for reinforcement quantities because it records the required diameter, shape, quantity, cutting length and other detailing information. Generic calculations should be used for budgeting and checking, not for replacing the design.

    A structural drawing may specify:

    • D8 links
    • D10 distribution bars
    • D12 main reinforcement
    • D16 beams
    • D20 columns
    • Specific spacing
    • Specific lap arrangements
    • Anchorage lengths
    • Hooks and bends

    Each of these affects the final steel quantity.

    For example, a beam may require 12 m straight bars plus additional lengths for anchorage and bends.

    A simple length measurement from the building dimensions would therefore underestimate the actual steel requirement.

    How Does Concrete Cover Affect Steel Quantity?

    Concrete cover protects reinforcement from environmental exposure and helps place the steel correctly within the concrete section. Cover requirements can affect cutting and bar placement, but they should be taken from the structural drawings rather than guessed.

    If a slab has a certain overall dimension, the reinforcement does not necessarily extend to the full concrete edge.

    The cover creates a separation between the reinforcement and the outer concrete surface.

    For example, if a slab is 5 m wide, the cutting length of a straight bar may be slightly less than 5 m depending on the required cover and detailing.

    However, bends, hooks, anchorage and laps can change the calculation.

    The bar schedule should therefore be followed rather than simply subtracting a standard cover amount from every dimension.

    What Is the Difference Between Main Bars and Distribution Bars?

    Main reinforcement and distribution reinforcement serve different structural and detailing functions, so their diameter and spacing should not be assumed to be interchangeable. The structural drawings determine where each type of bar is required.

    In a slab, one direction may carry the primary bending reinforcement while the other direction provides distribution reinforcement.

    Depending on the slab design, reinforcement may also be required at:

    • Supports
    • Openings
    • Edges
    • Beam intersections
    • Column zones

    The quantity calculation should identify every bar type separately.

    Do not assume that a slab only requires one reinforcement diameter.

    Can You Estimate Steel Quantity by Tonnes Per Square Metre?

    Steel quantities are sometimes estimated using a rough kilograms-per-square-metre allowance during early budgeting, but this should not replace a reinforcement take-off. Actual steel demand varies significantly with structural design, spans, loads, slab thickness and reinforcement detailing.

    A preliminary budget might use an indicative steel intensity.

    For example, if an early estimate assumes:

    10 kg/m²

    for a 100 m² area:

    100 × 10 = 1,000 kg

    or:

    1 tonne

    But this is only an early budgeting assumption.

    The final quantity may be significantly different.

    A heavily reinforced structural element can require much more steel than a lightly reinforced slab.

    For construction procurement, the detailed reinforcement schedule should be used.

    How Can You Reduce Steel Waste?

    The best way to reduce reinforcement waste is to plan cutting carefully, use a bar-bending schedule and coordinate the order with the structural drawings. Steel should be saved through efficient cutting, not by reducing specified reinforcement.

    Good practices include:

    • Prepare a cutting list.
    • Group bars by diameter.
    • Identify standard stock lengths.
    • Plan cutting combinations.
    • Track offcuts.
    • Store bars properly.
    • Protect steel from contamination.
    • Avoid unnecessary cutting.
    • Follow the approved bending schedule.

    For example, if multiple bars can be cut from one 12 m stock length with minimal offcut, planning this before cutting can reduce scrap.

    However, never alter bar lengths or diameters simply to reduce waste without approval.

    How Should Reinforcement Steel Be Stored?

    Reinforcement bars should be stored in a way that keeps them organised, accessible and protected from unnecessary contamination. Good storage also makes it easier to identify diameters and prevent mix-ups during fixing.

    Bars should ideally be kept off the ground where practical.

    Organise them by diameter.

    Clearly separate D8, D10, D12, D16 and larger sizes.

    Avoid allowing bars to become covered with mud, oil or other contaminants.

    Surface rust and heavily deteriorated steel should be assessed according to the applicable specification rather than automatically accepted or rejected.

    Good storage also reduces handling time.

    A well-organised reinforcement yard makes it easier for the steel fixer to select the correct bar.

    What Other Materials Are Needed With Reinforcement Steel?

    Reinforcement is only one component of reinforced concrete construction. Depending on the project, you may also need binding wire, spacers, formwork materials, concrete and suitable tools for cutting and bending.

    A typical reinforcement operation may involve:

    • Y-bars
    • Binding wire
    • Cutting tools
    • Bar-bending equipment
    • Concrete spacers
    • Formwork
    • Cement
    • Sand
    • Ballast
    • Water

    For related construction work, you can explore our power tools for equipment that may be required during building and renovation projects.

    Where reinforcement is combined with other construction fixing requirements, you can also browse our bolts and nuts.

    The exact equipment should be selected according to the size and nature of the project.

    Y Bar Weight Per Metre Kenya: Example Calculation

    Suppose a project requires 500 metres of D12 and 300 metres of D16. Using theoretical weights, the combined reinforcement quantity is approximately 918.5 kg.

    D12:

    500 × 0.889 = 444.5 kg

    D16:

    300 × 1.580 = 474 kg

    Combined:

    444.5 + 474 = 918.5 kg

    Therefore:

    Total ≈ 0.92 tonnes

    This example shows how the Y bar weight per metre Kenya formula can quickly convert a reinforcement schedule from metres into a weight-based procurement estimate.

    How Do Laps Affect a 12 Metre Bar?

    A 12 m stock bar does not necessarily provide 12 m of usable continuous reinforcement because bends, hooks, anchorage and laps may consume part of the available length. Quantity calculations should therefore use the actual cutting length shown in the bar schedule.

    Suppose a structural run requires a continuous 18 m length.

    Two 12 m bars provide:

    24 m

    If a specified lap consumes 3 m:

    12 + 12 − 3 = 21 m

    This may be sufficient for an 18 m run, depending on the detailed arrangement.

    The example is deliberately simplified because actual lap and anchorage requirements depend on the structural design.

    The important principle is that stock length and effective reinforcement length are not always the same thing.

    What Should You Check Before Buying Steel?

    Before ordering reinforcement, verify the diameter, grade, quantity, nominal length, cutting schedule and structural drawings. This reduces the risk of ordering the wrong bars or an incorrect quantity.

    Check:

    1. Bar diameter.
    2. Number of bars.
    3. Cutting lengths.
    4. Bar shape.
    5. Lap requirements.
    6. Anchorage requirements.
    7. Steel grade.
    8. Standard stock length.
    9. Total calculated weight.
    10. Supplier’s product specification.

    A quotation should ideally make the unit clear.

    For example:

    D12 — 50 bars — 12 m each

    is much clearer than:

    50 pieces of steel

    If the supplier quotes by tonne, convert the scheduled lengths into kilograms before comparing the quotation.

    Final Answer: Y Bar Weight Per Metre Kenya

    The standard theoretical formula for Y bar weight per metre Kenya calculations is D² ÷ 162. Using this formula, D12 weighs approximately 0.89 kg/m, D16 weighs approximately 1.58 kg/m, and a 12 m D12 and D16 weigh approximately 10.67 kg and 18.96 kg respectively.

    For quick reference:

    • D8: 0.395 kg/m
    • D10: 0.617 kg/m
    • D12: 0.889 kg/m
    • D16: 1.580 kg/m
    • D20: 2.469 kg/m
    • D25: 3.858 kg/m
    • D32: 6.321 kg/m

    To calculate total steel weight:

    Total weight = Total length × Weight per metre

    For example, 500 m of D12:

    500 × 0.889 = 444.5 kg

    Lapping must also be considered because the total reinforcement purchased can be greater than the simple geometric length of the slab, beam or column.

    Most importantly, reinforcement diameter, spacing, lap length, anchorage and bar arrangement should come from the structural drawings. A weight calculator can tell you how much a specified amount of steel weighs, but it cannot determine how much reinforcement your building needs.

    For homeowners, contractors and project managers in Ngong, accurate quantity take-offs can help control material costs and make supplier quotations easier to compare. Combining the approved reinforcement schedule with accurate Y bar weight per metre Kenya calculations gives you a much stronger basis for procurement.

    Your One-Stop Hardware Partner in Ngong

    Imagine completing your project with the right tools, the best materials, and expert advice. At Ngong Hills Merchants, we turn your DIY or construction vision into reality with a complete selection of plumbing, electrical, glass, and sanitary ware.

    Contact our team for a consultation and get the right supplies, right now.

    QUALITY HARDWARE & SUPPLIES IN NGONG ✔ Complete Range of Plumbing & Electrical ✔ Power Tools, Adhesives & Paints ✔ Glass, Framing & Sanitary Ware ✔ Serving Ngong, Karen, Matasia, Kiserian & beyond.

    Request Your Free Consultation: Ngong Hills Merchants
    Email: ngonghillsmerchants [at] gmail.com
    Phone: +254 715974811
    Visit Us: Ngong Township, Ngong, Kenya
    Website: https://ngonghillsmerchants.com/
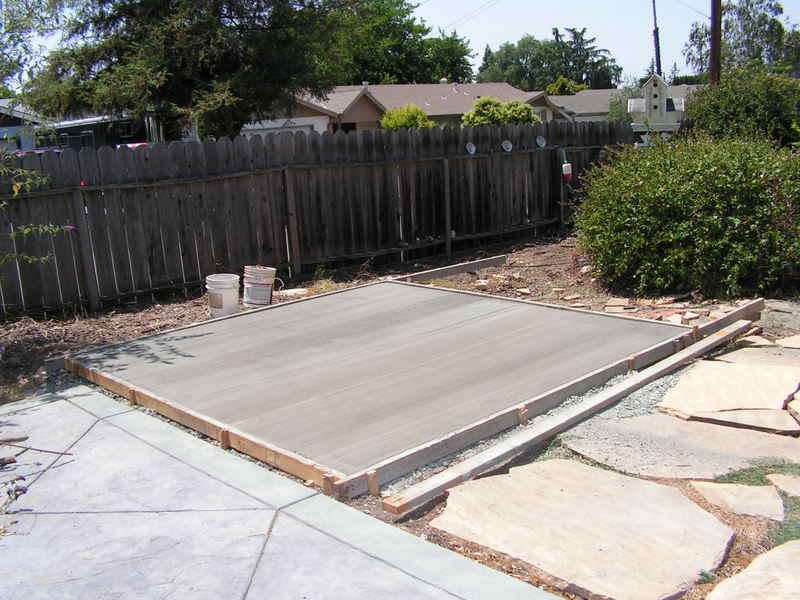
  • How Many Bags of Cement for a Slab? A Worked Calculation

    How Many Bags of Cement for a Slab? A Worked Calculation

    Knowing how many cement bags for slab Kenya projects require is one of the most important steps when preparing a concrete floor, suspended slab or other concrete surface. Buying too little cement can interrupt construction, while buying excessive quantities can unnecessarily increase costs and create storage problems.

    The number of cement bags required depends on the slab area, thickness, concrete mix ratio, cement bag size, aggregate quantities and the amount of material lost during handling and mixing. A 50 mm concrete floor will obviously require much less concrete than a 150 mm structural slab.

    For homeowners and contractors in Kenya, the calculation should therefore start with the volume of concrete required rather than simply estimating cement bags from the size of the house.

    This guide provides a practical slab material calculation, explains common concrete mix ratios in Kenya, and gives a worked example showing how to calculate cement, sand and ballast.

    Cement Bags for Slab Kenya: How Many Do You Need?

    The number of cement bags needed for a slab depends mainly on concrete volume and the specified mix ratio. For preliminary estimating, a typical 1:2:4 concrete mix may require roughly 6–7 bags of 50 kg cement per cubic metre, but the exact quantity depends on the mix specification and whether the concrete is structural.

    The first thing to establish is the volume of concrete.

    Use:

    Concrete volume = Length × Width × Thickness

    For example, a slab measuring:

    10 m × 5 m × 0.1 m

    requires:

    10 × 5 × 0.1 = 5 m³

    of wet concrete.

    Once the concrete volume is known, the required cement, sand and ballast can be calculated from the selected mix.

    For a simple preliminary estimate, many small projects use a nominal volumetric mix such as 1:2:4.

    However, structural slabs should not be specified purely from a generic internet ratio. The required concrete strength, reinforcement, exposure conditions, design loads and structural engineer’s specification must be considered.

    Cement Bags for Slab Kenya: Worked Calculation?

    A slab material calculation starts by determining the slab’s surface area and multiplying it by its thickness. The resulting concrete volume is then used to estimate cement, sand and ballast.

    The basic formula is:

    Concrete volume = Length × Width × Thickness

    All dimensions should be converted to metres.

    For example:

    Length = 8 m

    Width = 6 m

    Thickness = 100 mm

    Convert thickness:

    100 mm = 0.10 m

    Then:

    8 × 6 × 0.10 = 4.8 m³

    The slab therefore requires approximately 4.8 cubic metres of finished concrete before considering practical ordering allowances.

    This is the foundation of the entire calculation.

    If you incorrectly estimate the slab volume, every other material quantity will also be incorrect.

    Cement Bags for Slab Kenya by Slab Size

    To calculate cement bags, first determine the required concrete volume, then establish the cement quantity per cubic metre from the selected mix. Finally, convert the cement weight into 50 kg bags and include an appropriate allowance for wastage.

    Suppose a project requires:

    Cement Bags for Slab Kenya: 50 m² Example

    and the selected nominal mix requires approximately:

    6.5 bags of 50 kg cement per m³

    Then:

    5 × 6.5 = 32.5 bags

    You would therefore need approximately 33 bags before allowing for additional site losses.

    With a modest 5% allowance:

    32.5 × 1.05 = 34.125 bags

    A practical purchasing quantity would therefore be approximately 34–35 bags, subject to the actual concrete specification.

    This is a useful estimating approach, but the cement content for structural concrete should ultimately come from the approved mix design or project specification.

    Worked Example: Cement Bags for a 10 m × 5 m Slab

    Consider a 10 m by 5 m slab with a 100 mm thickness. The slab has an area of 50 m² and requires approximately 5 m³ of finished concrete before adding a practical ordering allowance.

    Step 1: Calculate slab area

    10 × 5 = 50 m²

    Step 2: Convert thickness

    The slab thickness is:

    100 mm = 0.10 m

    Step 3: Calculate concrete volume

    50 × 0.10 = 5 m³

    Therefore:

    Required concrete = 5 m³

    Step 4: Estimate cement

    Using an illustrative consumption of approximately 6.5 bags per cubic metre:

    5 × 6.5 = 32.5 bags

    Therefore:

    Theoretical cement requirement = approximately 33 bags

    Step 5: Allow for wastage

    Using a 5% allowance:

    32.5 × 1.05 = 34.125 bags

    A practical order could therefore be approximately:

    34–35 bags of 50 kg cement

    This example demonstrates why knowing the slab volume is more important than simply asking how many bags a particular house requires.

    How Much Sand Is Needed for a Concrete Slab?

    The quantity of sand depends on the selected concrete mix and the total dry material volume required to produce the finished concrete. For a nominal 1:2:4 mix, sand represents two parts of the seven total mix parts by volume.

    A 1:2:4 mix contains:

    1 part cement + 2 parts sand + 4 parts ballast

    The total is:

    7 parts

    However, you cannot simply divide the final wet concrete volume by seven and expect an exact material quantity. Dry aggregates contain voids and concrete undergoes volume changes during mixing.

    A common preliminary estimating approach uses a dry-volume factor of approximately 1.54.

    For the 5 m³ example:

    5 × 1.54 = 7.70 m³

    Total dry ingredients are therefore approximately:

    7.70 m³

    The sand portion is:

    7.70 × 2/7 = 2.20 m³

    So the preliminary sand requirement is approximately:

    2.2 m³ of sand

    An allowance may be required depending on handling, moisture, bulking and site conditions.

    How Much Ballast Is Needed for a Slab?

    In a nominal 1:2:4 mix, ballast represents four parts of the seven total mix parts. For a 5 m³ slab, a preliminary calculation gives approximately 4.4 m³ of ballast before practical site allowances.

    Using the same dry volume:

    5 × 1.54 = 7.70 m³

    Ballast portion:

    7.70 × 4/7 = 4.40 m³

    Therefore:

    Ballast ≈ 4.4 m³

    The exact aggregate specification should depend on the concrete application.

    For structural slabs, aggregate size and grading must be appropriate for the reinforcement arrangement, slab thickness and concrete design.

    The term “ballast” is commonly used in Kenyan construction to refer to coarse aggregate, but the correct aggregate specification should follow the project requirements.

    What Is the Concrete Mix Ratio in Kenya?

    Common nominal concrete ratios such as 1:2:4 can be useful for certain non-structural estimating purposes, but structural concrete should be produced according to the required strength and approved design rather than relying only on a generic ratio.

    A ratio such as 1:2:4 means:

    1 part cement

    2 parts sand

    4 parts coarse aggregate

    It does not directly mean that the finished concrete will achieve a particular strength under every circumstance.

    Strength depends on:

    • Cement type
    • Water-cement ratio
    • Aggregate quality
    • Aggregate grading
    • Mixing accuracy
    • Compaction
    • Curing
    • Workmanship
    • Testing
    • Concrete age

    For a structural suspended slab, reinforced slab or heavily loaded floor, the engineer’s concrete specification should take priority over a generic online calculation.

    1:2:4 vs 1:3:6 Concrete Mix

    A 1:2:4 mix contains more cement relative to aggregate than a 1:3:6 mix, but the correct mix depends on the intended application. Choosing a ratio solely because it uses less cement can compromise performance if it does not meet the project’s requirements.

    A 1:2:4 mix contains seven total parts.

    A 1:3:6 mix contains ten total parts.

    The latter has a greater proportion of aggregate relative to cement.

    This can reduce cement consumption, but it should not be selected simply as a cost-saving measure for a structural slab.

    For a house floor, external paving or other non-structural work, the appropriate mix may differ from that required for a structural reinforced concrete slab.

    Always establish the purpose of the concrete before calculating material quantities.

    How Does Slab Thickness Affect Cement Quantity?

    Slab thickness has a direct effect on concrete volume, and therefore on cement, sand and ballast requirements. Doubling slab thickness approximately doubles the concrete volume for the same surface area.

    Consider a 50 m² slab.

    At 50 mm:

    50 × 0.05 = 2.5 m³

    At 100 mm:

    50 × 0.10 = 5.0 m³

    At 150 mm:

    50 × 0.15 = 7.5 m³

    This means that a 150 mm slab requires approximately three times the concrete volume of a 50 mm slab over the same area.

    The cement requirement will consequently increase.

    This is why slab thickness must be confirmed before purchasing cement.

    For structural slabs, thickness should be based on structural design rather than simply selecting a convenient number.

    Cement Bags for Different Slab Areas

    For quick budgeting, estimating cement consumption per cubic metre allows you to compare different slab sizes. The following examples use an illustrative 6.5 bags of 50 kg cement per cubic metre and should not replace a project-specific concrete specification.

    Slab Area Thickness Concrete Volume Approx. Cement at 6.5 Bags/m³
    20 m² 100 mm 2.0 m³ 13 bags
    30 m² 100 mm 3.0 m³ 20 bags
    40 m² 100 mm 4.0 m³ 26 bags
    50 m² 100 mm 5.0 m³ 33 bags
    60 m² 100 mm 6.0 m³ 39 bags
    80 m² 100 mm 8.0 m³ 52 bags
    100 m² 100 mm 10.0 m³ 65 bags
    120 m² 100 mm 12.0 m³ 78 bags

    These figures are intended for preliminary planning.

    The actual cement content may differ significantly depending on the concrete grade and mix design.

    How Many Bags for a 50 Square Metre Slab?

    A 50 m² slab at 100 mm thickness contains approximately 5 m³ of concrete. Using the illustrative rate of 6.5 bags per cubic metre gives approximately 33 bags of 50 kg cement before wastage.

    Calculation:

    Area = 50 m²

    Thickness = 0.10 m

    Volume = 50 × 0.10 = 5 m³

    At 6.5 bags per cubic metre:

    5 × 6.5 = 32.5 bags

    Therefore:

    Approximately 33 bags

    Adding 5%:

    32.5 × 1.05 = 34.125 bags

    A practical allowance would therefore be around 34–35 bags, provided the assumed cement consumption is appropriate for the concrete specification.

    How Many Bags for a 100 Square Metre Slab?

    A 100 m² slab at 100 mm thickness requires approximately 10 m³ of concrete. At an illustrative consumption of 6.5 bags per cubic metre, this equals approximately 65 bags of 50 kg cement before wastage.

    Calculation:

    100 × 0.10 = 10 m³

    Then:

    10 × 6.5 = 65 bags

    With a 5% allowance:

    65 × 1.05 = 68.25 bags

    A preliminary purchasing quantity could therefore be approximately 68–69 bags, subject to the approved concrete mix.

    This example demonstrates how quickly cement requirements increase as the slab area increases.

    How Much Sand and Ballast for a 100 m² Slab?

    For a 100 m² slab at 100 mm thickness, the concrete volume is 10 m³. Using a preliminary 1:2:4 dry-volume calculation gives approximately 4.4 m³ of sand and 8.8 m³ of ballast.

    First calculate concrete volume:

    100 × 0.10 = 10 m³

    Dry material volume:

    10 × 1.54 = 15.4 m³

    For a 1:2:4 mix:

    Sand:

    15.4 × 2/7 = 4.4 m³

    Ballast:

    15.4 × 4/7 = 8.8 m³

    These are preliminary quantities.

    Actual aggregate quantities can differ because of moisture, aggregate grading, compaction and the particular mix design.

    For structural concrete, use the approved design quantities rather than relying solely on this nominal calculation.

    Does Reinforcement Affect Cement Requirements?

    Reinforcement does not directly determine the amount of cement in the concrete mix, but it affects the structural design, slab thickness, concrete cover and aggregate requirements. Reinforced slabs should therefore be constructed according to an engineer-approved design.

    A reinforced concrete slab may contain:

    • Steel reinforcement bars
    • Welded mesh
    • Binding wire
    • Concrete spacers
    • Formwork
    • Concrete

    The steel does not mean you simply add more cement.

    Instead, the slab is designed as a structural system.

    The required concrete grade, thickness and reinforcement arrangement should be established by the structural design.

    For construction fixing and related hardware, you can browse our bolts and nuts for suitable general fastening products.

    What Is the Difference Between a Ground Slab and a Suspended Slab?

    A ground-bearing slab rests on a prepared sub-base or ground system, while a suspended slab spans between structural supports and carries loads differently. The calculation and structural requirements should therefore not be treated as identical.

    A ground slab may be used for:

    • House floors
    • Garages
    • Workshops
    • External areas
    • Other ground-level surfaces

    A suspended slab may be used between floors or over open spaces.

    Suspended slabs require careful structural design because they carry loads through beams, walls, columns or other supporting elements.

    The slab thickness, reinforcement and concrete strength must therefore be established professionally.

    Do not use a simple cement-bag calculator to determine the structural adequacy of a suspended slab.

    How Do You Reduce Concrete Material Waste?

    Accurate measurements, proper batching, good formwork and careful handling can reduce concrete waste. The goal is to order enough material for the slab without creating a large unnecessary surplus.

    Before ordering materials, verify:

    • Slab dimensions
    • Thickness
    • Openings
    • Steps
    • Beams
    • Edge details
    • Mix specification
    • Concrete grade

    Small details can affect the final concrete volume.

    For example, if a slab contains thickened sections, beams or steps, those areas need to be included separately.

    If a slab is being poured in stages, calculate each pour carefully.

    Avoid preparing more concrete than can be placed and compacted within the required working period.

    Should You Add Wastage to the Slab Calculation?

    Yes, a modest allowance can help account for handling losses, uneven formwork and small measurement differences. However, excessive wastage should not be treated as normal because concrete and cement are significant project costs.

    Suppose the theoretical concrete requirement is:

    5.0 m³

    A 5% allowance gives:

    5 × 1.05 = 5.25 m³

    The additional 0.25 m³ provides a small buffer.

    For ready-mix concrete, ordering requirements should be discussed with the supplier because delivery quantities and minimum order volumes may affect the practical amount ordered.

    For site-mixed concrete, the contractor should manage batching carefully to maintain consistency.

    Should You Use a Concrete Mixer?

    A concrete mixer can improve batching consistency and productivity, especially for larger slabs. It can also reduce the physical effort required for repeated mixing compared with manual preparation.

    For small quantities, manual mixing may be practical when properly managed.

    For larger slabs, a mixer can help the team maintain consistent batches.

    You can learn more about our power tools and equipment when planning equipment for construction and renovation work.

    The important point is consistency.

    Each batch should use the intended proportions rather than relying on approximate shovel counts that vary significantly from one batch to another.

    How Important Is Water in Concrete?

    Water is essential for cement hydration and concrete workability, but excessive water can reduce concrete performance. The water-cement ratio should therefore be controlled rather than adding water simply to make the mix easier to place.

    A common mistake on construction sites is adding extra water because the concrete appears difficult to work.

    While additional water may temporarily improve workability, it can alter the concrete’s performance.

    Concrete should be proportioned and mixed according to the approved specification.

    For structural slabs, the site team should follow the engineer’s and concrete supplier’s requirements.

    How Long Should a Concrete Slab Cure?

    Curing helps concrete develop strength and reduces the risk of excessive early moisture loss. Proper curing is particularly important in Kenya’s warm and sometimes windy conditions.

    After placing, compacting and finishing concrete, the surface should be protected from excessive moisture loss.

    Common curing approaches include controlled water curing and appropriate coverings or curing compounds, depending on the project.

    The exact curing period should follow the concrete specification.

    Do not assume that concrete is fully ready for heavy loading simply because it appears hard on the surface.

    Concrete strength develops over time.

    What Tools and Materials Are Needed for Slab Construction?

    A concrete slab requires more than cement, sand and ballast. Proper preparation usually involves measuring equipment, formwork, reinforcement, mixing equipment, compaction tools and finishing tools.

    Depending on the project, you may need:

    • Cement
    • Clean sand
    • Coarse aggregate or ballast
    • Water
    • Reinforcement
    • Binding wire
    • Formwork
    • Spacers
    • Concrete mixer
    • Wheelbarrows
    • Shovels
    • Screed boards
    • Spirit levels
    • Trowels
    • Floats
    • Protective equipment

    For associated drilling and fixing work, you can browse drill bits and related accessories.

    For electrical work that will be installed alongside the building project, you can also explore our electrical supplies.

    How Do You Prepare the Ground for a Ground Slab?

    A ground-bearing slab needs a properly prepared base so that loads can be distributed effectively and settlement risks are controlled. The slab should not simply be poured over loose or poorly compacted ground.

    Ground preparation may involve:

    1. Removing unsuitable material.
    2. Establishing the correct level.
    3. Providing an appropriate sub-base.
    4. Compacting the fill.
    5. Installing damp-proofing where specified.
    6. Installing reinforcement where required.
    7. Setting up formwork.
    8. Checking levels before pouring.

    The exact build-up depends on soil conditions, building design, moisture conditions and intended use.

    A good concrete mix cannot compensate for a poorly prepared foundation.

    How Does Slab Thickness Affect Cost?

    Increasing slab thickness increases concrete volume and therefore increases cement, sand, ballast, reinforcement and potentially labour costs. The correct thickness should therefore be based on structural and functional requirements rather than simply using more concrete for safety.

     Cement Bags for Slab Kenya: 100 m² Example

    At 100 mm:

    100 × 0.10 = 10 m³

    At 150 mm:

    100 × 0.15 = 15 m³

    That is an additional:

    5 m³ of concrete

    The additional concrete means additional cement, sand and ballast.

    There may also be additional reinforcement and labour depending on the design.

    This is why slab thickness should be determined before preparing a material budget.

    How Can You Estimate the Cost of Cement for a Slab?

    Once you know the estimated number of cement bags, multiply that quantity by the current price per bag and add the cost of sand, ballast, reinforcement, labour, transport and other construction materials.

    The basic cement cost formula is:

    Cement cost = Number of bags × Price per bag

    For example, if the calculation gives:

    35 bags

    and the current cement price is:

    KES X per bag

    then:

    35 × X = estimated cement cost

    Because cement prices can change, use the current supplier quotation rather than an old price from an online article.

    The total slab budget should also include:

    • Sand
    • Ballast
    • Reinforcement
    • Formwork
    • Labour
    • Transport
    • Equipment
    • Water
    • Compaction
    • Finishing
    • Curing materials

    Cement is only one component of the overall slab cost.

    Common Mistakes When Calculating Cement for a Slab

    The most common slab-material mistakes are incorrect dimensions, wrong thickness, using an unsuitable mix ratio, ignoring reinforcement and failing to account for practical site conditions. Avoiding these errors can significantly improve budget accuracy.

    Mistake 1: Forgetting to convert millimetres to metres

    100 mm is:

    0.10 m

    not 100 m.

    Mistake 2: Using the wrong slab area

    Always calculate:

    Length × Width

    rather than estimating from the building’s general floor area if the slab contains irregular sections.

    Mistake 3: Ignoring thickness

    A 100 mm slab and a 150 mm slab have very different material requirements.

    Mistake 4: Treating all slabs as identical

    A ground floor, suspended slab, driveway and industrial floor may have different requirements.

    Mistake 5: Using generic ratios for structural design

    A generic 1:2:4 ratio should not replace structural engineering specifications.

    Mistake 6: Ignoring waste

    Theoretical quantities are not always the same as practical purchasing quantities.

    Is a 1:2:4 Mix Suitable for Every Slab?

    No. A 1:2:4 ratio is a useful nominal mix for certain estimating and non-critical applications, but it should not automatically be used for every slab. Structural concrete should meet the required design strength and specification.

    For a structural slab, the concrete grade is more important than simply saying “use 1:2:4.”

    The concrete may need to satisfy specific requirements relating to:

    • Characteristic strength
    • Workability
    • Water-cement ratio
    • Aggregate size
    • Exposure
    • Reinforcement
    • Curing
    • Testing

    A structural engineer or qualified construction professional should determine the appropriate specification.

    Cement Bags for Slab Kenya: Quick Reference

    For preliminary budgeting, converting slab volume into cement bags is the simplest approach. The figures below use an illustrative rate of 6.5 bags of 50 kg cement per cubic metre and are not a substitute for an approved concrete mix design.

    Concrete Volume Approx. Cement Bags
    1 m³ 6.5 bags
    2 m³ 13 bags
    3 m³ 19.5 bags
    4 m³ 26 bags
    5 m³ 32.5 bags
    6 m³ 39 bags
    8 m³ 52 bags
    10 m³ 65 bags
    15 m³ 97.5 bags
    20 m³ 130 bags

    For practical procurement, round to complete bags and include a reasonable allowance where appropriate.

    A Simple Formula for Your Own Cement Bags for Slab

    You can calculate the basic concrete volume for almost any rectangular slab using one straightforward formula. Once the volume is known, apply the cement consumption specified for your concrete mix.

    Use:

    Length × Width × Thickness = Concrete Volume

    For example:

    12 m × 8 m × 0.10 m

    equals:

    9.6 m³

    If the approved mix requires a particular cement content per cubic metre, multiply:

    9.6 × cement bags per m³

    This produces the estimated cement quantity.

    The same concrete volume can then be used to determine sand and ballast quantities according to the specified mix.

    Final Answer: How Many Cement Bags for Slab?

    The number of cement bags required for a slab depends on its volume and concrete specification. For example, a 10 m × 5 m slab at 100 mm thickness contains approximately 5 m³ of concrete, and an illustrative rate of 6.5 bags per cubic metre gives about 33 bags of 50 kg cement before wastage.

    The most reliable method is:

    1. Measure the slab length.

    2. Measure the slab width.

    3. Confirm the slab thickness.

    4. Convert all measurements to metres.

    5. Calculate concrete volume.

    6. Apply the specified cement content or mix design.

    7. Calculate sand and ballast quantities.

    8. Include an appropriate practical allowance.

    For a 50 m² slab at 100 mm thickness, the concrete volume is approximately 5 m³.

    Using an illustrative consumption of 6.5 bags per cubic metre, the calculation is:

    5 × 6.5 = 32.5 bags

    So the preliminary requirement is approximately 33 bags, with a practical purchasing allowance potentially bringing this to around 34–35 bags.

    However, this should not be treated as a universal structural specification. If the slab is structural, suspended, heavily loaded or part of a larger engineered building, use the concrete grade, mix design and reinforcement requirements provided by the qualified professional responsible for the project.

    Accurate cement bags for slab Kenya calculations can help you budget more effectively, but good construction ultimately depends on the complete concrete system: correct materials, proper batching, suitable reinforcement, good compaction, adequate curing and competent workmanship.

    For construction or renovation projects in Ngong, having the right materials and equipment available before work starts can also reduce delays and unnecessary trips to the hardware store.

    Your One-Stop Hardware Partner in Ngong

    Imagine completing your project with the right tools, the best materials, and expert advice. At Ngong Hills Merchants, we turn your DIY or construction vision into reality with a complete selection of plumbing, electrical, glass, and sanitary ware.

    Contact our team for a consultation and get the right supplies, right now.

    QUALITY HARDWARE & SUPPLIES IN NGONG ✔ Complete Range of Plumbing & Electrical ✔ Power Tools, Adhesives & Paints ✔ Glass, Framing & Sanitary Ware ✔ Serving Kiserian, Ongata Rongai, Ngong Hills & beyond.

    Request Your Free Consultation: Ngong Hills Merchants
    Email: ngonghillsmerchants [at] gmail.com
    Phone: +254 715974811
    Visit Us: Ngong Township, Ngong, Kenya
    Website: https://ngonghillsmerchants.com/

  • How Many Bags of Cement Per Square Metre of Plaster?

    How Many Bags of Cement Per Square Metre of Plaster?

    Knowing the cement per square metre plaster requirement is essential when budgeting for construction, renovation or wall-finishing work. If you buy too little cement, plastering can stop before the project is complete; if you buy too much, you tie up money in materials that may deteriorate if they are poorly stored.

    The actual amount of cement needed depends on the plaster thickness, cement-to-sand ratio, wall condition, quality of sand, workmanship and expected wastage. A 10 mm plaster layer will not consume the same amount of material as a 20 mm layer, while a 1:4 mix will use more cement than a 1:5 mix for the same plaster volume.

    For homeowners, contractors and DIY builders in Kenya, understanding cement per square metre plaster calculations provides a much better starting point for estimating project costs.

    This guide explains how to calculate cement and sand, how many 50 kg bags may be required for different wall areas, how plaster thickness affects consumption, and how to reduce unnecessary material waste.

    Cement Per Square Metre Plaster: How Much Do You Need?

    The cement per square metre plaster requirement commonly falls within an approximate range of 0.10–0.15 of a 50 kg bag per square metre for ordinary wall plastering, depending on thickness, mix ratio and wastage. A precise project estimate should always be calculated from the actual plaster specification.

    There is no universal number of bags that applies to every plastering job.

    For preliminary budgeting, however, a practical estimate can be useful.

    For example, if your project uses approximately 0.10 bag per square metre, then:

    • 10 m² requires about 1 bag
    • 50 m² requires about 5 bags
    • 100 m² requires about 10 bags
    • 200 m² requires about 20 bags

    At a higher consumption rate of 0.15 bag per square metre:

    • 10 m² requires about 1.5 bags
    • 50 m² requires about 7.5 bags
    • 100 m² requires about 15 bags
    • 200 m² requires about 30 bags

    These figures are useful for early budgeting, but they should not replace a proper calculation.

    The most accurate approach is to calculate the plaster volume from the wall area and thickness, then determine how much cement is required according to the specified cement-to-sand ratio.

    What Determines Cement Per Square Metre Plaster?

    The main factors affecting cement per square metre plaster are plaster thickness, mix ratio, wall condition, sand quality, water content, application technique and wastage. Small changes in any of these factors can affect the final number of cement bags required.

    Plaster thickness

    Thickness is one of the most important variables.

    A 10 mm plaster layer requires less mortar than a 15 mm layer. A 20 mm layer requires approximately twice the wet plaster volume of a 10 mm layer.

    Cement-to-sand ratio

    The mix ratio determines the proportion of cement in the mortar.

    A 1:4 mix contains:

    1 part cement + 4 parts sand

    A 1:5 mix contains:

    1 part cement + 5 parts sand

    Consequently, a 1:4 mix generally requires more cement than a 1:5 mix for the same volume of plaster.

    Wall condition

    A flat, well-built wall may require relatively consistent plaster thickness. An uneven wall may require considerably more mortar to achieve a level finish.

    Sand quality

    Sand with excessive clay, silt or unsuitable grading can affect workability and mortar performance.

    Wastage

    Some mortar may fall from the wall, remain in mixing containers or become unusable before application. A realistic allowance should therefore be included in the estimate.

    Understanding these variables makes your cement per square metre plaster calculation more reliable.

    How Do You Calculate Cement Per Square Metre Plaster?

    The basic calculation involves multiplying the plastered area by the plaster thickness, converting the wet volume into an estimated dry-material volume, and then dividing the dry volume according to the cement-to-sand ratio.

    The basic formula is:

    Plaster volume = Area × Thickness

    Suppose a wall measures:

    10 metres × 3 metres

    The wall area is:

    10 × 3 = 30 m²

    If the plaster thickness is 15 mm:

    15 mm = 0.015 m

    Therefore:

    30 × 0.015 = 0.45 m³

    The wet plaster volume is approximately 0.45 cubic metres.

    Dry materials occupy more volume than the finished wet mortar because of voids between sand particles and other factors. For preliminary estimating, a dry-volume factor of approximately 1.33 is commonly used.

    Therefore:

    0.45 × 1.33 = 0.5985 m³

    For a 1:4 mix, there are five total parts:

    1 + 4 = 5 parts

    The cement portion is:

    0.5985 ÷ 5 = 0.1197 m³

    Using an approximate cement density of 1,440 kg/m³:

    0.1197 × 1,440 = 172.4 kg

    For 50 kg bags:

    172.4 ÷ 50 = 3.45 bags

    The theoretical requirement is therefore approximately 3.5 bags of cement.

    After allowing for reasonable wastage and practical site conditions, the purchasing quantity may be slightly higher.

    This method is much more dependable than simply assuming that every square metre consumes the same amount of cement.

    How Many Bags of Cement for 10 Square Metres of Plaster?

    For 10 m² of ordinary wall plaster, a preliminary estimate may fall around 1–1.5 bags of 50 kg cement, depending on the thickness and mix ratio. A detailed calculation should be used when preparing a formal project budget.

    If the plaster is relatively thin and the wall is straight, consumption may be toward the lower end of the range.

    If the wall is uneven or the plaster is thicker, consumption can increase.

    For a small renovation, it is also important to consider the practicality of purchasing cement in complete bags. A theoretical calculation might produce a fraction of a bag, but the actual purchase will normally involve whole bags.

    Cement should also be stored correctly if it will not be used immediately.

    Keeping bags dry and protected from ground moisture helps reduce material losses.

    How Many Bags of Cement for 50 Square Metres?

    For 50 m² of ordinary plastering, approximately 5–8 bags of 50 kg cement can be a useful preliminary range, although the actual cement per square metre plaster depends on the specified thickness and mix.

    For example, at 0.10 bag per square metre:

    50 × 0.10 = 5 bags

    At 0.15 bag per square metre:

    50 × 0.15 = 7.5 bags

    Therefore, an early budgeting estimate might be approximately 5–8 bags.

    However, if you know the exact thickness and mix ratio, use those values to perform a detailed calculation.

    This becomes especially important for large projects where a small difference in consumption per square metre can translate into several additional bags of cement.

    How Many Bags of Cement for 100 Square Metres?

    A 100 m² plastering area may require approximately 10–15 bags of 50 kg cement under common estimating conditions, but a project-specific calculation should be used for accurate procurement.

    At 0.10 bag per square metre:

    100 × 0.10 = 10 bags

    At 0.15 bag per square metre:

    100 × 0.15 = 15 bags

    A practical order may therefore fall within this range depending on the specification.

    For example, a 100 m² wall plastered at 15 mm with a 1:4 mix can produce a theoretical requirement of approximately 11.5 bags before wastage.

    Adding a modest allowance could result in an order quantity of approximately 12–13 bags.

    This illustrates why knowing the actual plaster thickness is more useful than relying solely on a general rule.

    Worked Example: Cement Per Square Metre Plaster for 100 m²

    A detailed calculation provides a better estimate than a simple rule of thumb. For 100 m² at 15 mm thickness using a 1:4 mix, the theoretical cement requirement is roughly 11.5 bags before allowing for wastage.

    Start with the plaster area:

    100 m²

    Plaster thickness:

    15 mm = 0.015 m

    Wet plaster volume:

    100 × 0.015 = 1.5 m³

    Apply the dry-volume factor:

    1.5 × 1.33 = 1.995 m³

    For a 1:4 cement-to-sand ratio:

    Cement = 1.995 ÷ 5

    Cement = 0.399 m³

    Convert the cement volume to weight:

    0.399 × 1,440 = 574.6 kg

    Convert to 50 kg bags:

    574.6 ÷ 50 = 11.49 bags

    Therefore:

    Theoretical cement requirement ≈ 11.5 bags

    Allowing for approximately 5–10% wastage gives a practical range of roughly:

    12–13 bags

    This is a useful example of how the cement per square metre plaster requirement can be calculated rather than guessed.

    How Much Sand Is Needed for Plastering?

    Sand is calculated alongside cement because the cement-to-sand ratio determines how much of each material goes into the mortar. In a 1:4 mix, four parts of sand are used for every one part of cement by volume.

    Using the 100 m² example above:

    Dry material volume:

    1.995 m³

    For a 1:4 mix:

    Sand = 1.995 × 4 ÷ 5

    Sand ≈ 1.596 m³

    Therefore, approximately 1.6 m³ of sand is required before allowing for wastage and other site variations.

    If the mix changes to 1:5, the calculation changes because the total mix contains six parts:

    1 part cement + 5 parts sand = 6 parts

    The amount of cement and sand must therefore be recalculated.

    This is why the cement-to-sand ratio should be established before buying materials.

    1:4 vs 1:5 Plaster Mix: Which Should You Use?

    A 1:4 mix contains a higher proportion of cement than a 1:5 mix, but the richer mix is not automatically the best choice for every wall. The appropriate plaster ratio depends on the substrate, exposure, required finish and project specification.

    A 1:4 mix contains one part cement for every four parts sand.

    A 1:5 mix contains one part cement for every five parts sand.

    The 1:4 mix therefore uses more cement.

    However, adding more cement simply to make plaster “stronger” is not necessarily good practice. Plaster needs to be compatible with the substrate and correctly mixed, applied and cured.

    An excessively rich mix can increase shrinkage and cracking risks under certain conditions.

    For ordinary construction work, follow the project specification or the recommendation of the qualified construction professional supervising the work.

    The correct cement per square metre plaster figure should therefore be based on the selected mix rather than a universal number.

    How Does Plaster Thickness Change Cement Requirements?

    The thicker the plaster layer, the more cement and sand are required per square metre. This is why uneven walls can consume significantly more material than walls built to consistent alignment.

    Consider 100 m² of wall.

    At 10 mm:

    100 × 0.010 = 1.0 m³

    At 15 mm:

    100 × 0.015 = 1.5 m³

    At 20 mm:

    100 × 0.020 = 2.0 m³

    A 20 mm layer therefore requires approximately twice the wet mortar volume of a 10 mm layer.

    This relationship is important when calculating cement per square metre plaster.

    If your walls are uneven, do not assume the nominal plaster thickness will be the actual average thickness.

    Instead, inspect the substrate and determine whether additional material will be required to achieve the specified finish.

    Where large variations exist, the appropriate solution may involve correcting the substrate rather than simply applying an excessively thick plaster layer.

    Cement Per Square Metre Plaster Coverage Table

    A coverage table is useful for preliminary budgeting, but actual consumption should be adjusted according to thickness, mix ratio, substrate condition and wastage.

    Plastered Area Approximate 50 kg Cement Bags
    10 m² 1–2 bags
    20 m² 2–3 bags
    30 m² 3–5 bags
    50 m² 5–8 bags
    75 m² 8–11 bags
    100 m² 10–15 bags
    150 m² 15–22 bags
    200 m² 20–30 bags
    300 m² 30–45 bags
    500 m² 50–75 bags

    The table is intended as a starting point rather than a fixed construction standard.

    If you are preparing a bill of quantities, use the actual dimensions and specified plaster thickness.

    How Do You Calculate the Total Plastering Area?

    Accurate surface measurement is one of the easiest ways to improve your plastering estimate. Calculate each wall, then deduct significant door and window openings where appropriate.

    For a rectangular wall:

    Area = Length × Height

    Suppose a wall measures 8 metres by 3 metres:

    8 × 3 = 24 m²

    Now assume it has a door measuring 0.9 metres by 2.1 metres:

    0.9 × 2.1 = 1.89 m²

    Net area:

    24 − 1.89 = 22.11 m²

    Repeat the calculation for every wall.

    Windows should also be measured and deducted where applicable under the project’s measurement method.

    For professional quantity surveying, follow the applicable measurement standard and contract requirements.

    For a homeowner preparing a rough budget, however, measuring each wall individually is still considerably better than estimating from the number of rooms alone.

    Should You Include Wastage in the Cement Calculation?

    Yes. A practical cement estimate should include a reasonable allowance for wastage, handling losses and variations in plaster thickness. The allowance should be controlled rather than excessive.

    Material can be lost in several ways.

    Mortar can fall from the wall during application.

    Some material may remain in buckets or mixing equipment.

    Sand and cement can also be wasted through poor handling.

    Uneven surfaces can increase consumption beyond the theoretical quantity.

    For these reasons, a theoretical result such as 11.49 bags should not necessarily become an order for exactly 11 bags.

    Depending on site conditions, approximately 5–10% additional material may be considered for preliminary procurement.

    The correct allowance depends on the contractor, project conditions and material management practices.

    What Type of Sand Is Best for Plastering?

    Good plastering requires suitable, clean and properly graded sand. Sand containing excessive clay, organic matter or undesirable contaminants can affect mortar workability, bonding and long-term performance.

    The sand should be suitable for plastering rather than selected purely because it is cheap or readily available.

    Very coarse material can make finishing difficult.

    Excessively fine or contaminated sand can affect water demand and mortar behaviour.

    The moisture content of the sand also matters because wet sand occupies a different volume from dry sand.

    For large projects, the material specification should be confirmed before delivery.

    This can prevent the common problem of ordering large quantities of unsuitable sand and discovering the issue after work has started.

    How Much Water Should Be Added to Plaster?

    Water should be added carefully to achieve workable mortar without making the mixture excessively wet. Too much water can affect plaster performance, shrinkage and strength.

    There is no single water quantity that applies to every batch.

    Sand moisture varies.

    Weather conditions vary.

    The cement and sand proportions also affect workability.

    Experienced plasterers therefore adjust water gradually while maintaining the required consistency.

    An excessively wet mix may be easier to spread initially, but that does not mean it will produce a better finished wall.

    Water should be clean and suitable for construction use, and mixing should follow the project’s requirements.

    How Should the Wall Be Prepared Before Plastering?

    Proper surface preparation improves adhesion and helps produce a more durable plaster finish. Dust, loose particles, contamination and weak areas should be addressed before plaster application.

    Before plastering, inspect the wall for:

    • Loose mortar
    • Dust
    • Oil or other contaminants
    • Excessively smooth areas
    • Deep holes
    • Cracks
    • Uneven masonry
    • Weak joints

    The surface should be prepared according to the substrate and plaster system being used.

    Where necessary, the wall may need appropriate dampening before plastering so that the substrate does not rapidly draw moisture from the fresh mortar.

    Poor preparation can cause problems even when the cement and sand proportions are correct.

    A technically correct cement per square metre plaster calculation cannot compensate for an unsuitable or poorly prepared substrate.

    What Tools Do You Need for Plastering?

    Good tools make it easier to measure, mix, apply and finish plaster consistently. Using appropriate equipment can also reduce material waste and improve productivity.

    Common plastering tools include:

    • Measuring tape
    • Buckets
    • Shovels
    • Mixing equipment
    • Trowels
    • Hawk boards
    • Floats
    • Straightedges
    • Spirit levels
    • Brushes
    • Protective equipment

    For drilling and related construction work, you can explore our range of power tools.

    For drilling into different materials, browse our drill bits and accessories.

    For construction fixing requirements, discover our bolts and nuts.

    Choosing appropriate tools can make a significant difference when working on a large plastering project.

    How Can You Reduce Cement and Plaster Waste?

    Accurate measurement, consistent mixing, controlled thickness and proper application are the most effective ways to reduce waste. Good material management can save money without compromising the quality of the plaster.

    Start by measuring the wall accurately.

    Next, establish the required thickness.

    Then confirm the cement-to-sand ratio.

    Prepare manageable batches rather than mixing more mortar than can be used within its workable period.

    Avoid excessive water.

    Monitor the thickness of the plaster while applying it.

    If the project consistently consumes more cement than your estimate predicts, investigate the reason.

    The problem could be:

    • Excessive plaster thickness
    • Uneven masonry
    • Poor mixing
    • Mortar falling during application
    • Incorrect measurement
    • Excessive site waste
    • Unsuitable sand

    Monitoring actual consumption is particularly valuable on large projects.

    If you are using 20 bags more than expected on a major building, the issue may not simply be “higher cement prices.” It may indicate an avoidable material-management problem.

    What Happens If You Use Too Much Cement?

    Using excessive cement does not automatically make plaster better. An unnecessarily rich mix can increase costs and may contribute to shrinkage and cracking problems under unsuitable conditions.

    Cement is only one component of plaster.

    The overall performance depends on the relationship between cement, sand, water, substrate, application and curing.

    A very cement-rich plaster can also be more expensive.

    For this reason, the goal should be to use the correct cement quantity, not the maximum possible quantity.

    A professional contractor should select the mix according to the project’s requirements.

    What Happens If You Use Too Little Cement?

    Using too little cement can produce a mortar with inadequate cohesion and performance for the intended application. Reducing cement simply to lower the initial cost can result in repairs and additional finishing expenses later.

    A plaster mix must contain enough binder for the required application.

    If the mix is poorly proportioned, the finished plaster may become weak, powdery or susceptible to damage.

    The correct approach is to follow the specified ratio.

    Do not attempt to reduce the cement content simply because cement is one of the more expensive components of the mix.

    A small saving during construction can become an expensive repair later.

    How Does Plaster Quality Affect Painting?

    A properly plastered and cured wall provides a better base for painting and other finishes. Uneven plaster, cracks and surface defects can increase preparation and finishing costs.

    Painting does not hide every plastering defect.

    Light falling across an uneven wall can make ridges and waves especially visible.

    A good plaster finish should therefore be properly levelled and finished before decorative coatings are applied.

    After the plaster has adequately cured and the surface has been prepared, the appropriate primer and paint system can be selected.

    You can explore our range of paints for products suited to different finishing requirements.

    For bathroom and wet-area projects, browse our sanitary ware collection when planning the finishing stage.

    Can Plastering Cement Be Used for Other Construction Work?

    Cement is used for many construction applications, but the correct cement type, mix and application depend on the job. Plastering requirements should not automatically be applied to structural concrete, screeds or other specialised work.

    Plaster mortar is designed for a particular purpose.

    Concrete, masonry mortar, screeds and other cement-based materials can have different specifications.

    Do not assume that changing the cement-to-sand ratio will make plaster suitable for every construction application.

    For structural elements, follow the structural engineer’s specifications and the applicable construction standards.

    For ordinary plastering, follow the project’s plaster specification and use appropriate materials.

    How Much Cement Do You Need for a Whole House?

    The number of cement bags required for a whole house cannot be determined reliably from the number of bedrooms alone. The correct method is to calculate the total plastered surface area and apply the relevant consumption rate.

    A house may have hundreds of square metres of internal and external wall surfaces.

    Consider:

    • Wall lengths
    • Wall heights
    • Doors
    • Windows
    • Internal partitions
    • External walls
    • Ceiling surfaces
    • Plaster thickness
    • Mix ratio

    For example, a house with 400 m² of plastered wall surface will require a very different amount of cement from one with 250 m².

    The same applies to a house where the average plaster thickness is 20 mm instead of 12–15 mm.

    This is why cement per square metre plaster is a more useful measurement than simply asking how many bags a three-bedroom or four-bedroom house requires.

    Cement Per Square Metre Plaster: Quick Calculation Formula

    You can estimate cement requirements by combining the surface area, plaster thickness, dry-volume factor and cement-to-sand ratio. This formula provides a practical starting point for budgeting and material planning.

    Use the following sequence:

    1. Calculate wall area

    Area = Length × Height

    2. Calculate wet plaster volume

    Volume = Area × Thickness

    3. Estimate dry-material volume

    Dry volume = Wet volume × 1.33

    4. Calculate cement volume

    For 1:4:

    Cement = Dry volume ÷ 5

    5. Convert to kilograms

    Cement weight = Cement volume × approximately 1,440 kg/m³

    6. Convert to 50 kg bags

    Bags = Cement weight ÷ 50

    7. Add a reasonable wastage allowance

    This gives you a much more useful estimate of cement per square metre plaster than relying on a single generic figure.

    Cement Per Square Metre Plaster: Practical Coverage Guide

    For quick budgeting, the following approximate coverage figures can help you estimate the number of 50 kg bags required. Always refine the estimate using actual wall measurements and the project’s plaster specification.

    Area to Plaster Approximate Bags
    10 m² 1–2
    25 m² 3–4
    50 m² 5–8
    75 m² 8–11
    100 m² 10–15
    125 m² 13–19
    150 m² 15–22
    200 m² 20–30
    250 m² 25–38
    300 m² 30–45
    500 m² 50–75

    These figures should be viewed as preliminary estimating ranges.

    The exact quantity depends on the plaster system.

    When Should You Contact a Hardware Supplier?

    A hardware supplier can help you source the materials and tools required after you have established your project quantities. For larger projects, discussing the complete material list can also help prevent unnecessary purchases.

    Before buying, prepare information such as:

    • Total plastering area
    • Average plaster thickness
    • Cement-to-sand ratio
    • Required cement bag size
    • Estimated sand quantity
    • Tools required
    • Expected project duration

    This makes it easier to purchase the right quantity.

    At Ngong Hills Merchants, you can also source related construction products as your project progresses.

    For plumbing work, explore our plumbing supplies.

    For electrical installations, browse our electrical range.

    For glass-related work, view our glass products.

    For bonding and repair applications, discover our adhesives.

    This makes it easier to coordinate multiple stages of a construction or renovation project.

    Final Answer: How Many Bags of Cement Per Square Metre of Plaster?

    The practical cement per square metre plaster requirement is commonly estimated at around 0.10–0.15 of a 50 kg bag per square metre for ordinary plastering, but the exact quantity depends on thickness, mix ratio, surface condition and wastage.

    For quick budgeting:

    10 m² = approximately 1–2 bags

    50 m² = approximately 5–8 bags

    100 m² = approximately 10–15 bags

    200 m² = approximately 20–30 bags

    For a more precise calculation, multiply the plastered area by the plaster thickness, convert the wet volume to dry material volume, divide the dry volume according to the cement-to-sand ratio, convert the cement volume into 50 kg bags and then include a reasonable wastage allowance.

    For example, 100 m² of plaster at 15 mm thickness using a 1:4 mix produces a theoretical requirement of approximately 11.5 bags, with roughly 12–13 bags being a practical purchasing allowance depending on site conditions.

    The key is not to rely on one fixed number for every project. Accurate measurements and the correct mix specification will always produce a better estimate.

    Whether you are plastering a single room, renovating a house or managing a larger construction project in Ngong, careful material planning can help control costs and reduce unnecessary waste.

    Your One-Stop Hardware Partner in Ngong

    Imagine completing your project with the right tools, the best materials, and expert advice. At Ngong Hills Merchants, we turn your DIY or construction vision into reality with a complete selection of plumbing, electrical, glass, and sanitary ware.

    Contact our team for a consultation and get the right supplies, right now.

    QUALITY HARDWARE & SUPPLIES IN NGONG ✔ Complete Range of Plumbing & Electrical ✔ Power Tools, Adhesives & Paints ✔ Glass, Framing & Sanitary Ware ✔ Serving Ngong, Karen, Matasia, Kiserian & beyond.

    Request Your Free Consultation: Ngong Hills Merchants
    Email: ngonghillsmerchants [at] gmail.com
    Phone: +254 715974811
    Visit Us: Ngong Township, Ngong, Kenya
    Website: https://ngonghillsmerchants.com/
  • Roof Leak Repair Tools in Kenya: Powerful Essentials

    Roof Leak Repair Tools in Kenya: Powerful Essentials

    A leaking roof can quickly turn a minor maintenance issue into expensive damage to ceilings, walls, insulation, furniture, electrical installations, and other parts of a property. Having the right roof leak repair tools in Kenya can make routine inspection and minor roofing maintenance more manageable while helping homeowners, contractors, and maintenance professionals work more efficiently.

    Roof leaks can develop for many reasons. Loose roofing screws, deteriorated washers, damaged sheets, cracked tiles, failed flashing, blocked gutters, damaged ridge caps, poor roof penetrations, and deteriorated sealants can all create opportunities for water to enter a building.

    One important point is that the place where water appears inside a building may not be the actual point where it entered the roof. Water can travel along roofing sheets, timber, structural members, or other surfaces before eventually appearing as a ceiling stain or drip.

    That is why effective roof maintenance starts with inspection and diagnosis rather than simply covering every visible gap with sealant.

    The tools you choose should also match the roofing material and the type of repair being performed. A tool suitable for a corrugated metal roof may not be appropriate for delicate roofing tiles, while repairs involving significant structural damage require professional assessment rather than a DIY approach.

    7 Powerful Roof Leak Repair Tools in Kenya

    The right roof leak repair tools in Kenya help with inspection, fastening, cutting, gripping, sealing, and maintenance, allowing suitable minor repairs to be completed more efficiently and safely.

    A practical roof-maintenance toolkit does not need to contain every tool available in a hardware shop.

    Instead, it should contain tools that solve common roofing problems.

    Seven particularly useful tools and equipment categories include:

    1. Roofing hammer
    2. Screwdriver or drill/driver
    3. High-leverage pliers
    4. Pry bar
    5. Utility knife
    6. Caulking gun
    7. Measuring and inspection tools

    Depending on the roofing system, you may also need replacement screws, washers, flashing tape, sealants, roofing sheets, tiles, or other compatible materials.

    For more demanding projects, appropriate access and fall-protection equipment is equally important.

    Why the Right Tools Matter When Repairing Roof Leaks

    Using appropriate roofing tools improves control, reduces unnecessary effort, and helps prevent damage caused by using unsuitable equipment.

    Roofing repairs often involve working with materials that can be damaged easily.

    Metal roofing sheets can bend.

    Tiles can crack.

    Fasteners can strip.

    Sealants can be applied unevenly.

    A poorly selected tool can therefore create a new problem while attempting to fix an existing one.

    For example, using ordinary pliers to force a stubborn roofing screw can damage the fastener head. Using excessive force on a roofing sheet can distort its profile. Applying sealant over a dirty or wet surface can result in poor adhesion.

    The objective should always be to use the correct tool for the specific task.

    Roofing Hammer for Minor Roof Repairs

    A roofing hammer is useful for controlled fastening, removal of suitable nails, and minor roofing maintenance tasks where hammering is appropriate.

    A good hammer is one of the most basic tools a contractor or maintenance worker can keep in a roofing toolkit.

    Depending on the roofing system, it may be used for:

    • Removing old nails
    • Installing suitable roofing nails
    • Adjusting compatible roofing components
    • Securing certain materials
    • General maintenance

    However, roofing sheets should never be struck unnecessarily.

    Metal sheets can become dented or distorted when excessive force is applied.

    Tiles require even greater care because concentrated impact can cause cracking.

    The hammer should therefore be used deliberately and only where the roofing system allows it.

    Screwdriver for Loose Roofing Fasteners

    A suitable screwdriver is essential when inspecting, removing, or replacing roofing screws and other compatible fasteners.

    Loose fasteners are one potential source of water entry in metal roofing systems.

    A screw can become loose through movement, weather exposure, poor installation, or deterioration of the surrounding materials.

    During inspection, check:

    • Screw heads
    • Washers
    • Roofing sheet condition
    • Fastener alignment
    • Rust
    • Gaps around penetrations

    If a fastener is damaged, simply tightening it may not solve the problem.

    The washer may have deteriorated.

    The surrounding roofing material may be damaged.

    The screw may have lost its holding strength.

    A proper repair may therefore involve replacing the fastener and washer.

    Drill/Driver for Roofing Repairs

    A drill/driver can make fastening and replacement work faster and more consistent when used with the correct bit, torque setting, and roofing fastener.

    For larger maintenance projects, manually installing every screw can become time-consuming.

    A suitable drill/driver can help with:

    • Removing roofing screws
    • Installing replacement screws
    • Drilling appropriate holes
    • General construction work

    However, power should be controlled.

    Over-tightening roofing screws can deform the sheet or damage the sealing washer.

    The objective is to achieve the appropriate fastening pressure rather than maximum possible torque.

    When selecting equipment for construction and maintenance work, you can explore our power tools for suitable options.

    High-Leverage Pliers for Roof Maintenance

    High-leverage pliers provide strong gripping and cutting capability, making them useful for handling wire, suitable fasteners, metal components, and other maintenance tasks.

    Pliers are among the most versatile tools in a contractor’s toolbox.

    Depending on their design, they can help with:

    • Gripping
    • Cutting suitable wire
    • Bending metal
    • Holding small components
    • Removing certain fasteners
    • Manipulating roofing accessories

    High-leverage models can be particularly useful where additional mechanical advantage is needed.

    However, never use pliers to cut materials beyond the manufacturer’s rated capacity.

    Likewise, pliers should not be used as a substitute for a proper wrench when installing or removing fasteners designed for wrenching.

    Using the correct tool protects both the tool and the roofing component.

    Pry Bar for Removing Damaged Roofing Materials

    A pry bar provides controlled leverage when removing old nails, lifting roofing components, or separating damaged materials during suitable repair work.

    When a roofing sheet or flashing component needs to be replaced, a pry bar can make removal easier.

    It can assist with:

    • Removing nails
    • Lifting roofing edges
    • Separating old materials
    • Removing damaged flashing
    • Creating controlled leverage

    Care is essential.

    Excessive force can bend metal sheets or damage the structure beneath the roofing.

    Before prying, determine where the underlying support is located.

    This is particularly important when removing materials around roof edges, valleys, or structural junctions.

    Utility Knife for Roofing Materials

    A utility knife provides controlled cutting for appropriate roofing tapes, membranes, packaging, sealants, and flexible repair materials.

    Many roof repairs involve materials that need to be cut to size.

    A utility knife may be useful for:

    • Flashing tape
    • Waterproofing membranes
    • Protective materials
    • Packaging
    • Flexible roofing products
    • Sealant tubes

    Always use a sharp, properly secured blade.

    Cut away from your body and keep your hands away from the cutting path.

    A dull blade can be more dangerous because it may require excessive force.

    Replace or retract blades when they become damaged or unsuitable.

    Caulking Gun for Roofing Sealant

    A caulking gun allows controlled application of suitable roofing sealants around compatible joints, gaps, penetrations, and minor repair areas.

    Roofing sealant can be useful for specific maintenance situations.

    However, sealant should never be viewed as a universal solution.

    If a roofing sheet is severely damaged, the correct solution may be replacement.

    If flashing has failed, the flashing may need to be reconstructed or replaced.

    If water is entering because of poor drainage, sealing one location will not address the underlying issue.

    When sealant is appropriate, surface preparation matters.

    The area should be cleaned and prepared according to the sealant manufacturer’s instructions.

    For suitable construction bonding and sealing requirements, you can discover our adhesives.

    Measuring and Inspection Tools

    Simple inspection and measuring tools help identify the location, dimensions, and extent of roofing damage before repairs begin.

    A basic inspection kit can include:

    • Tape measure
    • Marker
    • Flashlight
    • Straightedge
    • Inspection mirror
    • Level where appropriate

    A tape measure helps determine the dimensions of replacement materials.

    A marker can help identify specific repair areas.

    A flashlight is particularly useful when inspecting roof spaces from below.

    An inspection mirror can help examine areas that are difficult to see directly.

    Accurate inspection reduces unnecessary material purchases and helps contractors understand the full extent of the problem.

    Roofing Screws and Washers

    Replacement roofing screws and sealing washers are important components of many metal-roof repairs because fastening points can become potential sources of water entry.

    A roofing screw creates a penetration through the roofing material.

    That penetration needs to remain properly sealed.

    The washer positioned beneath the screw head helps provide a weather-resistant seal.

    Over time, washers can deteriorate because of:

    • UV exposure
    • Weather
    • Temperature changes
    • Mechanical stress
    • Poor-quality materials
    • Incorrect installation

    When inspecting a leaking metal roof, examine the condition of both the screw and the washer.

    Replacing only the screw may not solve the problem if the washer has failed.

    Choosing the Right Roofing Sealant

    The correct sealant should be compatible with the roofing material and capable of handling the environmental conditions around the repair area.

    Roofing systems are exposed to demanding conditions.

    These include:

    • Rain
    • Sunlight
    • Heat
    • Temperature changes
    • Wind
    • Expansion and contraction

    A sealant that works well for one material may not be suitable for another.

    Before purchasing, check:

    • Material compatibility
    • Exterior suitability
    • Water resistance
    • Application temperature
    • Curing requirements
    • Expected movement
    • Manufacturer instructions

    Never assume that every general-purpose sealant is suitable for roofing.

    Flashing Tape for Minor Repairs

    Flashing tape can provide a practical solution for certain minor waterproofing applications when the surface is properly prepared and the product is compatible with the roofing system.

    Flashing is especially important around areas where different materials meet.

    Examples include:

    • Roof-to-wall junctions
    • Vents
    • Chimneys
    • Skylights
    • Valleys
    • Roof penetrations

    Flashing tape can sometimes assist with minor repairs.

    However, severely damaged flashing should generally be replaced or professionally repaired rather than repeatedly covered.

    A temporary patch should not be mistaken for a permanent solution.

    Replacement Roofing Sheets

    When a roofing sheet has extensive corrosion, large holes, severe deformation, or other significant damage, replacement may be more reliable than repeated patching.

    Before replacing a sheet, identify:

    • Roofing profile
    • Material
    • Dimensions
    • Thickness or gauge where applicable
    • Colour
    • Fastener type
    • Overlap requirements

    The replacement material should integrate properly with the existing roof.

    Improperly fitted roofing sheets can create new points of water entry.

    For larger replacement projects, professional installation is recommended.

    Repairing a Mabati Roof

    Mabati roofs require repair tools and materials designed for metal roofing, particularly when addressing fasteners, corrosion, overlaps, flashing, and damaged sheets.

    During an inspection, look closely at:

    • Roofing screws
    • Rubber washers
    • Sheet overlaps
    • Rust
    • Holes
    • Ridge caps
    • Flashing
    • Gutters
    • Roof penetrations

    Surface rust may be manageable with appropriate treatment.

    Severe corrosion, however, can weaken the sheet.

    If the metal has become thin, perforated, or structurally compromised, replacing the affected section may be preferable to repeatedly applying patches.

    Repairing a Tile Roof

    Tile roofing requires careful handling because cracked or displaced tiles can allow water to enter while excessive pressure can create additional damage.

    When inspecting tile roofs, check for:

    • Cracked tiles
    • Missing tiles
    • Displaced tiles
    • Damaged flashing
    • Failed mortar or compatible sealing details
    • Blocked drainage areas

    Use appropriate access equipment.

    Do not walk unnecessarily across fragile tiles.

    If tiles need to be removed, work carefully to avoid damaging adjacent units.

    A single cracked tile can sometimes be replaced without disturbing a large section of the roof.

    Repairing a Flat Roof

    Flat and low-slope roofs require particular attention to waterproofing membranes, drainage, joints, flashing, and areas where water can accumulate.

    A flat roof that repeatedly develops leaks may have a broader waterproofing problem.

    Inspect:

    • Membranes
    • Joints
    • Roof outlets
    • Drains
    • Flashing
    • Parapets
    • Surface cracks
    • Areas of standing water

    If water remains on the roof for extended periods, simply sealing one crack may not solve the problem.

    Drainage should also be investigated.

    Why Gutters Matter in Roof Leak Prevention

    Blocked or damaged gutters can contribute to water accumulation and overflow, making gutter inspection an important part of roof maintenance.

    Gutters collect and redirect rainwater.

    When they become blocked with leaves, dirt, or other debris, water can overflow against walls and roof edges.

    Check:

    • Gutters
    • Downpipes
    • Valley gutters
    • Drain outlets
    • Connections

    Regular cleaning can help prevent avoidable drainage problems.

    For wider water-management and installation projects, you can browse our plumbing supplies.

    How to Find a Roof Leak

    Finding the actual entry point is essential because water can travel away from the original defect before appearing inside the building.

    Start inside.

    Identify the location of:

    • Ceiling stains
    • Damp patches
    • Peeling paint
    • Drips
    • Water marks

    Then inspect the corresponding roof area when conditions are safe.

    Look for:

    • Damaged roofing
    • Loose fasteners
    • Rust
    • Cracks
    • Flashing problems
    • Penetrations
    • Ridge defects
    • Blocked drainage

    The visible interior damage may be several metres away from the actual entry point.

    Roof Inspection From the Attic or Roof Space

    Inspecting the roof from inside can sometimes reveal water trails and staining without immediately requiring access to the exterior roof surface.

    A flashlight can help identify:

    • Wet timber
    • Water marks
    • Damp insulation
    • Light entering through holes
    • Staining around penetrations

    However, insulation can obscure the path of water.

    Water can also travel along structural components.

    An interior inspection should therefore be combined with an exterior assessment where safe.

    The Importance of Roof Flashing

    Flashing directs water away from vulnerable junctions and penetrations, making it one of the most important areas to inspect when diagnosing persistent roof leaks.

    Flashing may be found around:

    • Chimneys
    • Vents
    • Skylights
    • Walls
    • Valleys
    • Roof edges
    • Other penetrations

    If flashing has separated, cracked, corroded, or been installed incorrectly, water can enter even when the main roofing sheets appear intact.

    Repeatedly applying sealant over failed flashing may provide only temporary relief.

    Roof Repair Safety in Kenya

    Roof maintenance involves working at height, so safety equipment and suitable weather conditions should always be considered before starting a repair.

    Essential safety measures may include:

    • Stable ladder access
    • Slip-resistant footwear
    • Gloves
    • Eye protection
    • Appropriate fall protection
    • Secure tools
    • Safe working surfaces

    Never treat a roof repair as an ordinary ground-level DIY project.

    A wet roof can become extremely slippery.

    Strong winds can destabilize workers and materials.

    Lightning presents a serious hazard.

    If weather conditions become unsafe, postpone the repair.

    Never Repair a Roof During a Storm

    A roof leak should never justify climbing onto a roof during heavy rain, strong winds, or lightning.

    If water starts entering during a storm:

    1. Keep people away from the affected area.
    2. Protect furniture where practical.
    3. Use containers to collect dripping water.
    4. Move electrical equipment away from water.
    5. Avoid contact with wet electrical systems.
    6. Wait for safe conditions before inspecting the roof.

    If water is reaching electrical sockets, cables, lighting fixtures, or appliances, the situation should be treated as an electrical safety issue.

    Do not attempt to solve an electrical hazard with ordinary roofing tools.

    When to Call a Professional Roofer

    Professional assistance is appropriate when a roof has extensive damage, structural problems, difficult access, recurring leaks, or defects that cannot be safely diagnosed.

    Call a qualified roofing professional if:

    • The roof is sagging.
    • Large areas are damaged.
    • Multiple leaks are present.
    • Severe corrosion is visible.
    • Structural timber appears damaged.
    • The roof is unsafe to access.
    • The leak keeps returning.
    • Flashing requires major reconstruction.
    • Water is reaching electrical systems.
    • The source of the leak cannot be identified.

    DIY tools are useful for minor maintenance.

    They are not substitutes for professional assessment of major roofing problems.

    Common Roof Leak Repair Mistakes

    Avoiding common repair mistakes can save money and prevent recurring leaks after maintenance work.

    Sealing without inspecting

    Applying sealant to the first visible hole may leave the actual leak untreated.

    Using incompatible materials

    Not every sealant or tape is suitable for every roofing surface.

    Ignoring fasteners

    A leaking screw penetration can remain a problem even when surrounding roofing material appears intact.

    Over-tightening screws

    Excessive pressure can damage washers and roofing sheets.

    Ignoring flashing

    Many leaks originate around roof junctions and penetrations.

    Patching severely damaged sheets

    Replacement may be more reliable when the roofing material has deteriorated significantly.

    Working in unsafe weather

    No repair is worth risking a fall or exposure to lightning.

    How to Prevent Future Roof Leaks

    Routine maintenance is one of the most effective ways to identify roofing problems before they develop into major leaks.

    Inspect the roof periodically.

    Look for:

    • Loose screws
    • Damaged washers
    • Rust
    • Cracked tiles
    • Failed sealants
    • Damaged flashing
    • Blocked gutters
    • Damaged ridge caps
    • Roof penetrations
    • Debris accumulation

    Small problems are usually easier to address before they cause extensive interior damage.

    A replacement washer can be inexpensive compared with repairing a damaged ceiling.

    Cleaning a gutter is simpler than repairing a water-damaged wall.

    Preventive maintenance therefore protects both the roof and the rest of the building.

    Build a Practical Roof Repair Toolkit

    Keeping a basic selection of roofing tools and consumables available can make routine maintenance faster and reduce delays when minor problems appear.

    A practical toolkit can include:

    • Roofing hammer
    • Screwdriver
    • Drill/driver
    • High-leverage pliers
    • Pry bar
    • Utility knife
    • Tape measure
    • Marker
    • Caulking gun
    • Suitable roofing sealant
    • Roofing tape
    • Replacement screws
    • Rubber washers
    • Gloves
    • Eye protection

    Keep tools clean and dry after use.

    Store sealants and other consumable materials according to manufacturer instructions.

    Inspect tools before using them on a roof.

    Maintaining Your Roof Repair Tools

    Proper maintenance keeps roofing tools reliable and reduces the risk of tool failure during repairs.

    After completing work:

    • Remove dirt and debris.
    • Wipe away moisture.
    • Check cutting edges.
    • Inspect handles.
    • Lubricate suitable moving parts.
    • Check drill bits.
    • Inspect electrical power-tool cables.
    • Store everything in a dry location.

    Rust can weaken metal tools over time.

    Damaged handles can compromise grip.

    Dull cutting tools can require excessive force.

    Tool maintenance is therefore part of safe roofing maintenance.

    For fastening, drilling, and construction tasks, you can also browse our drill bits to find suitable options for different materials.

    Choosing Quality Roof Repair Tools

    Quality tools are generally a better investment for regular contractors because they provide improved durability, control, and reliability over repeated use.

    The cheapest tool is not always the most economical.

    A poor-quality screwdriver can damage fastener heads.

    A weak pry bar can deform.

    Low-quality pliers can lose jaw alignment.

    A poor drill bit can wear quickly.

    Professionals should consider:

    • Material quality
    • Ergonomics
    • Durability
    • Intended application
    • Manufacturer specifications
    • Replacement availability

    The best tool is the one that reliably performs the intended task.

    Why a Reliable Supplier Matters

    A dependable construction supplier can make roofing maintenance easier by providing access to tools, fasteners, adhesives, electrical products, plumbing supplies, and other materials required for wider projects.

    Roof repairs rarely happen in isolation.

    A property owner repairing a roof may also need to:

    • Repair damaged ceilings
    • Repaint walls
    • Replace electrical components
    • Repair plumbing
    • Replace damaged fittings
    • Work on windows or glass

    Having access to multiple product categories can simplify procurement.

    For related finishing work, you can explore our paints.

    For construction and installation requirements, our fittings range can also support appropriate projects.

    Final Thoughts

    The best roof leak repair tools in Kenya are not necessarily the most expensive tools; they are the tools that match the roofing system, repair requirement, material, and working conditions.

    A basic roof-maintenance kit should include a hammer, screwdriver, drill/driver, pliers, pry bar, utility knife, caulking gun, and measuring equipment.

    Depending on the roof, you may also need roofing screws, rubber washers, sealants, flashing tape, replacement sheets, tiles, or other compatible materials.

    The most important step is diagnosis.

    Do not assume that the location of an interior water stain is the location of the roof defect.

    Inspect fasteners, flashing, roof penetrations, overlaps, ridges, valleys, gutters, and damaged roofing materials.

    Use sealant where it is appropriate, but do not rely on sealant to compensate for structural damage or severely deteriorated roofing.

    Most importantly, work safely.

    Roof maintenance involves working at height, and wet or windy conditions can dramatically increase the risk of an accident. Never climb onto a roof during lightning or severe weather, and seek professional help when the roof is structurally damaged, difficult to access, or beyond the scope of minor maintenance.

    Whether you are a homeowner, contractor, landlord, technician, or property manager, investing in the right tools and carrying out regular inspections can help identify roofing problems early.

    A small repair today can prevent a much more expensive repair tomorrow.

    When sourcing dependable construction and maintenance supplies, Ngong Hills Merchants provides access to a broad range of tools, plumbing, electrical, adhesives, paints, glass, fittings, and other hardware products for projects in Ngong and surrounding areas.

    Your One-Stop Hardware Partner in Ngong

    Imagine completing your project with the right tools, the best materials, and expert advice. At Ngong Hills Merchants, we turn your DIY or construction vision into reality with a complete selection of plumbing, electrical, glass, and sanitary ware.

    Contact our team for a consultation and get the right supplies, right now.

    QUALITY HARDWARE & SUPPLIES IN NGONG ✔ Complete Range of Plumbing & Electrical ✔ Power Tools, Adhesives & Paints ✔ Glass, Framing & Sanitary Ware ✔ Serving Ngong, Karen, Matasia, Kiserian & beyond.

    Request Your Free Consultation: Ngong Hills Merchants
    Email: ngonghillsmerchants [at] gmail.com
    Phone: +254 715974811
    Visit Us: Ngong Township, Ngong, Kenya
    Website: https://ngonghillsmerchants.com/

  • High-Leverage Pliers in Kenya:Powerful Benefits for Pros

    High-Leverage Pliers in Kenya:Powerful Benefits for Pros

    Professionals who work with electrical installations, construction, plumbing, fabrication, mechanical repairs, and general maintenance depend heavily on reliable hand tools. Among the most useful are high-leverage pliers. For electricians, technicians, mechanics, contractors, and maintenance professionals, choosing the right high-leverage pliers in Kenya can improve grip, cutting performance, control, and efficiency while reducing the physical effort required for demanding tasks.

    Pliers may look simple, but their design has a direct effect on how effectively force is transferred from the user’s hand to the jaws. High-leverage designs position the pivot closer to the working jaws, increasing the mechanical advantage of the tool. This can make demanding gripping and cutting tasks easier than they would be with ordinary pliers.

    The difference becomes particularly noticeable when professionals work with thick wire, hard materials, tightly held components, or repetitive tasks.

    However, leverage is only one consideration. Professionals should also examine jaw design, cutting capacity, handle construction, insulation where applicable, material quality, ergonomics, corrosion resistance, and intended application before selecting a pair.

    What Are High-Leverage Pliers?

    High-leverage pliers are hand tools designed to increase mechanical advantage by optimizing the relationship between the handles, pivot, and jaws. This allows the user to apply greater force at the working end with comparatively less hand effort.

    A conventional pair of pliers already uses the basic principle of leverage.

    The handles act as one lever.

    The jaws act as another.

    The pivot provides the fulcrum.

    High-leverage pliers are engineered to improve this mechanical advantage.

    The result can be greater gripping or cutting force without requiring the user to squeeze with excessive effort.

    This is particularly valuable when working with materials that resist cutting or components that require a strong grip.

    For professionals who use hand tools throughout the working day, that difference can have a meaningful effect on productivity and fatigue.

    7 Powerful Reasons Professionals Choose High-Leverage Pliers in Kenya

    High-leverage pliers can provide stronger cutting and gripping performance, improved control, reduced hand effort, and greater versatility for demanding professional applications.

    Their advantages become especially relevant when a technician is performing repetitive or heavy-duty work.

    The seven key benefits include:

    1. Greater mechanical advantage
    2. Stronger cutting performance
    3. Improved gripping force
    4. Reduced hand effort
    5. Better control during demanding tasks
    6. Greater versatility
    7. Improved productivity for professionals

    These advantages explain why high-leverage designs are common among professional tradespeople.

    1. Greater Mechanical Advantage

    The primary advantage of high-leverage pliers is their ability to multiply the force applied through the handles, making demanding tasks easier to perform.

    Mechanical advantage is the principle behind many hand tools.

    A longer handle relative to the distance between the pivot and jaws allows the user’s hand force to be converted into greater force at the working end.

    This does not mean the tool can cut anything.

    Every pair of pliers has a rated capacity and intended application.

    The important point is that an appropriately designed high-leverage tool can make the same task require less physical effort than a poorly matched conventional tool.

    For professionals, this can mean fewer interruptions and more consistent work.

    2. Stronger Cutting Performance

    High-leverage cutting pliers are designed to deliver substantial force at the cutting edges, making them useful for appropriate wire and cable-cutting applications.

    Electricians and technicians regularly encounter different types and sizes of wire.

    Depending on the tool’s specifications, high-leverage cutters may be suitable for:

    • Electrical wire
    • Cable
    • Binding wire
    • Soft metal wire
    • General maintenance materials

    The exact cutting capacity varies by tool.

    Professionals should therefore check the manufacturer’s specifications before cutting hard materials.

    Using a cutter outside its intended capacity can damage the cutting edges or create a dangerous failure.

    For electrical work, the cutting tool must also be suitable for the type and size of conductor involved.

    3. Improved Gripping Force

    High-leverage designs can provide a strong grip when holding, twisting, positioning, or manipulating suitable components and materials.

    A secure grip is important across many trades.

    A technician may need to hold a small component securely.

    A plumber may need to manipulate a fitting.

    A mechanic may need to hold a component during removal or installation.

    An electrician may need to bend or position wire.

    In each situation, jaw design matters.

    Different pliers are designed for different gripping requirements.

    Long-nose pliers, combination pliers, linesman pliers, locking pliers, and cutting pliers each have different strengths.

    High leverage should therefore be combined with the correct jaw configuration.

    4. Reduced Hand Effort

    By improving mechanical advantage, high-leverage pliers can reduce the amount of hand force required for certain demanding operations.

    This is especially useful for professionals who use hand tools repeatedly.

    Consider an electrician cutting multiple lengths of suitable wire during a large installation.

    If every cut requires excessive force, fatigue can build up.

    The same principle applies to technicians performing repetitive gripping or bending work.

    A well-designed tool can make the task more manageable.

    Reduced effort does not mean the tool eliminates fatigue.

    Proper technique, breaks, tool selection, and work organization remain important.

    However, using an appropriately designed tool can make repetitive tasks less demanding.

    5. Better Control During Demanding Tasks

    A well-balanced high-leverage tool can give professionals better control while applying force, particularly when the handles and jaws are appropriately designed for the task.

    Control is important when precision matters.

    A tool that requires excessive squeezing can cause the user’s hand to fatigue quickly.

    Fatigue can affect precision.

    Good ergonomics can help.

    Look for handles that provide a secure grip without creating excessive pressure points.

    The pivot should operate smoothly.

    The jaws should align correctly.

    The cutting edges should meet properly.

    These seemingly small details can make a significant difference during professional use.

    6. Greater Versatility

    High-leverage pliers can perform multiple gripping, bending, cutting, and positioning tasks, making them useful additions to professional tool kits.

    A contractor does not necessarily want to carry dozens of tools for simple tasks.

    A versatile pair of combination or linesman-style pliers can handle several routine operations.

    Depending on the design, this can include:

    • Gripping
    • Twisting
    • Bending
    • Cutting
    • Pulling
    • Holding
    • Positioning

    However, versatility has limits.

    Using combination pliers to perform a task specifically intended for a specialized tool may damage the pliers or produce poor results.

    Professionals should still maintain specialized cutters, crimpers, strippers, wrenches, and other tools where required.

    7. Improved Professional Productivity

    When the correct pliers reduce effort and improve cutting or gripping efficiency, professionals can complete suitable repetitive tasks more efficiently.

    Productivity is not simply about working faster.

    It also involves reducing unnecessary effort, avoiding tool failures, and producing consistent results.

    A contractor who spends less time struggling with inappropriate tools can focus more attention on the actual installation or repair.

    This becomes particularly valuable during large projects.

    A single installation may involve hundreds of repetitive actions.

    Small improvements in tool efficiency can accumulate over time.

    High-Leverage Pliers for Electricians

    Electricians can benefit from high-leverage pliers when performing suitable wire cutting, gripping, twisting, and positioning tasks, provided the tool is correctly rated for electrical work.

    Electrical professionals frequently work with conductors of different sizes.

    They may need to:

    • Cut wire
    • Bend conductors
    • Twist wires
    • Pull wire
    • Hold components
    • Position cable
    • Prepare connections

    For electrical applications, tool insulation deserves particular attention.

    Not every plier with a plastic handle is electrically insulated.

    A tool intended for work around energized systems must meet the appropriate insulation and safety requirements for that application.

    Professionals should never assume that a colourful or rubberized handle automatically makes a tool safe for live electrical work.

    For related electrical requirements, contractors can browse electrical supplies at Ngong Hills Merchants.

    Insulated Pliers vs Standard Pliers

    Insulated pliers designed and certified for electrical work provide a level of protection that ordinary hand tools do not necessarily provide. Professionals must distinguish genuine insulated tools from simple tools with coated handles.

    This distinction is critical.

    A standard pair of pliers may have a plastic grip.

    That does not automatically mean it is rated for electrical work.

    Professionals working around electrical systems should look for appropriate certification and markings from recognized standards.

    The tool should also be inspected regularly.

    If insulation is damaged, cracked, cut, burned, or deteriorated, the tool should not be relied upon for electrical protection.

    Electrical safety depends on the complete working procedure, not just the presence of insulated handles.

    High-Leverage Pliers for Mechanics

    Mechanics can use appropriate high-leverage pliers for gripping, cutting, bending, retaining, and manipulating components during repair and maintenance work.

    Mechanical environments can involve stubborn components and heavy-duty materials.

    Pliers may be used for:

    • Hose clamps
    • Wire
    • Retaining components
    • Small fasteners
    • Clips
    • Springs
    • General gripping

    However, pliers should not automatically replace correctly sized wrenches.

    Using pliers on a bolt head can damage the fastener and create additional problems.

    The right tool should always match the job.

    For vehicle maintenance and related work, contractors and mechanics can also explore the automobile product range.

    High-Leverage Pliers for Plumbers

    Plumbers can benefit from high-leverage gripping tools when manipulating suitable pipes, fittings, clips, and components, although specialized pipe tools should be used for applications requiring them.

    Plumbing work frequently involves components that must be held firmly.

    Pliers can assist with:

    • Gripping
    • Positioning
    • Removing clips
    • Holding components
    • General maintenance

    However, pipe fittings should not be damaged by excessive gripping force.

    Where a component requires a specific wrench or pipe tool, use the appropriate tool.

    The objective is not simply maximum force.

    It is controlled force applied to the correct surface.

    Contractors can also explore plumbing supplies when planning installation projects.

    High-Leverage Pliers for Construction Workers

    Construction professionals can use versatile high-leverage pliers for general cutting, gripping, bending, tying, and maintenance tasks where the tool is appropriate for the material.

    Construction environments often require tools that can handle varied tasks.

    A pair of robust pliers can become a regular part of a worker’s tool belt.

    They may be useful for:

    • Cutting suitable wire
    • Pulling materials
    • Bending wire
    • Holding components
    • General repairs
    • Maintenance

    Durability is particularly important on construction sites because tools can experience frequent handling, dust, moisture, and impact.

    Why Jaw Design Matters

    The shape and size of the jaws determine how effectively pliers can grip different objects, so professionals should choose jaw geometry according to the intended application.

    Common designs include:

    Combination jaws

    Suitable for general gripping and cutting applications.

    Long-nose jaws

    Useful where access is restricted or greater precision is required.

    Diagonal cutting jaws

    Designed primarily for cutting suitable wire and similar materials.

    Lineman-style jaws

    Designed for demanding electrical and general construction tasks.

    Locking jaws

    Useful when continuous gripping pressure is required.

    The highest leverage does not make a tool suitable for every job.

    Jaw geometry remains important.

    Handle Length and Leverage

    Handle length contributes to mechanical advantage, but longer handles can also affect tool size, accessibility, and maneuverability.

    A longer handle can increase the force generated at the jaws.

    But there are trade-offs.

    A very large tool may be difficult to use in confined spaces.

    A compact tool may provide better access but less mechanical advantage.

    Professionals should therefore consider where the work is performed.

    An electrician working inside a crowded electrical enclosure may need compact tools.

    A construction worker cutting larger suitable wire in an open environment may have more room for a larger high-leverage design.

    Material Quality Matters

    The steel used to manufacture pliers influences durability, cutting-edge performance, resistance to deformation, and overall service life.

    Quality pliers are typically manufactured from hardened tool steels or similar engineered materials.

    The important characteristics include:

    • Strength
    • Hardness
    • Toughness
    • Corrosion resistance
    • Cutting-edge durability

    The jaws should maintain their shape under appropriate loads.

    The cutting edges should remain aligned.

    The pivot should remain secure.

    Professionals should avoid treating pliers as disposable tools when the work requires reliable performance.

    Corrosion Resistance in Kenyan Working Conditions

    Pliers used in outdoor construction, plumbing, agriculture, or humid environments should be protected from moisture and stored correctly to reduce corrosion.

    Kenya has diverse working environments.

    A contractor may work in dry conditions in Kajiado or hot, humid environments along the coast.

    Tools may also be exposed to:

    • Rain
    • Sweat
    • Dust
    • Chemicals
    • Moisture
    • Construction debris

    After use, wipe tools clean.

    If appropriate, apply a light protective lubricant to exposed metal surfaces.

    Store tools in a dry location.

    Avoid leaving them outdoors overnight.

    Good maintenance can significantly extend tool life.

    Ergonomics and Professional Hand Tools

    Ergonomic handles can improve comfort and control during repetitive tasks, making them an important consideration for professionals who use pliers throughout the day.

    Look for handles that:

    • Fit comfortably in the hand
    • Provide adequate grip
    • Do not have sharp edges
    • Allow controlled squeezing
    • Resist slipping

    For electrical professionals, the handle material and insulation rating should also be considered.

    For general work, comfort is important because excessive pressure can contribute to hand fatigue.

    A tool should help the operator perform the task rather than forcing the operator to fight the tool.

    High-Leverage Pliers and Hand Fatigue

    Reducing the force required for appropriate cutting and gripping tasks can help manage hand fatigue, particularly when a professional performs repetitive work.

    However, tool selection is only one part of fatigue management.

    Professionals should also:

    • Change tasks where possible
    • Take appropriate breaks
    • Maintain neutral wrist positions
    • Use the correct tool
    • Avoid excessive force
    • Keep tools properly maintained

    A dull cutter can require more effort than a sharp one.

    A damaged pivot can make operation difficult.

    Poor technique can also increase strain.

    The best results come from combining good tools with good working practices.

    Do Not Use Pliers as a Hammer

    Pliers are designed for gripping, cutting, bending, and related tasks, not for striking objects. Using them as a hammer can damage the tool and create an injury hazard.

    This is a common misuse of hand tools.

    The handles can break.

    The jaws can deform.

    The pivot can become damaged.

    Fragments may also become airborne if the tool fails.

    Use the correct striking tool when striking is required.

    Similarly, do not use a pair of pliers as a substitute for every other hand tool.

    Do Not Exceed the Cutting Capacity

    Every cutting tool has a maximum intended capacity, and attempting to cut materials beyond that capacity can damage the cutting edges or cause the tool to fail.

    Before cutting wire, determine:

    • Material
    • Diameter
    • Hardness
    • Tool rating

    Hard materials may require specialized cutters.

    Never assume that because pliers can cut one type of wire, they can cut another of the same diameter.

    Material composition matters.

    Follow the manufacturer’s specifications.

    How to Choose High-Leverage Pliers

    The best high-leverage pliers should match the professional’s trade, materials, working environment, required cutting capacity, and safety requirements.

    Before purchasing, ask:

    1. What materials will I cut?
    2. What size will I typically work with?
    3. Do I need gripping, cutting, or both?
    4. Do I need insulated handles?
    5. Is the tool certified for electrical work?
    6. Will I use it every day?
    7. Will I work in confined spaces?
    8. Are replacement or servicing options available?
    9. Does the handle feel comfortable?
    10. Is the tool appropriate for the expected workload?

    Answering these questions makes selection easier.

    Why Professionals Should Buy Quality Hand Tools

    Quality hand tools can provide better durability, control, and performance, making them a worthwhile investment for professionals who depend on their equipment every day.

    A professional may use the same pair of pliers hundreds or thousands of times.

    That means small quality differences become significant over time.

    A durable pivot can maintain smooth operation.

    A well-hardened cutting edge can maintain performance.

    A comfortable handle can improve usability.

    A properly manufactured jaw can maintain alignment.

    The initial purchase price should therefore be considered alongside expected service life.

    Building a Complete Professional Tool Kit

    High-leverage pliers are valuable, but professionals should build a complete tool kit containing specialized tools for different applications rather than relying on one pair for every task.

    A professional toolkit may include:

    • Combination pliers
    • Long-nose pliers
    • Diagonal cutters
    • Adjustable wrench
    • Screwdrivers
    • Wire strippers
    • Crimpers
    • Hex keys
    • Measuring tools
    • Insulated tools where appropriate

    Contractors can also explore power tools for drilling, cutting, fastening, and other applications.

    For projects involving glass installation, glass accessories can also provide useful supporting components.

    Storage and Maintenance of Pliers

    Proper storage helps prevent corrosion, contamination, and unnecessary damage while keeping professional hand tools ready for use.

    After completing a job:

    1. Wipe away dirt and moisture.
    2. Remove material residue.
    3. Check the cutting edges.
    4. Inspect the pivot.
    5. Check the handles.
    6. Lubricate the pivot when appropriate.
    7. Store the tool in a dry location.

    Electrical professionals should pay particular attention to insulation.

    If an insulated tool has damaged insulation, it should be removed from electrical service until properly evaluated or replaced.

    High-Leverage Pliers vs Ordinary Pliers

    High-leverage pliers offer greater mechanical advantage for demanding tasks, while conventional pliers may be sufficient for lighter applications where maximum force is unnecessary.

    The comparison should not be viewed as “professional versus inferior.”

    Different tools serve different purposes.

    Ordinary pliers may be lighter and more convenient for small tasks.

    High-leverage models may be preferable when greater force is required.

    The right tool depends on the task.

    For a technician who performs both light and heavy work, carrying multiple plier types may be more practical than trying to make one tool do everything.

    The Value of Buying From a Reliable Hardware Supplier

    A reliable hardware supplier can help professionals choose appropriate tools by providing access to multiple categories and product options for different trades.

    Contractors often need more than pliers.

    A project may require:

    • Fasteners
    • Adhesives
    • Electrical components
    • Plumbing fittings
    • Drill bits
    • Power tools
    • Paint
    • Glass accessories

    Ngong Hills Merchants provides several of these categories.

    Professionals can browse bolts and nuts for fastening requirements and explore adhesives for suitable bonding applications.

    This can make procurement easier when several project requirements need to be sourced at the same time.

    Final Thoughts

    High-leverage pliers are valuable professional tools because their mechanical advantage can make demanding gripping and cutting tasks more manageable, efficient, and controlled.

    For electricians, mechanics, plumbers, construction workers, technicians, and maintenance professionals, the right pair can become one of the most frequently used tools in the kit.

    However, leverage alone should never determine the purchase.

    Consider the:

    • Jaw design
    • Cutting capacity
    • Handle construction
    • Insulation
    • Certification
    • Steel quality
    • Pivot
    • Ergonomics
    • Intended application
    • Working environment

    Professionals looking for high-leverage pliers in Kenya should also consider the wider tool ecosystem available from their supplier.

    The right pliers should complement the rest of the toolkit rather than replace specialized equipment.

    Most importantly, use pliers only for tasks they are designed and rated to perform. Never exceed their cutting capacity, use them as striking tools, or rely on ordinary pliers for electrical protection simply because their handles are covered in plastic.

    For professionals, a good hand tool is an investment in productivity.

    The right high-leverage pliers can provide the force, control, and durability needed for demanding everyday work while helping reduce unnecessary effort.

    When combined with proper maintenance, safe working practices, and the correct tool for each application, they can remain a dependable part of a professional toolkit for years.

    Your One-Stop Hardware Partner in Ngong

    Imagine completing your project with the right tools, the best materials, and expert advice. At Ngong Hills Merchants, we turn your DIY or construction vision into reality with a complete selection of plumbing, electrical, glass, and sanitary ware.

    Contact our team for a consultation and get the right supplies, right now.

    QUALITY HARDWARE & SUPPLIES IN NGONG ✔ Complete Range of Plumbing & Electrical ✔ Power Tools, Adhesives & Paints ✔ Glass, Framing & Sanitary Ware ✔ Serving Ngong, Karen, Matasia, Kiserian & beyond.

     Request Your Free Consultation: Ngong Hills Merchants
    Email: ngonghillsmerchants [at] gmail.com
     Phone: +254 715974811
    Visit Us: Ngong Township, Ngong, Kenya
    Website: https://ngonghillsmerchants.com/
  • Hardware Store Kenya Guide: Choosing the Right Soldering Iron

    Hardware Store Kenya Guide: Choosing the Right Soldering Iron

    Choosing the right soldering iron can make electrical repairs, electronics work, wiring projects, and DIY tasks considerably easier. When visiting a hardware store Kenya customers can find different soldering irons with varying wattages, tip designs, temperature controls, sizes, and accessories. Understanding these differences before buying helps you choose a tool that matches the work instead of simply selecting the cheapest or highest-powered model.

    A soldering iron is designed to heat solder so that it can form an electrical and mechanical connection between suitable conductive components. For electronics, the tool needs to provide enough heat to create a reliable joint without unnecessarily overheating sensitive components or circuit boards. Temperature control, tip selection, wattage, recovery time, ergonomics, and safety features therefore deserve attention when comparing models.

    Whether you are an electrician, electronics technician, repair specialist, contractor, student, hobbyist, or homeowner handling occasional repairs, selecting the right soldering iron is an investment in both work quality and productivity.

    7 Powerful Reasons to Choose the Right Soldering Iron at a Hardware Store Kenya

    The right soldering iron provides appropriate heat, control, precision, and reliability for the intended application. Choosing according to the work rather than price alone can produce better solder joints and reduce unnecessary tool replacement.

    A soldering iron that is suitable for small circuit-board repairs may not be appropriate for heavy wires or larger electrical connections.

    Likewise, a powerful iron designed for larger joints may be unnecessarily difficult to control when working with delicate electronics.

    The most important question is therefore not simply:

    “Which soldering iron is the most powerful?”

    Instead, ask:

    “What type of soldering work will I perform most often?”

    That question should guide the rest of the purchasing decision.

    What Is a Soldering Iron Used For?

    A soldering iron heats solder so it can join suitable electrical components, wires, terminals, or conductive surfaces. Different applications require different levels of heat, precision, and temperature control.

    Soldering is commonly used for:

    • Electronics repairs
    • PCB assembly
    • Wire connections
    • Electrical repairs
    • Circuit prototyping
    • Cable work
    • Component replacement
    • Hobby electronics
    • Small appliance repairs

    In electronics, soldering creates both the physical connection and the electrical pathway between components.

    A good solder joint should be mechanically secure and electrically reliable.

    The quality of the soldering iron matters because poor temperature regulation can make it difficult to create consistent joints.

    For anyone building a professional tool collection, a soldering iron should be considered alongside other essential electrical supplies.

    How Wattage Affects Soldering Iron Performance

    Wattage indicates the electrical power available to the heating element; it does not simply mean that a higher-wattage iron operates at a higher temperature. Higher wattage can provide greater thermal recovery when a joint draws heat from the tip.

    This is one of the most common misunderstandings when buying soldering irons.

    A 60W temperature-controlled iron does not necessarily run hotter than a 30W temperature-controlled model.

    Instead, the higher-powered system may have more reserve available when the tip loses heat during soldering.

    Recent soldering guidance notes that wattage represents available heating power rather than exact tip temperature, with temperature control and thermal recovery playing important roles in performance.

    For example, a small circuit-board joint may require relatively little thermal energy.

    A larger connector or thick wire can absorb considerably more heat.

    If the soldering iron cannot recover quickly enough, the tip temperature can fall and the solder may stop flowing properly.

    This is why wattage should be evaluated together with temperature control and recovery performance.

    What Soldering Iron Wattage Should You Choose?

    The appropriate wattage depends on the application, with lower-powered tools suitable for light work and higher-powered temperature-controlled models offering greater flexibility for mixed or demanding applications.

    As a general guide:

    Soldering Work Typical Suitable Range
    Small electronics 20–40W
    General electronics 40–60W
    Mixed repair work 50–80W
    Larger wires and connectors 60W+
    Heavy thermal loads Higher-power controlled station

    These are practical selection ranges rather than universal rules.

    For general electronics, temperature-controlled 60W-class equipment is commonly recommended as a versatile option because it provides useful thermal reserve without necessarily being excessive.

    The actual requirement depends on the size of the joint, the material, the tip, the solder, and the amount of heat being absorbed.

    Why Temperature Control Matters

    Temperature control allows the operator to set and maintain an appropriate tip temperature for different soldering tasks. It provides greater control than a basic uncontrolled iron.

    A basic soldering iron may simply heat to its designed operating condition.

    A temperature-controlled model allows you to adjust the heat.

    This is valuable because different applications have different thermal requirements.

    For delicate electronics, excessive heat can damage components, pads, insulation, or circuit-board materials.

    At the same time, insufficient heat can create poor solder joints because the solder does not flow properly.

    Temperature-controlled irons help address this balance.

    Electronics Notes identifies temperature control as one of the important specifications to consider when selecting a soldering iron and explains that controlled irons can maintain the bit temperature more effectively.

    Temperature-Controlled vs Basic Soldering Irons

    Basic soldering irons can be suitable for simple occasional work, while temperature-controlled irons provide greater flexibility and precision for regular electronics and repair applications.

    A basic iron can be attractive because of its lower purchase price.

    For occasional simple tasks, it may be adequate.

    However, technicians who perform different types of soldering may benefit from adjustable temperature control.

    A controlled station can allow the user to adapt the temperature according to:

    • Component type
    • Solder type
    • Joint size
    • Tip size
    • PCB characteristics
    • Heat sensitivity

    This makes a temperature-controlled station particularly useful for professional repair environments.

    Choosing the Correct Soldering Tip

    The soldering tip transfers heat from the iron to the joint, so tip shape and size directly influence precision and heat transfer. Different jobs require different tip geometries.

    Common tip shapes include:

    • Conical tips
    • Chisel tips
    • Flat tips
    • Bevel tips
    • Specialized precision tips

    A fine conical tip can be useful for precision work.

    A broader chisel tip can transfer heat effectively to larger joints.

    The ideal tip should be large enough to transfer heat efficiently while remaining suitable for the joint.

    Using an unnecessarily tiny tip on a large connection can make soldering slow because there is insufficient contact area.

    Conversely, an oversized tip may make delicate electronics difficult to control.

    Interchangeable tips are therefore a valuable feature for professionals working across different applications.

    Why Thermal Recovery Is Important

    Thermal recovery describes how quickly the soldering iron restores its temperature after heat is transferred into the joint. Good recovery helps maintain consistent soldering performance.

    Imagine touching the tip to a large copper connection.

    The joint absorbs heat.

    The tip temperature can fall.

    A good temperature-controlled system detects the change and provides additional heating power to restore the desired temperature.

    This is where wattage becomes useful.

    A higher-powered controlled iron can have more reserve available for thermal recovery.

    Therefore, comparing soldering irons only by maximum temperature can be misleading.

    A better evaluation includes:

    • Temperature stability
    • Heater performance
    • Recovery speed
    • Tip design
    • Available wattage
    • Control system

    For professional work, recovery can have a noticeable effect on productivity.

    Soldering Iron Voltage Matters

    Always select a soldering iron designed for the electrical supply available in your working environment. Using an unsuitable voltage can create serious equipment and safety problems.

    Before buying a mains-powered soldering iron, check its voltage specification.

    The product should be compatible with the electrical supply for the intended location.

    Do not assume that every imported tool is automatically suitable.

    This is particularly important when buying online or purchasing products intended for another market.

    A product designed for a different voltage may require appropriate electrical conversion equipment, and some devices should not be used outside their specified electrical parameters.

    Check the manufacturer’s specifications before connecting the tool.

    Soldering Stations vs Handheld Irons

    A soldering station combines a handpiece with a control unit and is generally useful for technicians who need adjustable temperature, interchangeable tips, and consistent performance.

    A simple handheld iron is compact and convenient.

    It can be useful for occasional repairs.

    A soldering station, however, can provide additional control.

    Typical features may include:

    • Temperature adjustment
    • Digital or analogue display
    • Replaceable tips
    • Stable stand
    • Sponge or brass-wool cleaning system
    • Temperature recovery control
    • ESD-related protection on suitable models

    For a professional electronics repair workshop, a soldering station may be a better long-term investment than repeatedly purchasing basic irons.

    ESD Protection for Electronics Work

    Electrostatic discharge protection can be important when working with sensitive electronic components because static electricity can damage semiconductor devices even when visible damage is absent.

    Not every soldering task requires the same level of ESD protection.

    However, technicians repairing modern electronics should consider ESD-safe equipment and appropriate workplace procedures.

    This can include:

    • ESD-safe soldering equipment
    • Grounding arrangements
    • ESD work surfaces
    • Appropriate wrist straps
    • Controlled handling procedures

    The soldering iron should be appropriate for the type of electronic work being performed.

    For precision electronics repair, ESD protection should be treated as part of the complete workstation rather than as an optional feature.

    Soldering Iron Ergonomics

    A comfortable soldering iron can improve control during repeated work and help reduce unnecessary hand fatigue. Weight, handle design, cable flexibility, and balance all affect usability.

    Professional technicians can spend hours performing detailed soldering.

    A tool that is uncomfortable after ten minutes can become frustrating during a full workday.

    Look for:

    • Comfortable grip
    • Balanced handpiece
    • Appropriate weight
    • Flexible cable
    • Heat-resistant handle
    • Easy-to-reach controls

    The handpiece should remain comfortable while the working tip reaches the required temperature.

    Good ergonomics are particularly important for technicians who perform repeated repair work.

    The Importance of a Stable Soldering Iron Stand

    A proper stand provides a safe place to position a hot soldering iron between joints and reduces the likelihood of accidental contact with the hot tip.

    Never place a hot soldering iron directly on a workbench.

    A stable stand should hold the tool securely.

    It should also be positioned where the operator can return the iron without reaching across cables, components, or other equipment.

    A good workstation should keep the hot tool controlled when it is not being actively used.

    Some soldering stations include dedicated holders as part of the system.

    Soldering Iron Safety at Home and Work

    Soldering irons reach temperatures high enough to cause serious burns and ignite unsuitable materials, so safe handling and proper workspace organization are essential.

    Keep the following principles in mind:

    • Never touch the heated tip.
    • Use a proper stand.
    • Keep flammable materials away.
    • Keep cables organized.
    • Work in a suitable ventilated area.
    • Wear appropriate eye protection.
    • Do not leave a hot iron unattended.
    • Unplug the tool when it is no longer required.
    • Allow it to cool before storage.
    • Keep the tool away from children.

    Safety guidance for soldering also recommends ventilation, eye protection, keeping flammable materials away, using the stand, and unplugging the iron when not in use.

    The workbench should be organized so that the operator can move the tool safely without catching the power cable or knocking over components.

    Soldering Fumes and Ventilation

    Soldering should be performed with appropriate ventilation because heating soldering materials and flux can produce fumes that should not be unnecessarily inhaled.

    Good ventilation helps remove fumes from the breathing zone.

    For regular professional work, a suitable local extraction system may be appropriate.

    Avoid positioning your face directly above the soldering point.

    A small fan can move air, but it should not simply blow fumes across the operator’s face.

    The objective is to control and remove contaminants from the working area.

    Selecting Solder for the Job

    The soldering iron is only one part of the soldering system; solder type, diameter, flux characteristics, and the materials being joined also affect the final result.

    Solder is available in different compositions and diameters.

    For electronics, the appropriate solder should be selected according to the application and applicable requirements.

    Common considerations include:

    • Solder alloy
    • Diameter
    • Flux core
    • Melting characteristics
    • Intended application

    Lead-free solder can require different thermal conditions from traditional lead-containing solder.

    This is another reason why temperature control and thermal recovery are useful.

    The solder manufacturer’s specifications should be followed.

    Flux and Soldering Quality

    Flux helps promote solder wetting and can improve the formation of reliable joints when used appropriately. However, flux residues and cleaning requirements depend on the solder and application.

    A poor solder joint can result from several causes.

    These include:

    • Dirty surfaces
    • Insufficient heat
    • Excessive heat
    • Poor tip condition
    • Incorrect solder
    • Poor technique
    • Contamination

    The objective is not simply to make the solder melt.

    The solder must properly wet the intended surfaces.

    Clean surfaces are therefore important.

    How to Choose a Soldering Iron for Electronics

    For electronics repair and PCB work, prioritize temperature control, suitable wattage, appropriate tip sizes, thermal recovery, ESD considerations, and ergonomic design.

    For a general electronics technician, a temperature-controlled 40–60W or 60W-class station can provide a useful balance of precision and thermal capacity.

    For very small components, precision tips and a suitable lower thermal mass can be more important than maximum wattage.

    For connectors, thick wires, shielding, and larger thermal masses, additional power reserve can become useful.

    Recent guidance similarly identifies controlled 60W-class equipment as a versatile choice for general electronics, with higher power becoming useful for heavier thermal loads.

    Choosing a Soldering Iron for Electrical Repairs

    Electrical repair work can involve larger conductors and connections than delicate PCB work, so the required power and tip size may be different.

    For example, soldering a small electronic component requires precision.

    Soldering a larger wire connection may require greater heat transfer.

    This means one soldering iron may not be ideal for every electrical application.

    The contractor or technician should identify the typical joint sizes before buying.

    If the work includes both electronics and larger electrical connections, a versatile temperature-controlled model may provide better value.

    For other electrical installation requirements, contractors can also browse electrical products and select components according to their project specifications.

    Soldering Iron for DIY Projects

    DIY users generally benefit from a straightforward, adjustable soldering iron that is easy to control and supported by essential accessories.

    If you are a beginner, avoid buying equipment based solely on the highest wattage.

    Instead, look for:

    • Adjustable temperature
    • Comfortable grip
    • Stable stand
    • Replaceable tips
    • Suitable power rating
    • Clear controls
    • Basic accessories

    A complete kit can be convenient because it may include solder, tips, tweezers, a stand, and other accessories.

    However, evaluate the quality of each component rather than assuming every kit offers equal value.

    Soldering Iron for Professional Technicians

    Professional technicians should prioritize reliability, temperature stability, tip availability, ergonomic design, serviceability, and long-term operating costs.

    If soldering is part of your daily work, tool quality becomes more important.

    A professional technician may perform hundreds of joints during a working week.

    Small differences in heat recovery and ergonomics can therefore have a cumulative impact.

    Interchangeable tips are particularly valuable because technicians can use different tip geometries for different tasks.

    A reliable temperature-controlled station can also provide greater consistency.

    How to Maintain a Soldering Iron

    Proper maintenance extends tip life and helps the soldering iron continue transferring heat effectively. Regular inspection and cleaning should form part of normal use.

    Important maintenance practices include:

    • Keep the tip clean.
    • Use the appropriate tip-cleaning method.
    • Avoid excessive mechanical force.
    • Tin the tip appropriately.
    • Replace damaged tips.
    • Keep ventilation openings clear.
    • Inspect the power cable.
    • Check the plug and connections.
    • Store the tool safely.

    The tip is one of the most important consumable components.

    If it becomes heavily oxidized, damaged, or contaminated, soldering performance can decline.

    How to Protect Soldering Tips

    Correct tip care helps maintain heat transfer and can extend the useful life of the tip. Avoid unnecessary abrasion and excessive temperatures.

    Do not scrape modern soldering tips aggressively with abrasive materials unless the manufacturer specifically recommends the method.

    Use the cleaning system recommended for the tip.

    Keep an appropriate coating of solder on the working surface when required.

    Avoid leaving the iron at unnecessarily high temperatures for long periods.

    When a tool is not being used for an extended period, use its sleep or standby function if available.

    Common Soldering Iron Buying Mistakes

    Many soldering problems begin with purchasing decisions that focus on one specification while ignoring the overall application.

    Common mistakes include:

    Buying only by wattage

    A higher wattage does not automatically mean better performance.

    Ignoring temperature control

    For varied electronics work, fixed-temperature equipment can be limiting.

    Choosing the wrong tip

    Tip geometry directly affects heat transfer and precision.

    Ignoring voltage

    An unsuitable mains rating can create equipment and safety problems.

    Buying a tool without replacement tips

    A soldering iron becomes less useful if compatible tips are difficult to obtain.

    Ignoring ergonomics

    An uncomfortable tool can become problematic during long work sessions.

    Choosing the cheapest option

    Low initial cost does not necessarily mean low total cost.

    Why Quality Tools Are a Better Investment

    A quality soldering iron can provide more consistent performance, better control, and greater durability, making it a practical investment for people who solder regularly.

    The cheapest iron may appear attractive at first.

    But consider the long-term requirements.

    You may eventually need:

    • Replacement tips
    • Better temperature control
    • Faster recovery
    • A stronger stand
    • Better ergonomics
    • More reliable heating

    If the first tool cannot meet these requirements, you may end up buying another one.

    Selecting an appropriate tool from the beginning can therefore be more economical.

    Buying Soldering Tools From a Hardware Store Kenya

    When purchasing soldering equipment from a hardware store Kenya, compare the tool’s specifications with your actual application and ask about compatible tips, accessories, and maintenance requirements.

    Before making the purchase, consider the following checklist:

    Feature What to Check
    Wattage Is it appropriate for your work?
    Temperature Is it adjustable?
    Recovery Does it maintain heat under load?
    Tips Are replacements available?
    Voltage Is it suitable for your power supply?
    Handle Is it comfortable and balanced?
    Stand Is it stable and heat-resistant?
    Safety Does it have suitable protective features?
    ESD Is it appropriate for sensitive electronics?
    Accessories Does the kit contain useful essentials?

    This approach helps you compare tools based on actual usefulness rather than appearance.

    Soldering Tools and Your Wider Hardware Kit

    A soldering iron is often only one part of a technician’s wider tool collection, so it makes sense to consider complementary tools and accessories when planning your purchase.

    Depending on the work, you may also need:

    • Screwdrivers
    • Pliers
    • Wire cutters
    • Wire strippers
    • Multimeters
    • Tweezers
    • Heat-shrink tubing
    • Solder
    • Flux
    • Desoldering braid
    • Replacement tips

    For broader repair and installation projects, Ngong Hills Merchants also provides power tools and drill bits.

    For fastening and assembly tasks, contractors can browse bolts and nuts.

    Final Thoughts

    Choosing the right soldering iron is about matching wattage, temperature control, tip design, recovery performance, safety, and ergonomics to the work you actually perform.

    A beginner doing occasional repairs may only need a straightforward adjustable iron.

    An electronics technician may benefit from a temperature-controlled station with interchangeable tips and appropriate ESD protection.

    A contractor working with larger electrical connections may need more thermal capacity.

    The key is to select the tool according to the application.

    When visiting a hardware store Kenya, do not ask only for the most powerful soldering iron. Explain what you intend to solder, how frequently you will use the tool, and whether you are working on delicate electronics, wires, connectors, or larger electrical components.

    For general electronics, controlled 60W-class equipment is a practical reference point, although smaller or larger tools may be appropriate depending on the thermal load. Wattage should be viewed as available heating capacity rather than simply maximum operating temperature.

    Also consider the less obvious features.

    A comfortable handle can improve control.

    A stable stand can improve safety.

    Replaceable tips can extend the usefulness of the tool.

    Temperature control can make different jobs easier.

    Good thermal recovery can improve productivity.

    And appropriate ventilation and safe handling can reduce unnecessary risks.

    Ultimately, the best soldering iron is not necessarily the cheapest, the smallest, or the highest-powered model.

    It is the one that gives you the appropriate combination of heat, control, precision, reliability, and safety for your specific work.

    Your One-Stop Hardware Partner in Ngong

    Imagine completing your project with the right tools, the best materials, and expert advice. At Ngong Hills Merchants, we turn your DIY or construction vision into reality with a complete selection of plumbing, electrical, glass, and sanitary ware.

    Contact our team for a consultation and get the right supplies, right now.

    QUALITY HARDWARE & SUPPLIES IN NGONG ✔ Complete Range of Plumbing & Electrical ✔ Power Tools, Adhesives & Paints ✔ Glass, Framing & Sanitary Ware ✔ Serving Ngong, Karen, Matasia, Kiserian & beyond.

     Request Your Free Consultation: Ngong Hills Merchants
    Email: ngonghillsmerchants [at] gmail.com
     Phone: +254 715974811
     Visit Us: Ngong Township, Ngong, Kenya
     Website: https://ngonghillsmerchants.com/

  • Why Contractors Choose Ngong Hills Merchants for Projects

    Why Contractors Choose Ngong Hills Merchants for Projects

    Modern construction projects depend on more than skilled labour. Contractors also need dependable access to quality materials, suitable tools, practical product advice, and a supplier that understands the pressure of keeping a project moving. For contractors looking for a contractor supply store in Ngong, having a reliable local source can make purchasing and project planning considerably easier.

    A missing fitting, unsuitable tool, poor-quality adhesive, or delayed material can interrupt work and increase labour costs. The right supplier can help contractors reduce these interruptions by providing access to multiple product categories in one place.

    Ngong Hills Merchants serves customers from its Ngong location and maintains product categories covering plumbing, electrical, glass, framing, sanitary ware, paints, adhesives, power tools, drill bits, bolts and nuts, and other hardware requirements. Its online catalogue also shows a broad range of construction and maintenance products.

    For contractors, this breadth matters because construction rarely involves one material category alone.

    A plumbing installation may require pipes, fittings, sealants, tools, and fasteners. A glass installation may require framing and accessories. Electrical work requires appropriate fittings and testing equipment. Finishing work may require paint, adhesives, cleaning products, and tools.

    Having access to several of these requirements through one supplier can simplify procurement and reduce unnecessary movement between stores.

    Why Choose a Contractor Supply Store in Ngong?

    A reliable contractor supply store in Ngong can help professionals access essential materials and tools while reducing procurement delays and unnecessary travel.

    Construction projects operate around deadlines.

    A contractor may have several teams working simultaneously, including:

    • Masons
    • Plumbers
    • Electricians
    • Painters
    • Glaziers
    • Carpenters
    • Tilers
    • Welders
    • General construction workers

    Each team depends on materials arriving when required.

    If the electrician cannot complete an installation because a required fitting is missing, the electrical team may have to stop. If a plumber lacks the correct connection, installation can be delayed. If finishing materials are unavailable, completed structural work may remain unfinished.

    This is why procurement becomes an important part of project management.

    Ngong Hills Merchants’ own guidance on choosing a reliable hardware supplier emphasizes product quality, inventory depth, pricing, staff knowledge, and after-sales support as important considerations when selecting a supplier.

    For a contractor, these factors directly affect productivity.

    A Broad Product Range Simplifies Procurement

    Contractors benefit when one supplier can cover several categories of materials and tools, reducing the need to make multiple purchasing trips for different stages of a project.

    Construction projects often require products from different categories at the same time.

    For example, a residential construction project could require:

    • Plumbing materials
    • Electrical fittings
    • Paint
    • Adhesives
    • Glass
    • Sanitary ware
    • Fasteners
    • Power tools
    • Drill bits
    • Cleaning products

    Ngong Hills Merchants lists these and other categories in its online product catalogue.

    This creates an opportunity for contractors to consolidate purchasing.

    Instead of treating every small requirement as a separate shopping trip, a contractor can prepare a project materials list and source multiple requirements from the same supplier.

    That can help reduce:

    • Travel time
    • Procurement delays
    • Transport expenses
    • Administrative effort
    • Missed materials
    • Unplanned site interruptions

    For busy contractors, time saved during procurement can translate into additional productive hours on site.

    Plumbing Supplies for Active Construction Sites

    Reliable plumbing materials are essential because poorly selected pipes, fittings, or accessories can lead to leaks, rework, and additional labour costs after installation.

    Plumbing work requires compatibility between different components.

    A contractor may need pipes, connectors, valves, plugs, fittings, sealants, and installation tools.

    Choosing the correct product requires consideration of the application rather than simply selecting the cheapest available component.

    Factors can include:

    • Pipe material
    • Pipe diameter
    • Pressure requirements
    • Connection type
    • Temperature
    • Intended use
    • Installation environment

    Contractors can browse the plumbing supplies range when planning plumbing requirements.

    The objective should always be to select materials appropriate to the installation and compatible with the rest of the system.

    A small saving on an unsuitable component can become expensive when labour and reinstallation are considered.

    Electrical Materials Require Careful Selection

    Electrical installations require appropriate products because material quality and compatibility can affect both performance and safety. Contractors should select electrical components according to the requirements of the installation rather than appearance or price alone.

    Electrical work can involve:

    • Switches
    • Sockets
    • Cables
    • Connectors
    • Junction components
    • Testing equipment
    • Conduit-related products
    • Accessories

    A contractor may also require specialized measuring equipment during installation and maintenance.

    Ngong Hills Merchants lists electrical products as one of its major product categories, including equipment such as clamp meters in its catalogue.

    Contractors can browse electrical supplies when sourcing components for suitable projects.

    Electrical installations should always be carried out by appropriately qualified personnel and in accordance with applicable requirements.

    Power Tools Help Contractors Work Efficiently

    The right power tools can reduce manual effort and improve productivity, particularly when contractors are performing repetitive drilling, fastening, cutting, grinding, or installation work.

    Construction sites often require tools that can handle demanding workloads.

    Depending on the trade, contractors may need:

    • Drills
    • Impact tools
    • Grinders
    • Sanders
    • Cutting equipment
    • Rotary tools
    • Accessories
    • Replacement components

    Tool selection should take into account the job, operating conditions, frequency of use, and required performance.

    Contractors can explore the power tools collection when planning their equipment requirements.

    The accessories matter too.

    A drill is only useful if the contractor has the appropriate bit for the material being drilled.

    That is why specialist accessories should be included in the purchasing plan.

    Drill Bits Can Affect Productivity

    Using the correct drill bit for the material can improve drilling performance and help reduce premature tool or accessory wear.

    Construction projects may involve drilling into:

    • Concrete
    • Masonry
    • Metal
    • Timber
    • Tiles
    • Other building materials

    Different materials require different cutting or drilling characteristics.

    A contractor should therefore avoid treating all drill bits as interchangeable.

    For suitable applications, you can browse drill bits when preparing a project tool list.

    Having the correct accessories available before work begins can prevent unnecessary interruptions.

    Fasteners Are Small but Important

    Bolts, nuts, screws, and other fasteners may be relatively inexpensive compared with major construction materials, but they are essential to many assemblies and installations.

    A contractor can have all the major components for a job but still be unable to complete it because a particular fastener is missing.

    Fasteners are used across many trades.

    They can support:

    • Framing
    • Mechanical assemblies
    • Equipment installation
    • Repairs
    • Fixtures
    • Fabrication
    • General construction

    Contractors can browse bolts and nuts when sourcing suitable fastening components.

    The correct fastener should be selected according to the application, material, load, environment, and manufacturer’s specifications.

    Adhesives for Construction and Finishing

    Adhesives are important in many construction and finishing applications, but the correct adhesive depends on the materials being joined and the conditions the bond will experience.

    Modern construction uses adhesives for a wide range of applications.

    These can include:

    • General repairs
    • Installation work
    • Finishing
    • Sealing-related applications
    • Joining compatible materials
    • Maintenance

    Not every adhesive is suitable for every surface.

    The contractor should consider:

    • Surface material
    • Bond strength
    • Moisture exposure
    • Temperature
    • Flexibility
    • Setting time
    • Indoor or outdoor use

    You can discover the available adhesives when preparing your materials list.

    Using the right product can help prevent avoidable failures and rework.

    Glass and Framing for Modern Projects

    Glass has become increasingly important in contemporary construction, while framing provides the support and structure required for many glazed installations. Contractors therefore need access to both glass-related products and compatible accessories.

    Glass can be used for:

    • Windows
    • Doors
    • Partitions
    • Shopfronts
    • Interior features
    • Decorative applications

    Framing is equally important.

    Poorly selected or incorrectly installed framing can affect alignment, stability, weather resistance, and the finished appearance.

    Ngong Hills Merchants lists both glass and framing categories in its product catalogue.

    Contractors can explore the glass range and browse framing products according to project requirements.

    For supporting components, glass accessories can also form part of the procurement list.

    Sanitary Ware for Residential and Commercial Projects

    Bathrooms and washrooms require coordinated sanitary ware and plumbing components, making it useful for contractors to source these requirements alongside related installation materials.

    Residential construction may require:

    • Toilets
    • Basins
    • Sinks
    • Showers
    • Bathroom accessories
    • Related fittings

    Commercial developments may require larger quantities because of multiple bathrooms or washroom facilities.

    The contractor must consider dimensions, compatibility, installation method, water connections, drainage, appearance, and intended use.

    Ngong Hills Merchants provides a dedicated sanitary ware collection for customers planning these installations.

    Buying related materials together can also help contractors identify compatibility issues before products reach the site.

    Paint and Finishing Materials

    Finishing materials have a major influence on the appearance and protection of a completed building, making paint selection an important part of the final construction stage.

    Paint does more than add colour.

    Depending on the product and application, coatings can help protect surfaces from environmental exposure and everyday wear.

    Contractors should consider:

    • Surface type
    • Interior or exterior application
    • Existing coating
    • Preparation requirements
    • Desired finish
    • Coverage
    • Drying conditions
    • Environmental exposure

    You can explore paints and finishing products when preparing a project’s finishing schedule.

    Proper surface preparation remains essential.

    Even an excellent coating can perform poorly when applied over an unsuitable or inadequately prepared surface.

    Cleaning Supplies Matter During Handover

    Cleaning is often the final step between construction and client handover, and appropriate cleaning products can help contractors present completed spaces professionally.

    Construction can leave behind:

    • Dust
    • Adhesive residue
    • Paint marks
    • Cement residue
    • Packaging
    • Dirt
    • Installation debris

    A proper cleaning process helps reveal the quality of the finished work.

    It can also help contractors identify defects before the client does.

    Ngong Hills Merchants provides cleaning items as part of its wider product selection.

    For contractors, including cleaning supplies in the project procurement plan can help avoid a last-minute scramble before handover.

    What Contractors Need From a Contractor Supply Store in Ngong

    The right contractor supply store in Ngong should offer more than products; contractors need dependable stock, practical product guidance, quality materials, and convenient access.

    Construction materials are rarely completely interchangeable.

    Two products may appear similar but have different:

    • Dimensions
    • Strength characteristics
    • Compatibility
    • Applications
    • Installation requirements
    • Durability
    • Finishes

    A knowledgeable supplier can help the contractor ask the right questions before purchasing.

    For example:

    “Which fitting matches this pipe?”

    “Which drill bit is suitable for this surface?”

    “Which adhesive is appropriate for these materials?”

    “What frame works with this glass application?”

    These questions can prevent mistakes before they reach the site.

    Ngong Hills Merchants states that it provides project consultation and guidance as part of its customer support approach.

    Stock Availability Can Keep Projects Moving

    For contractors, product availability is closely connected to productivity because a missing material can stop an otherwise active work team.

    Imagine a contractor has five workers ready to complete an installation.

    Everything is prepared except one essential fitting.

    The labour is already being paid.

    The site is already mobilized.

    But the task cannot be completed.

    The contractor now has to leave the site, search for the missing component, purchase it, and return.

    That single missing item can consume hours.

    For larger projects, repeated procurement interruptions can become significant.

    This is why contractors value suppliers with broad inventory and dependable sourcing.

    Ngong Hills Merchants’ published guidance specifically identifies inventory depth and the ability to source required products as important characteristics of a reliable hardware supplier.

    One Supplier Can Simplify Project Planning

    Consolidating purchasing with a capable supplier can simplify project administration by reducing the number of vendors, invoices, collection trips, and product checks required.

    Consider a contractor managing a renovation.

    Instead of purchasing:

    • Electrical supplies from one shop
    • Plumbing from another
    • Adhesives from another
    • Tools from another
    • Glass accessories elsewhere

    the contractor can investigate whether multiple requirements can be sourced through one supplier.

    This can simplify:

    • Purchasing
    • Record keeping
    • Communication
    • Transport
    • Stock planning
    • Reordering

    It does not mean every product must always come from one supplier.

    Specialized materials may require specialist suppliers.

    But where a supplier can meet several requirements without compromising quality, consolidation can be efficient.

    Contractors Need Value, Not Just Low Prices

    The best construction supplier is not necessarily the one offering the lowest individual price; contractors should consider quality, durability, availability, service, and total project cost.

    A cheap component can become expensive if it fails prematurely.

    The contractor may then have to pay for:

    • Replacement materials
    • Additional labour
    • Transport
    • Removal
    • Reinstallation
    • Client complaints
    • Project delays

    This is particularly important for products that are difficult to replace after installation.

    A slightly higher-quality material may deliver better value if it performs reliably.

    The goal should therefore be value for money rather than simply the lowest purchase price.

    Bulk Purchasing Can Help Larger Projects

    Large projects often require repeated quantities of the same materials, making planned procurement and bulk purchasing useful for contractors managing substantial workloads.

    Before placing a large order, contractors should establish:

    • Exact quantities
    • Product specifications
    • Required delivery schedule
    • Storage capacity
    • Installation sequence
    • Potential wastage
    • Future requirements

    This reduces the risk of buying too much or too little.

    It also allows the contractor to plan cash flow more effectively.

    Where multiple phases of construction are involved, materials can be scheduled according to the project programme.

    The Importance of Reliable Project Communication

    Clear communication between contractors and suppliers helps reduce misunderstandings about product specifications, quantities, timing, and availability.

    A contractor should communicate clearly.

    Instead of saying:

    “I need some pipe.”

    provide details such as:

    • Pipe type
    • Diameter
    • Length
    • Quantity
    • Intended application

    Similarly, when ordering electrical components, specify the required type and quantity.

    For tools, specify the task and material.

    Clear information makes it easier for the supplier to provide an appropriate product.

    It also reduces the risk of incorrect orders.

    Tools Should Match the Trade

    Professional contractors can improve productivity by selecting tools according to the work being performed rather than purchasing equipment based purely on power or brand recognition.

    A plumber may need different tools from a glazier.

    An electrician has different requirements from a painter.

    A general contractor may require a broader collection.

    The tool should match:

    • Material
    • Frequency of use
    • Work environment
    • Required precision
    • Duration of operation
    • Safety requirements

    Contractors should also maintain tools properly.

    A high-quality tool that is neglected can perform poorly.

    Likewise, the correct tool used incorrectly can create safety and quality problems.

    Reliable Fasteners and Fittings Reduce Rework

    Small components can have a disproportionate impact on construction quality because they often connect, secure, seal, or support larger assemblies.

    A poor fitting can create a leak.

    An unsuitable fastener can weaken an assembly.

    A poor-quality accessory can affect the operation of a door or window.

    A wrong electrical component can compromise an installation.

    Contractors therefore need to take small components seriously.

    Good procurement means checking specifications across the entire system rather than focusing only on the largest visible materials.

    Supporting Contractors From Foundation to Finish

    The most useful construction suppliers are those capable of supporting multiple stages of a project, from installation and structural work to finishing and final maintenance.

    A building project can change dramatically as it progresses.

    Early stages may require:

    • Tools
    • Fasteners
    • Plumbing components
    • Electrical materials

    Later stages may require:

    • Glass
    • Sanitary ware
    • Paint
    • Adhesives
    • Cleaning supplies

    A contractor who has already established a relationship with a dependable supplier can simplify these transitions.

    Instead of searching for a new supplier at every stage, they can return to a familiar source.

    That familiarity can make repeat purchasing more straightforward.

    Why Local Access Matters in Ngong

    For contractors working around Ngong, having a local supplier can reduce the time and transport involved in sourcing commonly required construction and maintenance products.

    Construction sites are frequently located away from major commercial centres.

    A contractor working in Ngong, Karen, Matasia, Kiserian, or nearby areas may benefit from having a supplier within the local area.

    Ngong Hills Merchants is listed in Ngong, Kenya, with current business information showing its location in Ngong and operating hours for Monday through Saturday. Ngong Hills Merchants

    The company’s published website also identifies its location as Ngong Township, Ngong, Kenya.

    Local access can be especially useful when an unexpected requirement emerges during an active project.

    Contractors Can Plan Better With a Materials List

    A detailed materials list makes it easier to compare requirements, identify missing components, estimate costs, and organize purchasing before workers begin installation.

    A good list should include:

    Category Information to Record
    Plumbing Type, size, quantity and application
    Electrical Component type, rating and quantity
    Glass Type, thickness, dimensions and quantity
    Framing Profile, dimensions and finish
    Fasteners Type, size and quantity
    Tools Tool type and required accessories
    Paint Surface, finish and estimated quantity
    Adhesives Application and compatible materials
    Sanitary ware Model, dimensions and fittings
    Cleaning Required products and quantities

    This approach gives the contractor a clearer purchasing picture.

    It also makes it easier to identify whether a supplier can cover most of the project requirements.

    Quality Control Starts Before Installation

    Contractors should inspect materials before they are installed because identifying damaged, incorrect, or unsuitable products early is easier than discovering problems after installation.

    When materials arrive, check:

    • Quantity
    • Dimensions
    • Visible damage
    • Product type
    • Packaging
    • Accessories
    • Model or specification
    • General condition

    For glass, inspect for visible damage before installation.

    For plumbing products, verify sizes and connections.

    For electrical components, confirm specifications.

    For tools, inspect condition and accessories.

    Early inspection helps prevent defective or incorrect materials from reaching the installation stage.

    Building Long-Term Supplier Relationships

    A dependable relationship between a contractor and supplier can make future projects easier by creating familiarity with purchasing requirements, commonly used products, and project schedules.

    Contractors frequently work on multiple projects.

    Once a supplier understands their common requirements, repeat procurement can become more efficient.

    The contractor also learns which products are available and where to source them.

    The supplier learns the contractor’s preferred specifications and purchasing patterns.

    Over time, this can create a more efficient working relationship.

    However, the relationship should continue to be based on quality, transparency, and professional service.

    Why Contractors Return to Trusted Suppliers

    Contractors tend to value suppliers that consistently deliver appropriate products, communicate clearly, and help them solve procurement problems rather than simply processing transactions.

    Reliability becomes especially important when a project is under pressure.

    A contractor may suddenly discover:

    • A missing component
    • A damaged item
    • An unexpected measurement
    • A change in specification
    • An additional material requirement

    A supplier that can help identify an appropriate solution becomes more valuable than one that simply sells products.

    That is the difference between a transaction and a working supplier relationship.

    Final Thoughts

    Contractors choose dependable suppliers because construction success depends on more than workmanship; it also depends on having the right materials and tools available at the right time.

    For contractors looking for a contractor supply store in Ngong, Ngong Hills Merchants offers a broad product mix covering plumbing, electrical, glass, framing, sanitary ware, paints, adhesives, power tools, drill bits, fasteners, cleaning items, and other hardware categories.

    Its published resources also emphasize quality products, inventory availability, product knowledge, pricing, and customer support as important factors for contractors choosing a reliable hardware partner.

    For a contractor, the value of a supplier is ultimately measured by how well that supplier supports the project.

    Can you find the materials you need?

    Are the products appropriate for their intended applications?

    Can you get advice when specifications are unclear?

    Can you source tools and accessories alongside materials?

    Can you reduce unnecessary purchasing trips?

    Can you plan your procurement with greater confidence?

    These are the questions that matter when choosing a construction supplier.

    Ngong Hills Merchants’ broad product range makes it possible for contractors to investigate multiple project requirements through one local supplier, from plumbing and electrical work through glass, framing, tools, sanitary ware, painting, and finishing.

    The result is a more organized approach to construction procurement.

    For contractors in Ngong and surrounding areas, choosing a supplier should therefore be about more than finding the cheapest item.

    It should be about finding a dependable project partner that combines product choice, practical support, quality, availability, and convenience.

    Your One-Stop Hardware Partner in Ngong

    Imagine completing your project with the right tools, the best materials, and expert advice. At Ngong Hills Merchants, we turn your DIY or construction vision into reality with a complete selection of plumbing, electrical, glass, and sanitary ware.

    Contact our team for a consultation and get the right supplies, right now.

    QUALITY HARDWARE & SUPPLIES IN NGONG ✔ Complete Range of Plumbing & Electrical ✔ Power Tools, Adhesives & Paints ✔ Glass, Framing & Sanitary Ware ✔ Serving Kiserian, Ongata Rongai, Ngong Hills & beyond.

     Request Your Free Consultation: Ngong Hills Merchants
    Email: ngonghillsmerchants [at] gmail.com
    Phone: +254 715974811
     Visit Us: Ngong Township, Ngong, Kenya
    Website: https://ngonghillsmerchants.com/

  • Best Chainsaws for Land Clearing in Kenya: Expert Guide

    Best Chainsaws for Land Clearing in Kenya: Expert Guide

    Whether you’re clearing farmland in Kajiado, preparing a construction site in Nairobi, managing trees around a rural property, or maintaining a large compound, choosing the right chainsaws for land clearing in Kenya can make a significant difference in productivity and project efficiency. A chainsaw can cut through suitable branches, trunks, and woody vegetation far more efficiently than many manual cutting tools, making it useful for demanding outdoor work.

    However, selecting a chainsaw should not be based on engine size or price alone. Land-clearing conditions vary considerably. A small residential property with thin branches requires a different approach from a large farm containing mature trees and dense vegetation. Terrain, tree diameter, working conditions, transportation, fuel availability, maintenance requirements, operator experience, and safety considerations all influence the appropriate equipment.

    Safety is especially important. Forestry and tree-felling work can involve falling branches, kickback, noise, vibration, difficult terrain, and unstable trees. The Food and Agriculture Organization notes that chainsaw operators are particularly exposed during felling and crosscutting, while the International Labour Organization has developed specific guidance covering chainsaw design and safe use.

    For Kenyan farmers, contractors, landscapers, property owners, and construction teams, the best chainsaw is therefore not necessarily the biggest or most expensive model. It is the machine that matches the job while providing appropriate safety features, manageable weight, dependable performance, and access to maintenance and replacement parts.

    Why Chainsaws Are Useful for Land Clearing

    Chainsaws can significantly improve productivity when clearing suitable woody vegetation, branches, and trees from land. Their portability makes them particularly useful where larger machinery cannot easily access the site.

    Land clearing can involve many different types of vegetation.

    A site may contain:

    • Small trees
    • Thick branches
    • Shrubs
    • Fallen timber
    • Tree trunks
    • Overgrown vegetation
    • Deadwood
    • Regrowth around fences
    • Woody plants along access routes

    Using manual tools for every piece of vegetation can make a large project extremely time-consuming.

    A chainsaw can provide a practical solution for suitable cutting work, particularly where the operator needs to move around a site rather than remain beside a fixed machine.

    This can be useful on farms, construction sites, large residential compounds, plantations, and rural properties.

    However, a chainsaw is not a universal land-clearing machine.

    Dense grass, soft vegetation, soil, rocks, construction debris, and materials other than suitable wood may require completely different equipment.

    Choosing the right tool for each stage of clearing is therefore important.

    What Makes a Chainsaw Suitable for Land Clearing?

    A suitable land-clearing chainsaw should provide an appropriate balance of cutting capability, weight, maneuverability, durability, and safety features. The correct choice depends on the size and type of vegetation being cleared.

    There is no single chainsaw that is ideal for every clearing project.

    A homeowner clearing small branches may benefit from a lighter machine.

    A contractor working with larger timber may require a more powerful professional model.

    A farmer clearing moderate vegetation may prioritize reliability and fuel efficiency.

    When evaluating a chainsaw, consider:

    • Engine or motor power
    • Bar length
    • Chain type
    • Overall weight
    • Fuel or battery system
    • Vibration control
    • Chain brake
    • Operator controls
    • Availability of replacement components
    • Maintenance requirements
    • Manufacturer support

    These factors should be considered together.

    A powerful chainsaw that is too heavy for the operator can reduce productivity and increase fatigue.

    Similarly, a lightweight machine that is unsuitable for the material being cut may struggle and suffer unnecessary wear.

    Engine Power and Cutting Performance

    Chainsaw power affects the machine’s ability to maintain cutting performance under load. The required power depends on the size, density, and quantity of material being cut.

    Petrol-powered chainsaws remain popular for demanding outdoor work because they can provide substantial cutting performance without relying on a mains electrical connection.

    For remote farms or undeveloped construction sites, this independence can be valuable.

    However, engine size alone should not determine your purchase.

    A larger engine generally means additional weight, fuel consumption, noise, and potentially greater operator fatigue.

    For routine clearing of smaller vegetation, excessive power may provide little practical benefit.

    For larger timber and intensive work, insufficient power can make cutting inefficient.

    The objective should be to match power to the workload.

    Choosing the Right Bar Length

    Bar length should be selected according to the typical diameter of the material being cut and the requirements of the job. A longer bar is not automatically better because it can add weight and reduce maneuverability.

    The guide bar is the component around which the cutting chain travels.

    Different chainsaws are available with different bar lengths.

    A shorter bar can be easier to handle when working with smaller branches and vegetation.

    A longer bar can provide greater cutting capacity for larger timber when used correctly.

    However, users should avoid choosing a bar simply because it is as long as possible.

    A large bar on a machine that lacks sufficient power can reduce performance.

    The bar and chain should be matched to the chainsaw according to the manufacturer’s specifications.

    For land clearing, think about the typical size of the trees and branches rather than the largest tree you might encounter.

    Petrol Chainsaws for Rural Land Clearing

    Petrol chainsaws remain a practical option for remote land-clearing projects because they can operate independently of mains electricity and are available in a wide range of power levels.

    For agricultural land in areas such as Kajiado, Narok, Kiambu, Machakos, or other rural regions, access to electrical power may be limited.

    A petrol chainsaw can therefore provide flexibility.

    It can be transported to different sections of a farm and used where required without an extension cable.

    However, petrol models require more maintenance than some electric alternatives.

    Operators need to pay attention to:

    • Fuel
    • Engine oil
    • Bar lubrication
    • Air filtration
    • Spark plug condition
    • Chain condition
    • Fuel-system maintenance
    • Storage

    Fuel also needs to be handled and stored responsibly.

    For professional land-clearing operations, a maintenance routine should form part of the project plan rather than being treated as an afterthought.

    Battery Chainsaws for Smaller Projects

    Battery-powered chainsaws can be convenient for lighter clearing, property maintenance, pruning, and locations where reduced noise and simpler starting are desirable.

    Battery technology has made cordless tools increasingly practical for many outdoor applications.

    A battery chainsaw can eliminate the need to mix or store petrol and can be easier to start.

    It can also be convenient for homeowners and property managers handling smaller jobs.

    However, battery runtime is an important consideration.

    For a large clearing operation, the operator may require several charged batteries or an appropriate charging arrangement.

    Battery capacity, motor power, bar length, chain type, and manufacturer ecosystem all affect performance.

    Battery chainsaws are therefore best evaluated according to the actual workload rather than simply comparing advertised specifications.

    Chainsaws for Farm Clearing

    Farm clearing often requires equipment that can handle variable vegetation while remaining manageable enough for repeated movement around the property. Reliability and ease of maintenance are especially important for agricultural users.

    A farm may require clearing around:

    • Fences
    • Access roads
    • Field boundaries
    • Buildings
    • Irrigation areas
    • Grazing areas
    • Planting zones
    • Storage areas

    The vegetation may also vary from small branches to mature trees.

    Instead of choosing the most powerful chainsaw available, farmers should consider how frequently the tool will be used and what type of vegetation dominates the property.

    For occasional maintenance, a manageable general-purpose model may be sufficient.

    For commercial land preparation, a more robust professional machine may be appropriate.

    The operator’s skill level should also influence the decision.

    Chainsaws for Construction Site Preparation

    Construction sites can require vegetation removal before excavation, grading, fencing, or building begins. Chainsaws can assist with suitable woody vegetation, but clearing should be coordinated with the wider site plan.

    A construction site in Nairobi or another rapidly developing area may contain trees, branches, bushes, or abandoned vegetation that interferes with planned works.

    Before cutting anything, the contractor should establish what can legally and safely be removed.

    The site should also be checked for:

    • Electrical lines
    • Underground services
    • Structures
    • Vehicles
    • Workers
    • Property boundaries
    • Unstable trees
    • Public access areas

    The presence of overhead electrical lines is particularly important.

    Tree-felling and cutting operations should not be undertaken close to power infrastructure without appropriate professional assessment and controls.

    Once vegetation has been removed, other equipment may be needed to process or transport the resulting material.

    For construction teams requiring additional equipment, you can explore our power tools for tools suitable for other stages of building and maintenance work.

    Safety Must Come Before Speed

    Chainsaw productivity should never be prioritized over operator and site safety. Proper training, personal protective equipment, equipment inspection, and controlled working conditions are essential.

    Chainsaws are powerful cutting machines.

    The risks include cuts, kickback, falling branches, falling trees, flying debris, noise, vibration, and fatigue.

    The FAO specifically identifies tree felling and crosscutting as activities where serious and fatal accidents can occur, and highlights kickback as a significant hazard.

    For this reason, anyone operating a chainsaw should understand the machine, follow the manufacturer’s instructions, and receive appropriate practical training.

    The machine should be inspected before use.

    Safety features should remain functional.

    The operator should never remove or bypass protective equipment or safety mechanisms to increase cutting speed.

    Essential Chainsaw Safety Equipment

    Appropriate personal protective equipment can reduce the severity of injuries associated with chainsaw operations. PPE should be selected for the task and maintained in usable condition.

    Recommended chainsaw safety equipment can include:

    • Safety helmet
    • Eye protection
    • Face protection
    • Hearing protection
    • Cut-resistant leg protection
    • Suitable gloves
    • Protective footwear
    • High-visibility clothing where appropriate

    The FAO recommends protective clothing, suitable footwear, helmets, face and eye protection, and hearing protection for forestry operations.

    Chainsaw trousers or chaps are particularly important because they are designed with cut-resistant materials that can help reduce injury if the chain contacts the operator’s legs.

    Protective boots should provide appropriate foot protection and traction.

    Hearing protection is also important because chainsaws can generate high noise levels.

    Understanding Chainsaw Kickback

    Kickback occurs when the upper portion of the guide-bar nose contacts an object, causing the saw to move rapidly and unexpectedly. Understanding and reducing kickback risk is a fundamental part of chainsaw safety.

    Kickback can happen extremely quickly.

    The operator may have very little time to react.

    The FAO recommends practices such as keeping the saw in front of the body, operating with both hands on the handles, avoiding contact between the bar nose and the tree, and not operating the chainsaw above shoulder height.

    A chainsaw’s safety features also matter.

    A functional chain brake is an important safety component.

    Do not purchase or use a machine if its safety systems have been deliberately removed, disabled, or damaged.

    The objective of efficient land clearing is controlled productivity, not maximum cutting speed.

    Why Two-Handed Operation Matters

    Chainsaws should be operated with both hands on the designated handles, maintaining control of the machine throughout the cut. This is particularly important because kickback or movement can occur unexpectedly.

    One-handed operation can significantly reduce control.

    It can also increase the difficulty of reacting to sudden movement.

    The operator should maintain a stable stance and keep the machine positioned appropriately in front of the body.

    Do not use a chainsaw above shoulder height.

    The operator should also avoid cutting when balance is compromised by unstable terrain, excessive fatigue, or awkward positioning.

    If the working position is unsafe, stop and reposition.

    Chainsaw Weight and Operator Fatigue

    The weight of a chainsaw can influence productivity, especially during long clearing sessions. A machine that is unnecessarily heavy can increase fatigue and make precise control more difficult.

    A common mistake is assuming that heavier equipment is automatically better.

    For professional land clearing, the operator may spend several hours moving between trees and branches.

    Excessive weight can contribute to:

    • Arm fatigue
    • Shoulder strain
    • Reduced concentration
    • Poor posture
    • Slower work
    • Greater risk of mistakes

    FAO guidance notes that chainsaw work can involve repetitive strain and recommends avoiding prolonged repetitive work patterns.

    Choose a machine that provides sufficient capability without being unnecessarily difficult to handle.

    Work-rest planning is also important.

    Vibration and Noise Considerations

    Chainsaw operators can be exposed to significant noise and vibration, making appropriate hearing protection, equipment maintenance, and exposure management important during extended work.

    Chainsaws generate mechanical vibration during operation.

    Extended exposure can contribute to hand and arm problems.

    Modern machines may incorporate vibration-damping systems that reduce transmitted vibration.

    The FAO notes that chainsaw vibration can affect workers and that vibration-damping systems can reduce the associated risk.

    Noise is another concern.

    Hearing protection should be worn as appropriate for the working environment.

    If a machine develops unusually high vibration or abnormal noise, stop using it and investigate the cause.

    The problem could involve the chain, bar, engine, bearings, or another component.

    Maintaining Your Chainsaw

    Regular maintenance helps preserve cutting performance, reliability, and safety. A poorly maintained chainsaw can become harder to control and less efficient.

    A maintenance routine should follow the manufacturer’s instructions.

    Important areas include:

    Chain condition

    A damaged, incorrectly adjusted, or excessively worn chain can affect cutting performance.

    Guide bar

    Inspect the bar for damage and wear.

    Chain lubrication

    Adequate lubrication is essential for the cutting system.

    Air filter

    A dirty filter can affect engine performance on petrol models.

    Spark plug

    Petrol machines require appropriate ignition-system maintenance.

    Fasteners

    Check that relevant bolts and components remain secure.

    Safety systems

    The chain brake and other safety mechanisms must remain functional.

    Do not operate a machine with damaged safety components.

    Sharpening and Chain Condition

    A properly maintained chain cuts more effectively and can reduce unnecessary strain on the machine. Chain maintenance should be performed according to the manufacturer’s specifications and by someone with the appropriate knowledge.

    A dull chain can make cutting slower.

    It may produce excessive dust rather than appropriate chips and require more force from the operator.

    This can increase fatigue.

    A chain that has struck soil, stones, or metal can also become damaged.

    Because chain sharpening involves specialized technique and the correct filing geometry, inexperienced users should follow manufacturer guidance or use an appropriately trained technician.

    Do not modify the chain or remove safety-related components in an attempt to increase cutting speed.

    Choosing Between Professional and Consumer Chainsaws

    Professional chainsaws are generally designed for more demanding workloads, while consumer-oriented models may be more appropriate for occasional property maintenance. The correct choice depends on frequency and intensity of use.

    A homeowner clearing a few branches each year has different requirements from a contractor working every day.

    Professional users may prioritize:

    • Durability
    • Serviceability
    • Power-to-weight ratio
    • Continuous workload capability
    • Parts availability
    • Ergonomics
    • Vibration control

    Occasional users may prioritize:

    • Ease of starting
    • Simplicity
    • Lower weight
    • Lower maintenance demands
    • Affordability

    Buying professional equipment for occasional use can be unnecessary.

    Buying a light consumer machine for intensive commercial clearing can also be a poor investment.

    Chainsaw Maintenance and Replacement Parts

    Availability of replacement parts and servicing should be considered before purchasing a chainsaw, especially for contractors and farmers who depend on their equipment.

    A chainsaw is not a one-time purchase.

    Eventually, components such as chains, guide bars, filters, spark plugs, sprockets, or other wear parts may require replacement.

    Before choosing a machine, ask:

    • Are replacement chains available?
    • Can the bar be replaced?
    • Are service technicians available?
    • Are spare parts accessible?
    • Does the manufacturer provide maintenance information?
    • Can the machine be serviced locally?

    This can be more important than saving a small amount at the time of purchase.

    Equipment downtime can be expensive during a commercial land-clearing project.

    Land Clearing Is More Than Cutting Trees

    Effective land clearing requires planning for what happens before, during, and after cutting. A chainsaw addresses only one part of the overall clearing process.

    Before work begins, assess the site.

    During cutting, manage the immediate hazards.

    After cutting, the resulting material may need to be:

    • Cut into manageable sections
    • Removed
    • Stacked
    • Chipped
    • Transported
    • Reused
    • Disposed of appropriately

    The correct machinery for these tasks will vary.

    A chainsaw may be followed by other equipment for handling or processing vegetation.

    Construction teams should also coordinate clearing with excavation, grading, fencing, drainage, and building activities.

    This prevents the site from becoming cluttered with cut material.

    Legal Considerations When Chainsaws for Land Clearing in Kenya

    Land clearing in Kenya must take account of applicable environmental, forestry, land-use, and workplace requirements. Not every tree or forested area can simply be cleared because the land is privately owned or being developed.

    This is particularly important where work involves forests or protected areas.

    Kenya’s Forest Conservation and Management Act contains restrictions on activities within public and provisional forests, including felling and clearing and the possession or introduction of chainsaws and logging equipment without the required authorization.

    The Forests (Harvesting) Rules also provide for controls around harvesting equipment and methods, with equipment considerations linked to terrain and site characteristics.

    Therefore, before clearing trees, determine:

    • Who owns the land
    • Whether the area is within a forest
    • Whether specific trees are protected
    • Whether a permit or authorization is required
    • Whether environmental requirements apply
    • Whether the work affects neighboring properties
    • Whether utility infrastructure is nearby

    For commercial or complex clearing projects, obtain the appropriate professional and regulatory advice before starting.

    Workplace Safety for Commercial Clearing

    Businesses conducting land clearing have additional responsibilities for worker safety. Risk assessment, appropriate equipment, training, supervision, and preventive measures should form part of the project.

    Kenya’s Occupational Safety and Health Act requires occupiers to conduct appropriate risk assessments and adopt preventive and protective measures so machinery, equipment, tools, and processes under their control are safe and without risk to health.

    For contractors, this means chainsaw work should not simply be assigned to any available worker.

    A proper work plan should consider:

    • Operator competence
    • Site hazards
    • PPE
    • Equipment condition
    • Emergency procedures
    • First aid
    • Communication
    • Weather
    • Terrain
    • Nearby workers
    • Public access
    • Power lines

    The ILO’s 2026 forestry training package also emphasizes integrating occupational safety and health into forestry work from the earliest stages.

    Working Around Power Lines

    Trees and branches near overhead electrical lines present a particularly serious hazard. Chainsaw operators should not attempt risky cutting around energized power infrastructure without appropriate professional assessment and controls.

    Before beginning clearing work, inspect the site for overhead lines.

    Branches can fall unpredictably.

    Trees can lean toward infrastructure.

    Conductive equipment can create additional risks.

    Where vegetation is close to power lines, specialist utility or tree-care professionals should be involved.

    Never assume that a line is de-energized simply because it appears inactive.

    This is one area where attempting to save time can create extremely serious consequences.

    Weather and Terrain Matter

    Rain, wind, steep slopes, unstable ground, and poor visibility can significantly change the risk profile of chainsaw work. Clearing should be postponed when conditions make safe operation difficult.

    Wet ground can reduce footing.

    Strong winds can change the behavior of trees and branches.

    Slopes can make positioning difficult.

    Poor visibility can make it harder to identify hazards.

    The safest approach is to assess conditions before starting and throughout the operation.

    Do not continue simply because work has already begun.

    If conditions become unsafe, stop and reassess.

    Buying Chainsaws for Kenyan Conditions

    Kenyan buyers should consider the local working environment, access to service, fuel or charging requirements, terrain, workload, and availability of replacement parts when selecting a chainsaw.

    A machine that performs well in a showroom may not necessarily be the best choice for a remote farm.

    Consider where the chainsaw will be used.

    For rural applications, portability and fuel availability may matter.

    For urban property maintenance, lower noise and easier starting may be more attractive.

    For commercial contractors, durability and serviceability may be the highest priorities.

    For occasional homeowners, ease of use and manageable weight may matter most.

    There is no universal “best” chainsaw.

    There is only the best fit for the job.

    Other Tools for a Complete Chainsaws for Land Clearing Project

    Chainsaws are valuable for woody vegetation, but a complete land-clearing operation may require several different tools and machines. Selecting equipment according to the material improves efficiency and reduces misuse.

    Depending on the project, teams may require:

    • Brush cutters
    • Axes
    • Pruning tools
    • Shovels
    • Rakes
    • Chipping equipment
    • Cutting tools
    • Transport equipment
    • Protective equipment

    Chainsaws should not be forced to perform tasks for which they were not designed.

    For construction and maintenance work beyond vegetation clearing, Ngong Hills Merchants also provides power tools that can support other stages of a project.

    For drilling and installation requirements, you can also browse drill bits.

    Why Buying Quality Equipment Pays Off

    Quality equipment can provide better reliability, serviceability, and working performance over its useful life. The cheapest chainsaw is not necessarily the lowest-cost option for a demanding project.

    Consider the total cost of ownership.

    A chainsaw that requires frequent repairs or replacement may cost more over time than a reliable machine with accessible service.

    Downtime can also affect contractors.

    If a machine fails during a time-sensitive project, the cost may include:

    • Delayed labor
    • Transport
    • Equipment rental
    • Missed deadlines
    • Additional service costs

    For professional users, reliability is therefore an economic consideration as well as a technical one.

    How to Store a Chainsaw

    Proper storage protects the machine between jobs and can reduce deterioration. Storage procedures should follow the manufacturer’s recommendations, especially for fuel-powered equipment.

    After completing a clearing project, clean the machine appropriately.

    Remove accumulated debris.

    Inspect the chain and guide bar.

    Store the machine in a dry, secure location.

    For petrol models, follow the manufacturer’s recommendations for fuel storage and long-term storage.

    Keep chainsaws inaccessible to unauthorized users and children.

    Do not leave cutting equipment exposed at a construction site where it can be damaged or misused.

    Good storage is part of equipment maintenance.

    How to Improve Land-Clearing Efficiency Without Increasing Risk

    The safest way to improve productivity is through planning, appropriate equipment, competent operators, and organized site management rather than simply increasing cutting speed.

    Efficient clearing can involve:

    • Surveying the site first
    • Marking work zones
    • Identifying hazards
    • Choosing the correct machine
    • Organizing PPE
    • Planning material removal
    • Scheduling breaks
    • Maintaining equipment
    • Coordinating workers
    • Keeping unauthorized people away from the cutting area

    A well-organized team can often accomplish more safely than a poorly organized team using more powerful equipment.

    Productivity should be measured by completed work without preventable incidents, equipment damage, or unnecessary downtime.

    Final Thoughts

    The best chainsaw for land clearing in Kenya is the one that matches the vegetation, workload, terrain, operator, and project requirements while providing appropriate safety features and dependable support.

    A small property-maintenance job may require a lightweight machine.

    A farm clearing operation may require a more robust petrol chainsaw.

    A commercial contractor may need professional equipment capable of handling frequent use.

    The important thing is to match the tool to the job.

    When choosing chainsaws for land clearing in Kenya, look beyond engine size and price. Consider power, bar length, weight, chain system, vibration control, safety features, maintenance requirements, spare parts, and local service support.

    Most importantly, remember that chainsaw work is inherently hazardous. The FAO identifies felling and crosscutting as activities associated with serious and fatal accidents, while international safety guidance emphasizes training, protective equipment, machine maintenance, and control of hazards such as kickback.

    Land clearing should also comply with applicable Kenyan forestry, environmental, and workplace safety requirements. Where trees are within forests, protected areas, near power infrastructure, or subject to specific controls, obtain the necessary professional guidance and authorization before work begins.

    For farmers in Kajiado, contractors preparing sites in Nairobi, property owners in Ngong, and businesses managing larger outdoor spaces, the right equipment can make land preparation considerably more organized and efficient.

    The best investment is not simply the most powerful chainsaw.

    It is the right chainsaw, properly maintained, operated by a competent person, supported by appropriate protective equipment, and used as part of a carefully planned clearing operation.

    Your One-Stop Hardware Partner in Ngong

    Imagine completing your project with the right tools, the best materials, and expert advice. At Ngong Hills Merchants, we turn your DIY or construction vision into reality with a complete selection of plumbing, electrical, glass, and sanitary ware.

    Contact our team for a consultation and get the right supplies, right now.

    QUALITY HARDWARE & SUPPLIES IN NGONG ✔ Complete Range of Plumbing & Electrical ✔ Power Tools, Adhesives & Paints ✔ Glass, Framing & Sanitary Ware ✔ Serving Ngong, Karen, Matasia, Kiserian & beyond.

     Request Your Free Consultation: Ngong Hills Merchants
    Email: ngonghillsmerchants [at] gmail.com
    Phone: +254 715974811
    Visit Us: Ngong Township, Ngong, Kenya
    Website: https://ngonghillsmerchants.com/